To install WordPress locally you need three things running on your own computer: a web server, PHP, and a MySQL database. An app like LocalWP or XAMPP installs all three for you, then WordPress runs at an address such as my-project.local or http://localhost/mysite. This guide walks through five ways to do it on Windows and Mac, with every click named, and it finishes with the part most tutorials skip: what happens when the local site has to go live.
- LocalWP is the fastest route for a beginner. Download it, click Create a new site, answer three questions, and WordPress is installed. You never touch a database or a config file.
- XAMPP is the route to pick if you want to understand what is happening. You start Apache and MySQL yourself, create the database yourself, and run the WordPress installer by hand.
- The operating system barely matters. LocalWP, XAMPP, MAMP and Docker all run on both Windows and Mac. Only the file paths change.
- A local site has no public address. Nobody outside your computer can open
localhost, so a client cannot review it and a teammate cannot open it. - Moving the site later is harder than installing it. Going from
localhostto a real domain means rewriting every URL stored in the database, including the ones buried inside serialized arrays. - You can skip the move entirely by starting on a cloud sandbox that already has a shareable URL, then mounting its files on your machine so your editor still works the way you like.
Which Method Should You Use?
All five methods below end with the same thing: a working WordPress site on your own computer. They differ in how much setup you do by hand and how much you learn along the way.
| Method | Best for | Setup time | Do you touch a database? | Windows / Mac |
|---|---|---|---|---|
| LocalWP | Complete beginners | About 5 minutes | No | Both |
| XAMPP | Learning how the stack fits together | About 20 minutes | Yes, in phpMyAdmin | Both |
| MAMP | Mac users who want a simple control panel | About 20 minutes | Yes, in phpMyAdmin | Both, Mac first |
| Docker | Developers who already use the terminal | About 5 minutes | No, the container handles it | Both |
| Studio by WordPress.com | The lightest install with the fewest questions | About 3 minutes | No | Both |
If you have never done this before, use Method 1. If you want to see every moving part, use Method 2.
Why Install WordPress Locally?
A local WordPress install runs entirely on your machine, so nothing you do reaches the internet. That is useful for four reasons.
- You can break it. Test a risky plugin, edit a theme file, or run an update that might fail. Your live site is untouched.
- It costs nothing to run. No hosting bill while you build. For a freelancer with several projects open at once, that adds up.
- It works offline. On a flight or on bad hotel WiFi, a local site keeps working because nothing has to travel over the network.
- It is fast. There is no upload step and no server queue, so a page reloads the moment you save a file. Over a day of small changes that is real time back.
Local work also pairs well with Git. Because the files sit in a normal folder, you can put your theme or plugin under version control the same way you would any other project. If you want the wider argument, we covered whether local WordPress development still earns its place in a modern workflow, and the challenges local development brings with it.
Method 1: Install WordPress Locally with LocalWP
LocalWP (once called Local by Flywheel) is the easiest way to install WordPress locally. It installs the web server, PHP and MySQL for you, then runs the WordPress installer in the background. You answer three screens and the site is ready. If you are weighing it against other tools, we have a longer list of Local by Flywheel alternatives.

Step 1: Download and Install LocalWP
Go to localwp.com and click Download. Choose your operating system from the list (Windows, macOS or Linux) and the installer starts downloading.

Open the file you just downloaded and follow the on-screen instructions. There is nothing to configure. On Windows you may see a security prompt asking to allow the app to make changes, which you should accept.
What you should see: LocalWP opens on an empty dashboard with no sites listed yet.
Step 2: Create a New WordPress Site
Click the Create a new site button, or the plus icon in the bottom left corner.

LocalWP offers three options:
- Create a new site, which installs a fresh copy of WordPress. Pick this one.
- Create from a Blueprint, which reuses a setup you saved earlier.
- Create from a Cloud Backup, which pulls an existing site from Google Drive or Dropbox.

Select Create a new site and click Continue.
Type a name for the site. LocalWP turns that name into the local address, so “my-project” becomes my-project.local. Click Continue.
Step 3: Choose Your Environment
This screen asks which versions of PHP, the web server and MySQL to use. There are two choices:
- Preferred, which uses versions LocalWP knows work together.
- Custom, which lets you pick the exact PHP version, web server and database yourself.

Choose Preferred unless you are copying a specific live server, in which case pick Custom and match its PHP version. Click Continue.
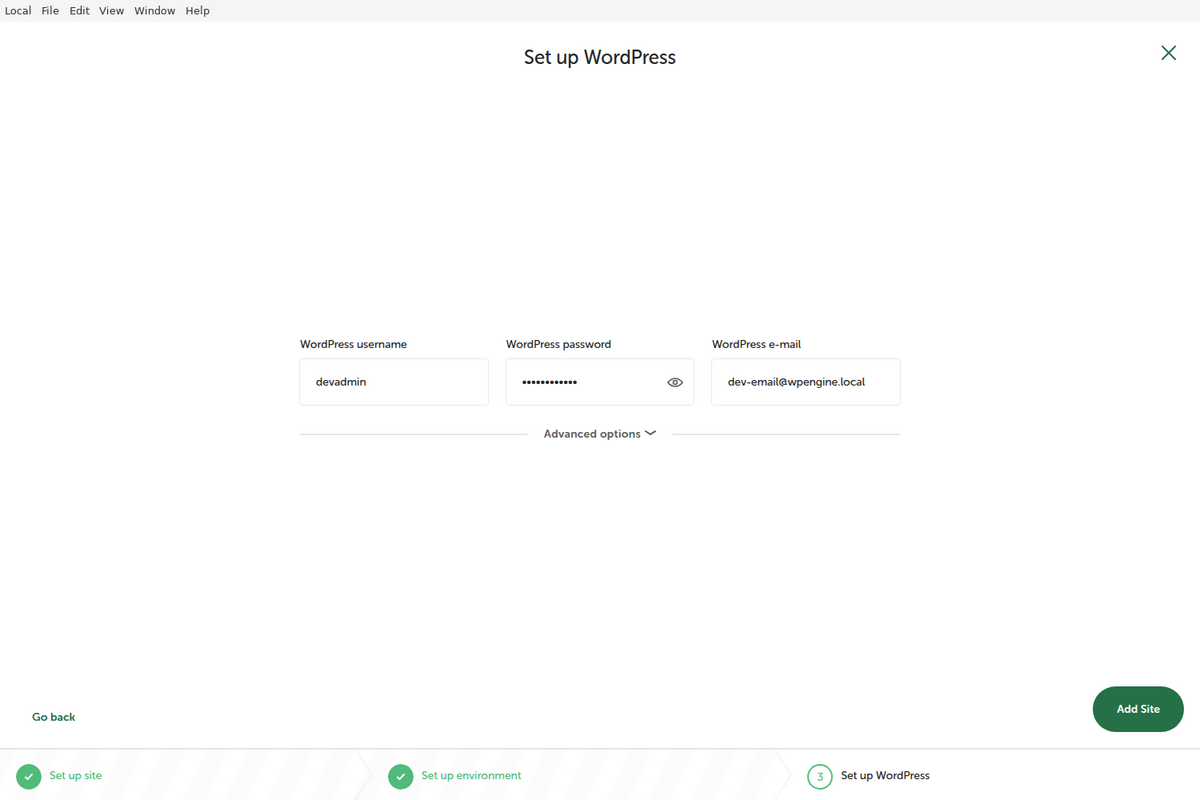
Step 4: Set Up Your WordPress Login
This is the login you will use to get into the WordPress dashboard. Fill in three fields:
- WordPress Username, the name you will log in with.
- WordPress Password. Write it down somewhere, because there is no password reset email on a local site.
- WordPress Email, which only matters for admin notices.
There is also an Advanced options toggle for WordPress Multisite. Leave it off unless you know you need a network of sites.
Click Add Site. LocalWP downloads WordPress and sets up the database. This takes one to three minutes.
What you should see: a progress bar, then the site appears in the left sidebar with a green dot next to it, which means it is running.
Step 5: Open Your Local WordPress Site
Select the site in the LocalWP sidebar. Two buttons appear at the top right:
- Open site opens the front end in your browser.
- WP Admin opens the WordPress dashboard login.
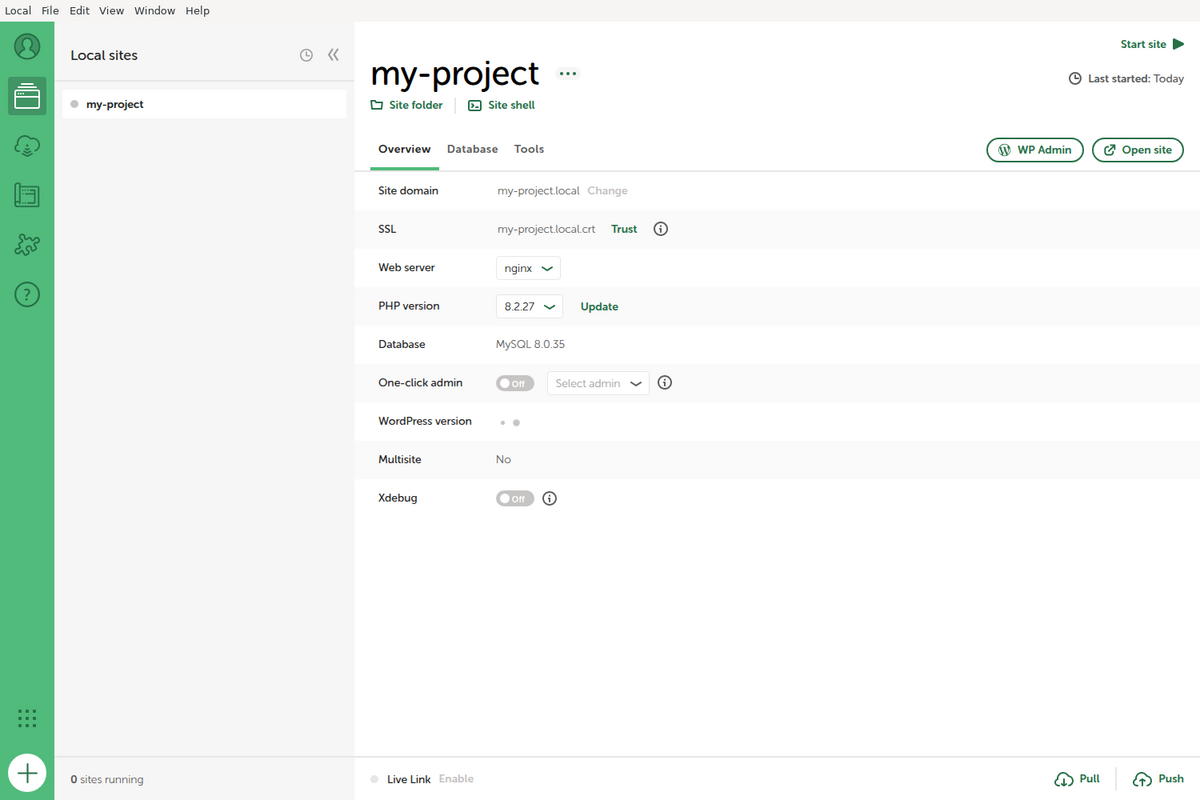
Click WP Admin and log in with the username and password from Step 4.
What you should see: the WordPress dashboard, running at an address like my-project.local/wp-admin. Your local WordPress site is installed.
The first time you open a .local address your browser may warn that the certificate is not trusted. That is normal, because LocalWP issues its own certificate. Click Trust in LocalWP’s site settings, or continue past the warning.
Where LocalWP Puts Your Files
You will need this path the moment you want to edit a theme or drop in a plugin.
- macOS:
~/Local Sites/[site-name]/app/public/ - Windows:
C:\Users\[username]\Local Sites\[site-name]\app\public\
A shortcut: right-click the site in LocalWP and choose Reveal in Finder on Mac or Show folder on Windows. Open that folder in VS Code and you can start editing.
Pros and Cons of LocalWP
- One-click WordPress installation
- Clean, intuitive interface
- Easy PHP version switching
- Built-in SSL certificates
- Live Links for temporary public access
- Uses more system resources
- Site sharing requires Live Links
- Less control over the underlying stack
- Limited server configuration
- Harder to replicate complex production environments exactly
When the project ends and you need the site somewhere real, the steps are in our guide to migrate a LocalWP site to any host.
Method 2: Install WordPress Locally with XAMPP (Windows and Mac)
XAMPP bundles the four pieces a WordPress site needs: the Apache web server, the MySQL database, PHP, and phpMyAdmin for managing the database. Unlike LocalWP, XAMPP does not install WordPress for you. You download WordPress yourself, create the database yourself, and run the installer. It takes longer, and you finish knowing what every part does.

Step 1: Download and Install XAMPP
Go to apachefriends.org and click the download button for your operating system.

Open the installer. It shows a list of components with tick boxes. For WordPress you need four:
- Apache, the web server that answers browser requests.
- MySQL, the database that stores your posts, pages and settings.
- PHP, the language WordPress is written in.
- phpMyAdmin, the screen you use to create the database.

Untick FileZilla, Mercury and Tomcat. WordPress does not use them and they take up space.
Accept the default install folder, which is C:\xampp on Windows and /Applications/XAMPP on macOS, then finish the installation.
Step 2: Start Apache and MySQL
Open the XAMPP Control Panel. It lists each module with a Start button beside it.
Click Start next to Apache, then Start next to MySQL. Leave the rest stopped.

What you should see: both module names turn green and a port number appears next to each one.
To confirm the web server is really running, click Admin next to Apache. Your browser opens the XAMPP dashboard at http://localhost.

httpd.conf, change Listen 80 to Listen 8080, save, and start Apache again. Your local address then becomes http://localhost:8080.Step 3: Create a Database for WordPress
WordPress needs an empty database to write into. Open a browser tab and go to http://localhost/phpmyadmin.

Click the Databases tab along the top.
In the Create database box, type a name with no spaces, such as wordpress_dev. Leave the dropdown next to it on utf8mb4_general_ci and click Create.

What you should see: the new database name appears in the list on the left, with no tables inside it yet.
Write the database name down. You need it in Step 5.
Step 4: Download WordPress and Put It in htdocs
Go to wordpress.org and click Get WordPress, then Download WordPress. You get a ZIP file.

Unzip it. You now have a folder called wordpress holding all the WordPress core files. The official WordPress installation guide covers the same ground if you want a second reference.
Open the XAMPP folder and find the one called htdocs. This is the folder Apache serves files from.

- Windows:
C:\xampp\htdocs\ - macOS:
/Applications/XAMPP/htdocs/
Drag the unzipped wordpress folder into htdocs, then rename it to something short like mysite. That name becomes part of your local address.
Step 5: Run the WordPress Installer
In your browser, go to http://localhost/mysite, replacing mysite with whatever you named the folder.
WordPress starts its installer. Pick your language and click Continue.

Click Let’s go. On the database screen, enter exactly this:
- Database Name: the name you created in Step 3, for example
wordpress_dev - Username:
root - Password: leave it empty, because a fresh XAMPP install has no MySQL password
- Database Host:
localhost - Table Prefix:
wp_
Click Submit, then Run the installation.
If you get an error establishing a database connection at this point, one of those five values is wrong. Nine times out of ten it is the database name or a stray password in the password field.
Step 6: Finish the Setup
WordPress now asks for the details of your site and your admin account.

- Site Title: anything you like, you can change it later
- Username: your admin login
- Password: WordPress suggests a strong one, copy it somewhere safe
- Your Email: your own address
Click Install WordPress.
What you should see: a Success screen with a Log In button. Your site is at http://localhost/mysite and the dashboard is at http://localhost/mysite/wp-admin.
Your files are in the htdocs folder you used in Step 4:
- Windows:
C:\xampp\htdocs\mysite\ - macOS:
/Applications/XAMPP/htdocs/mysite/
Open that folder in VS Code, PhpStorm or whichever editor you use, and you are ready to work.
Pros and Cons of XAMPP
- Lightweight and fast
- Free and open source
- Can run multiple WordPress sites
- Direct access to Apache and PHP
- Full control over server configuration
- Manual WordPress installation
- No built-in SSL
- Database setup is manual
- Steeper learning curve
- No GUI for site management
What About WAMP?
WAMP is the Windows-only equivalent of XAMPP. It ships the same Apache, MySQL and PHP, with a control panel that lives in the system tray instead of a window. If you already have WAMP installed, every step above still applies. The only difference is the folder name: WAMP serves from C:\wamp64\www\ rather than C:\xampp\htdocs\. Put the unzipped WordPress folder there and go to http://localhost/mysite exactly as in Step 5.
We do not link the WAMP download here because its official site was not responding when this guide was last checked. If you are starting fresh on Windows, XAMPP or LocalWP is the safer pick.
Method 3: Install WordPress Locally with MAMP (Mac)
MAMP stands for Macintosh, Apache, MySQL and PHP. It is the tool many Mac users reach for first, and there is a Windows build too. The process is the same shape as XAMPP with one useful difference: MAMP lets you point the document root at any folder on your Mac, so your WordPress files can live wherever you keep your projects.
Step 1: Install MAMP
Download MAMP from mamp.info and open the installer. The free version is all you need. MAMP PRO is a paid add-on and this guide does not require it.
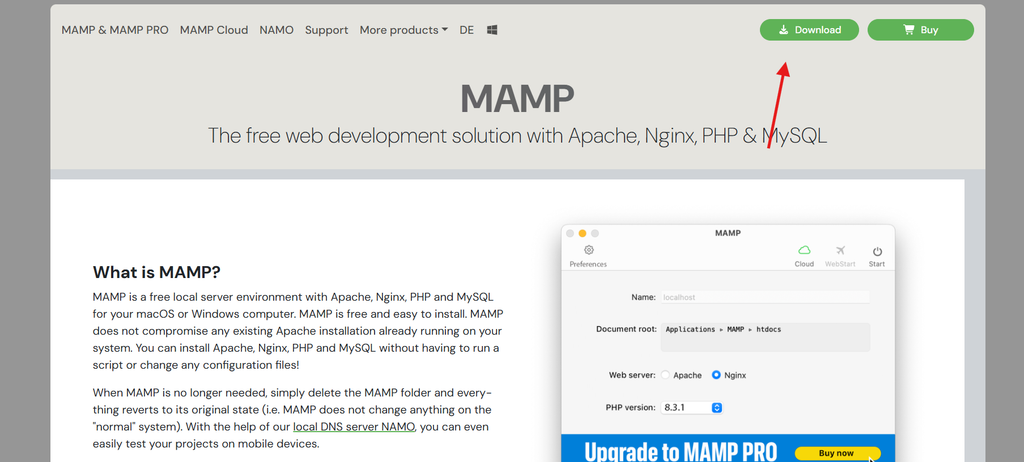
What you should see: a MAMP folder in your Applications directory containing the MAMP app.
Step 2: Start the Servers
Open MAMP and click Start in the top right. Two indicator lights next to Apache Server and MySQL Server turn green, and MAMP opens its welcome page in your browser.
MAMP runs Apache on port 8888 by default, so your local address is http://localhost:8888 rather than plain http://localhost. You can change that under Preferences then Ports if you prefer.
Step 3: Create the Database
From the MAMP welcome page, click Tools then phpMyAdmin. Click the Databases tab, type a name such as wordpress_dev, and click Create. This is the same screen described in Method 2, Step 3.
Step 4: Add WordPress and Install
Download WordPress from wordpress.org, unzip it, and copy the folder into MAMP’s document root at /Applications/MAMP/htdocs/. Rename it mysite.
Go to http://localhost:8888/mysite and work through the WordPress installer. The database details are almost the same as XAMPP, with one change that catches people out:
- Database Name:
wordpress_dev - Username:
root - Password:
root, because MAMP sets a MySQL password by default where XAMPP leaves it blank - Database Host:
localhost
Click Submit, then Run the installation, and fill in your site title and admin login as in Method 2, Step 6.
Method 4: Install WordPress Locally with Docker
Docker runs WordPress and MySQL inside containers, which are self-contained bundles that include their own PHP and their own database. Nothing is installed onto your operating system, so removing the site later is one command and leaves no trace. This method uses the terminal, but you only type two commands.
Step 1: Install Docker Desktop
Download Docker Desktop for Windows or Mac and install it. Open the app and wait until the whale icon in your menu bar or system tray stops animating, which means the engine is running.
Step 2: Create a Compose File
Make an empty folder for the project. Inside it, create a file named docker-compose.yml and paste this in. It describes two containers, one for the database and one for WordPress, and tells them how to talk to each other.
services:
  db:
    image: mysql:8.0
    volumes:
      - db_data:/var/lib/mysql
    environment:
      MYSQL_ROOT_PASSWORD: rootpass
      MYSQL_DATABASE: wordpress
      MYSQL_USER: wordpress
      MYSQL_PASSWORD: wordpress

  wordpress:
    image: wordpress:latest
    depends_on:
      - db
    ports:
      - "8080:80"
    environment:
      WORDPRESS_DB_HOST: db
      WORDPRESS_DB_USER: wordpress
      WORDPRESS_DB_PASSWORD: wordpress
      WORDPRESS_DB_NAME: wordpress
    volumes:
      - ./wp:/var/www/html

volumes:
  db_data:
The official WordPress Docker image documentation lists every setting you can change here, including the PHP version.
Step 3: Start It
Open a terminal in that folder and run:
docker compose up -dWhat you should see: Docker downloads the two images the first time, which takes a minute or two, then prints that both containers have started.
Go to http://localhost:8080 and the WordPress installer appears. You skip the database screen entirely, because the Compose file already supplied those details. Fill in your site title and admin login and you are done.
Your WordPress files are in the wp folder that appears next to docker-compose.yml. Open that in your editor.
To stop the site, run docker compose down. To delete it and its database completely, run docker compose down -v.
Method 5: Install WordPress Locally with Studio by WordPress.com
Studio is a free local WordPress app from WordPress.com. It is the shortest path of the five: there is no environment screen and no database step at all.
- Download Studio for Windows or Mac and install it.
- Open the app and click Add site.
- Give the site a name and confirm the folder Studio suggests for its files.
- Click Add site again. Studio installs WordPress and starts the server.
- Click WP Admin. Studio logs you straight in, so there is no password to remember.
Because it is newer than the others, Studio has fewer configuration options. If you need a specific PHP version to match a client’s server, use LocalWP or Docker instead.
Installing WordPress on Windows and on Mac
Every method above runs on both operating systems. What changes is where the files land and which port the server uses.
| Tool | Windows file path | Mac file path | Default local address |
|---|---|---|---|
| LocalWP | C:\Users\[you]\Local Sites\[site]\app\public\ |
~/Local Sites/[site]/app/public/ |
[site].local |
| XAMPP | C:\xampp\htdocs\mysite\ |
/Applications/XAMPP/htdocs/mysite/ |
http://localhost/mysite |
| WAMP | C:\wamp64\www\mysite\ |
Not available | http://localhost/mysite |
| MAMP | C:\MAMP\htdocs\mysite\ |
/Applications/MAMP/htdocs/mysite/ |
http://localhost:8888/mysite |
| Docker | The wp folder beside your Compose file |
The wp folder beside your Compose file |
http://localhost:8080 |
One Mac-specific point: macOS ships with its own Apache, which can hold port 80 and stop XAMPP from starting. MAMP avoids the clash by using port 8888, which is why its addresses look different.
Common Problems and How to Fix Them
Four things go wrong more often than everything else combined.
“Error establishing a database connection”
The installer cannot reach MySQL. Check that MySQL is actually started in your control panel, then check the four values you typed: database name, username root, the password (blank on XAMPP, root on MAMP), and host localhost. Our full guide to the error establishing a database connection covers the rarer causes.
Apache will not start
Another program is holding port 80. Change the Apache port to 8080 in httpd.conf, as described in Method 2, Step 2, and use http://localhost:8080 from then on.
A blank white page instead of your site
Usually a PHP error with error display switched off. Open wp-config.php in your site folder, find the line that sets WP_DEBUG, and change it to true so the actual message appears. If the page is loading but not rendering, our notes on a WordPress site not loading work through the rest.
“Object not found” or a 404 on every page
The folder name in your address does not match the folder in htdocs. Check the spelling, and remember it is case sensitive on macOS.
What Happens When the Local Site Has to Go Live
Your site works. It looks right at http://localhost/mysite. Now the client wants to see it, or it needs to launch. This is where local development stops being simple, and it is the part most install guides leave out.
Three things get in the way.
1. Every URL is written into the database
WordPress does not store links as relative paths. It writes the full address into the database, including inside serialized arrays, which are strings that record their own character length. Change http://localhost/mysite to https://clientdomain.com with a plain find and replace and those length counts no longer match, so the data becomes unreadable.
Serialized data is where your theme customizer settings, widget layouts, page builder content (Elementor, Beaver Builder, Divi), plugin settings and menus all live. One broken array can take a whole page layout down.
The safe way to do it is WP-CLI’s search-replace command, which understands serialized data and rewrites the lengths correctly. Our step-by-step guide to move WordPress from local to live walks through the whole migration.
2. Your machine is not the server
You built on PHP 8.2 with a generous memory limit and every extension available. The host runs an older PHP, enforces MySQL strict mode, caps memory lower, and has disabled a function your plugin calls. The site that ran perfectly on localhost throws a fatal error on the first page load.
3. Nobody else can see it
A local address only exists on your computer. A client cannot open it. A content writer cannot start filling pages. A second developer cannot pick up where you left off, because their copy of the database is already different from yours.
The usual workarounds are a temporary staging server, which costs money and time to set up, or a tunnelling tool, which adds a moving part that breaks when your laptop sleeps.
Build on a WordPress sandbox that already has a real URL, then mount its files on your machine and keep using your own editor.
Create a free WordPress sandboxThe Alternative: A Cloud Sandbox You Can Still Edit Locally
Developers install WordPress locally for the speed and for direct access to the files. The localhost address is a side effect of getting those two things, and it is the part that causes trouble at the end of the project.
So there is a second option: start on a WordPress sandbox in the cloud that has a shareable URL, an SSL certificate and a PHP version you choose, then use Local Mount to open that site’s files on your own computer as if they were a normal folder.
Edit a theme file in VS Code, save it, and the change is live on the site. There is no upload step and no migration at the end, because the site was never on localhost to begin with. When it is ready to launch, you point a domain at it and it becomes managed WordPress hosting rather than a rebuild. That is the workflow InstaWP is built around.

The tradeoff is honest: this needs an internet connection, and a true local install does not. If you are learning WordPress on a laptop with no reliable connection, LocalWP is still the right answer.
Setting Up Local Mount
Step 1: Turn it on. Open the Sites page in your InstaWP dashboard, click your site, choose Local Mount in the left panel, and switch Enable Mount on. Copy the Server Address, Username and Password it shows you.

Step 2 on Windows. Open File Explorer and click This PC.

Click Map network drive in the toolbar, paste the Server Address into the Folder field, and click Finish. Enter the Username and Password when prompted.

What you should see: your site appears under This PC as a drive letter.
Step 2 on macOS. Open Finder, click Go in the menu bar, then Connect to Server, or press Cmd and K together.

Type the Server Address with the https:// prefix and click Connect.

Enter the Username and Password.

What you should see: the site listed under Locations in the Finder sidebar. Open it and you have the familiar WordPress folder structure.
Step 2 on Linux. Use your file manager’s Connect to Server option, or mount it from the command line:
sshfs username@host:/path /local/mountpointOnce mounted, open the folder in your editor. You will see the standard WordPress layout:
/wp-admin/
/wp-content/
/themes/
/plugins/
/uploads/
/wp-includes/Go to /wp-content/themes/your-theme/ and start editing. Because the files are a normal folder to your operating system, Git works on them too:
cd /Volumes/InstaWP-Site/wp-content/themes/my-theme
git init
git add .
git commit -m "Initial commit"
git remote add origin git@github.com:username/my-theme.git
git push -u origin main
One thing worth being clear about: WordPress is still running on InstaWP’s servers, not on your machine. You are editing the files locally while the site executes in the cloud. That is why there is no XAMPP to configure and no local database to manage, and also why an internet connection is required.
The Local Mount feature explainer goes into the protocol, the permissions and the edge cases. There is also a walkthrough video:
When to Use a Local Install and When Not To
Neither approach wins outright. Pick by what the project actually needs.
Plenty of people use both. A local install for learning and for quick throwaway experiments, and a cloud sandbox for anything a client will eventually see. If you are weighing the two seriously, we compared them directly in our writeup of the best LocalWP alternative, and a WordPress staging site covers the case where the live site already exists.
Conclusion
Installing WordPress locally takes between three and twenty minutes depending on which tool you pick. LocalWP and Studio hide the database work. XAMPP and MAMP make you do it, which is the better way to learn. Docker gives you a disposable environment you can delete cleanly.
Whichever you choose, leave time for the day the site has to leave your machine. Moving a WordPress site off localhost takes longer than installing it did, and it is where most of the errors show up.
Pick LocalWP or Studio if you want WordPress running in five minutes. Pick XAMPP or MAMP if you want to see the database and the web server for yourself. Pick Docker if you already live in the terminal. And if the site is for a client, consider skipping localhost altogether: a cloud sandbox with a real URL removes the migration at the end, and Local Mount keeps your editor exactly where it was.
FAQs
How do I install WordPress locally on Windows?
Download LocalWP from localwp.com, run the installer, click Create a new site, type a site name, choose the Preferred environment, and set a WordPress username and password. LocalWP installs WordPress and the site opens at an address like my-project.local. If you would rather do it by hand, install XAMPP, start Apache and MySQL, create a database in phpMyAdmin, drop the WordPress folder into the XAMPP htdocs directory, and go to http://localhost/mysite.
How do I install WordPress locally on a Mac?
The same tools work. LocalWP and Studio by WordPress.com are the quickest. MAMP is the traditional Mac choice: install it, click Start, create a database through Tools then phpMyAdmin, copy WordPress into /Applications/MAMP/htdocs/, and open http://localhost:8888/mysite. Use root as both the database username and the password on MAMP.
Is installing WordPress locally free?
Yes. WordPress itself is free from wordpress.org, and LocalWP, XAMPP, MAMP, WAMP, Docker and Studio all have free versions that do everything in this guide. MAMP PRO and some LocalWP add-ons are paid, but you do not need them.
What is the difference between LocalWP and XAMPP?
LocalWP installs WordPress for you. It creates the database, writes wp-config.php and sets up the admin account, so you never see those steps. XAMPP only installs the server software. You download WordPress, create the database in phpMyAdmin, and run the installer yourself. LocalWP is faster; XAMPP teaches you what is actually happening.
Why does my local WordPress site say error establishing a database connection?
WordPress cannot reach MySQL with the details it was given. Check that MySQL is started in your control panel, then check the database name, the username (root), the password (blank on XAMPP, root on MAMP) and the host (localhost). A typo in the database name is the most common cause.
Can I access my local WordPress site from another computer or a phone?
Not by default. A local address such as localhost or my-project.local only resolves on the machine running the server, so a client or a teammate cannot open it. To let someone else see the site you need a tunnelling tool, a staging server, or a cloud sandbox that has its own public URL.
How do I move my local WordPress site to a live server?
Export the database, copy the files to the host, import the database, then rewrite every stored URL. Use WP-CLI’s search-replace command rather than a plain find and replace, because it handles serialized data correctly. Our guide to moving WordPress from a local server to live covers the full sequence, including permalinks and the white screen that often follows.
Do I need to install WordPress locally at all?
No. A local install is one way to get a private WordPress site to work on, and it is a good way to learn. If the project will end up on a real domain and other people need to see it along the way, starting on a cloud sandbox removes the migration step at the end. Local Mount then gives you the same file access in your own editor.
Can I use Local Mount offline?
No. WordPress runs on InstaWP’s servers, so you need a connection for a saved change to take effect. Many editors let you keep working offline and save once the connection returns.
Does Local Mount work on all InstaWP plans?
Local Mount is available from the Starter plan upwards. Check the InstaWP pricing page for the current plan details, since these change.
Can two developers mount the same InstaWP site?
Yes. Each person mounts the same site on their own computer, so everyone is editing one set of files against one database. There is no local copy to keep in sync.