Update 📢

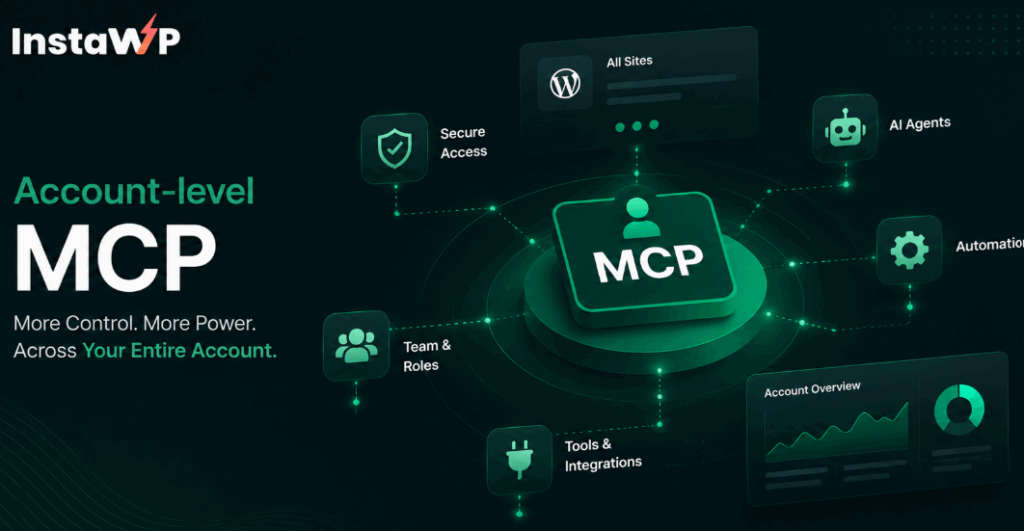
You can now enable MCP for any InstaWP site with a click of a button, no need to mess around with JSON files or create Application keys, its plug and play. Watch this video for more information: Enable MCP Server on InstaWP.
WordPress now powers over 43% of the web, but in 2025, it’s evolving into something bigger, an AI operations hub. If you’re an agency managing dozens of sites, you’ve probably asked: “How can I integrate AI into WordPress without relying on 10 different tools?”
The answer is the WordPress MCP Server.
A WordPress MCP server connects large language models like Claude directly to your WordPress dashboard, turning natural language prompts into secure, automated actions. Instead of clicking through wp-admin for every task, you can simply say: “Publish this post,” “Update plugins,” or “List pending comments.”
For agencies, this WordPress MCP integration transforms routine work into scalable, client-ready automation.
Table of Contents
Quick answer: What is WordPress MCP server and how do you use it?
A WordPress MCP (Model Context Protocol) Server is a standardized backend tool that acts as a bridge between AI agents (like Claude Desktop) and a WordPress installation. It allows AI tools to read, write, and manage WordPress content, users, and site settings directly through natural language commands, without requiring manual access to the WP-Admin dashboard.
Run the server, connect it to your WordPress sites with application passwords, then connect an AI client like Claude Desktop and start issuing prompts.
What is MCP (Model Context Protocol)?
Before we understand what WordPress MCP server is, let’s understand MCP. MCP stands for Model Context Protocol, an open protocol created by Anthropic that standardizes how AI applications provide context to Large Language Models (LLMs). It has since been adopted by other major AI companies.
Think of MCP as a universal translator between AI tools and external services. When applied to WordPress, MCP becomes a powerful middleware layer that translates plain-English prompts into secure, structured API calls.
The MCP for WordPress architecture consists of two main components:
- MCP Client: The AI agent or front-end interface that understands language (Claude Desktop, ChatGPT, Cursor, VS Code)
- MCP Server for WordPress: The backend application that interprets commands and sends them to the WordPress REST API
When you ask Claude to “list all posts from my WordPress site,” the WordPress MCP server receives that request, validates it, and performs a GET request to the /wp/v2/posts endpoint—returning structured results back to the AI.
What Is the WordPress MCP Server?
The WordPress MCP Server, also known as the MCP for WordPress, is a backend service that lets AI agents manage WordPress using the Model Context Protocol (MCP). It converts your natural language prompts into authenticated REST API calls that can create posts, manage plugins, handle users, and much more.
Instead of logging into multiple wp-admin dashboards or installing dozens of plugins, the MCP server acts as a translator—it takes your prompts and converts them into secure API requests that WordPress understands.
This means you can perform real tasks by simply asking your AI tool in plain English:
- “Create a new draft blog post titled ‘Holiday Campaign Ideas'”
- “Update WooCommerce plugins on all client stores”
- “List comments awaiting moderation on the travel_blog site”
- “Create a sample plugin for demo purposes”
- “Activate the new plugin and add its shortcode to a post”
The MCP server processes these instructions and executes them instantly, without a single manual click.
For instance, InstaWP’s WordPress MCP server can create a post without dropping a drop of sweat.
How to Set Up the WordPress MCP Server
When it comes to setting up a WordPress MCP server, you have two main paths:
- Official WordPress MCP Server: A self-hosted, open-source solution that requires manual installation, command-line configuration, and ongoing maintenance. Ideal for developers who want full control over their infrastructure.
- Managed Cloud WordPress with Built-in MCP: Platforms like InstaWP offer WordPress hosting with MCP server functionality built right into the dashboard—no installation, no configuration files, no terminal commands.
For agencies and teams who want to start using AI-powered WordPress management immediately, the managed approach eliminates the technical barrier entirely.
The InstaWP’s WordPress MCP Server is an open-source, developer-first implementation of the Model Context Protocol (MCP) designed to bridge AI agents like Claude with your WordPress sites. Built using Node.js and TypeScript, it translates natural language prompts into secure, authenticated API actions, such as creating posts, managing plugins, updating users, and more.
Unlike generic MCP setups, InstaWP’s WordPress MCP server is modular, production-ready, and tailored for WordPress. It comes with prebuilt tools for core operations (posts, pages, media, users, comments, categories, and plugins), environment-based configuration, and instant compatibility with Claude Desktop via a sample config file.
- WordPress-Native Tooling: Unlike generic MCP projects, InstaWP’s version includes tools specifically for WordPress functionality; everything from media uploads to plugin management is already mapped.
- Plug-and-Play with Claude: With a ready-to-use Claude Desktop config, integration is seamless—no complex setup needed.
- One-Line Launch via npx: Instantly spin up the server using
npx -y @instawp/mcp-wp—no install or repo cloning required. - Safe Staging with InstaWP: Test and deploy with disposable sandboxes, application passwords, and zero impact on live sites.
For agencies, this means faster deployment, safer experimentation, and a head start on AI-native WordPress automation—without writing middleware from scratch.
Have a look of the table below to learn how InstaWP’s WordPress MCP server is a far better choice than the official WordPress MCP server.
| Feature | Official WordPress MCP Server | InstaWP Built-in MCP Server |
|---|---|---|
| Setup Time | 15-30 minutes | Under 2 minutes |
| Technical Skill Required | Command line, Node.js, config files | None (dashboard UI) |
| Installation Method | npm install + manual config | One-click enable |
| Plugin Installation | Manual | Automatic |
| Token Management | Edit .env files manually | Visual dashboard UI |
| Token Expiration | Manual implementation | Built-in with date picker |
| Role-Based Permissions | Manual configuration | Automatic based on WP user roles |
| Multi-Site Support | Separate config per site | Centralized dashboard |
| Staging/Testing | Separate setup required | Built-in WP sandbox environments |
| Maintenance | Self-managed updates | Automatic updates |
| AI Client Compatibility | Claude, ChatGPT, Cursor, etc. | Claude, ChatGPT, Cursor, etc. |
| Cost | Free (self-hosted infrastructure costs) | Included with InstaWP plans |
| Best For | Developers with DevOps expertise | Agencies, teams, non-technical users |
Bottom Line: The official MCP server gives you complete control but requires technical expertise and ongoing maintenance. InstaWP’s built-in MCP server removes the complexity entirely—you get the same AI-powered WordPress management without writing a single line of code or touching a terminal.
Setting up InstaWP’s WordPress MCP Server: Step-by-Step Guide
To set up your AI-first WordPress workflow with InstaWP’s WordPress MCP server, you need:
- Node.js (version 18 or higher)
- A WordPress site (staging or live) on InstaWP with REST API access
- Application password (for secure API auth)
- Claude Desktop (or any compatible LLM tool)
Step 1: Enable MCP in Your Dashboard
Log into your InstaWP dashboard and navigate to your site’s detail page. Find the MCP menu on the left-hand side.

Click “Enable MCP”.

That’s it. The WordPress MCP plugin is automatically installed on your site, and a secure token is generated for you.

Step 2: Copy Your MCP URL
After enabling MCP, go back to your InstaWP site dashboard. You’ll see your unique MCP URL.

Click to copy the URL. This URL contains your authentication token and is ready to use with any MCP-compatible AI client.
Step 3: Connect to Claude Desktop
Open Claude Desktop and go to Settings → Connectors.

Click “Add Custom Connector” and paste your MCP URL here.

Enter a name for the site (e.g., “Client Site – Acme Corp”) and click Add. Once added, click Configure to see all the available WordPress MCP tools.
Step 4: Start Using Natural Language Commands
You’re ready! Try these prompts in Claude Desktop:
- “List all posts on the WP site”

- “Create a new blog post about AI trends in 2025”
- “Create a sample plugin for demo purposes”
- “Enable the new plugin”
- “Show me all pending comments”
Claude will call the appropriate MCP tools and execute your requests directly on your WordPress site.
📺 See it in action:
Just like Claude, you can also connect your site with ChatGPT using InstaWP’s WordPress MCP server. Once you copy the URL from InstaWP’s dashboard, open ChatGPT, go to Settings → Apps & Connectors.

Paste your MCP URL from InstaWP and name it (e.g., “InstaWP Site”). Set authentication to “No authentication” (token is already in the URL). Check the confirmation box and click Create.
Now you can manage your WordPress site directly from ChatGPT using the same natural language commands.
Set up WordPress’s Official MCP Server
While InstaWP’s MCP Server is one of the most powerful and developer-friendly implementations available today, we understand that some agencies—especially those with highly customized stacks or self-hosted DevOps pipelines—may prefer to work directly with the official WordPress MCP Server.
Below, we’ll walk you through how to install and configure the official WordPress MCP Server from scratch.
Step 1: Install the WordPress MCP Server
The official WordPress MCP server is open-source and published on npm. You can install it on your local machine, a cloud VM, or even containerize it for broader deployments.
npm install server-wp-mcpOr clone the repository:
git clone https://github.com/InstaWP/mcp-wp
cd mcp-wp
npm install
npm run buildThat’s it. You’ve just taken the first step toward AI-first WordPress management.
This package acts as the bridge between your sites and the AI models. It’s the beating heart of every MCP for WordPress setup. And if you’re working across multiple projects, you can run one server to manage them all—centralized, scalable, and elegant.
Step 2: Generate WordPress Application Passwords
Now that the WordPress MCP server is installed, you need a secure way for it to access your WordPress sites. This is where application passwords come in.
Go to your client’s WordPress dashboard and follow these steps:
- Navigate to Users → Profile
- Scroll to Application Passwords
- Add a label (e.g., “MCP Server Access”)
- Click Add New Application Password
- Copy the generated password securely

Do this for each site you want to connect. This is how the WordPress MCP server will securely authenticate API calls without exposing the main login.
Bonus Tip: WordPress staging environments make this setup even safer. Test your MCP integrations in a disposable WordPress sandbox before going live.
Step 3: Create Your Server Configuration
Now that you’ve installed the WordPress MCP server and created your secure application passwords, it’s time to tell the server which WordPress sites it should connect to. You’ll do this using a simple file called wp-sites.json.
Wondering what it is? It’s just a small text file (in JSON format) that lists the WordPress sites you want to control using AI, along with their login credentials (application passwords, not your main passwords!).
This is how you can create one.
- Open a text editor (like Notepad, VS Code, or Sublime). InstaWP comes with a VS Code editor built into the staging sites.
- Copy and paste the following structure:
{
"client_one": {

    "URL": "https://clientone.com",

    "USER": "admin",

    "PASS": "your-app-password"

  },

  "client_two": {

    "URL": "https://clienttwo.com",

    "USER": "admin2",

    "PASS": "another-password"

  }

}
- Replace:
- clientone.com and clienttwo.com with your actual site URLs.
- admin and admin2 with the real usernames used for logging into WordPress.
- your-app-password with the application password you generated from Step 2 for each site.
- clientone.com and clienttwo.com with your actual site URLs.
- Save this file with the exact name wp-sites.json.
Let’s say you run an agency that manages two sites:
- A blog site for a personal brand
- An e-commerce site for a client
You could name your entries like this:
{

  "personal_blog": {

    "URL": "https://myblog.com",

    "USER": "john_doe",

    "PASS": "abc123appPassword"

  },

  "client_shop": {

    "URL": "https://shopclient.com",

    "USER": "admin_shop",

    "PASS": "xyz456appPassword"

  }

}Now, your AI model knows how to reach both.
This configuration file is the central address book for your WordPress MCP server. It tells the server:
- Where your WordPress sites live (their URLs)
- How to log in securely
- What names to use when sending instructions
Whether you’re managing 2, 20, or 200 sites, this approach scales cleanly and securely.
Step 4: Launch Your WordPress MCP Server
Okay, you’ve installed the WordPress MCP server and created your wp-sites.json file (which lists the sites your AI will connect to). Now it’s time to actually launch the server so it can start talking to your WordPress sites.
1. Set the environment variable
Copy and paste this into your terminal:
export WP_SITES_PATH=~/path/to/wp-sites.jsonIt tells the WordPress MCP server where to find your wp-sites.json config file.
Replace this part:~/path/to/wp-sites.json with the actual location of the file on your computer.
For example, if you saved it on your desktop:
export WP_SITES_PATH=~/Desktop/wp-sites.json
If you’re on Windows using PowerShell, you’ll write it like this:
$env:WP_SITES_PATH = "C:\Users\YourName\Desktop\wp-sites.json"
2. Start the Server
Now run:
npm startThis command actually starts the WordPress MCP server, so it can begin listening for instructions from AI agents like Claude.
If everything is working, your terminal will show something like:
WordPress MCP server started with 2 site(s) configured
This means your MCP server has read the config file and is ready to communicate with the WordPress sites listed inside it. Success!
Now that your WordPress MCP server is running, you can test it by connecting Claude (or any compatible LLM). Try prompts like:
“Show me the last 5 posts from client_one”
“Create a new draft post on client_two titled ‘Welcome to AI-Powered WordPress’”
“List all plugins active on client_one”
The AI model sends those commands to your MCP for WordPress setup, and your WordPress MCP server turns them into API calls your site understands.
Step 5: Test Your WordPress MCP Setup with Claude
Once your WordPress MCP server is running, connect it to Claude or another AI tool that supports JSON tool calling. You can now issue real-time commands like:
- “Fetch all draft posts from client_one”
- “Publish a new post titled ‘AI in WordPress 2025’ on client_two.”
- “Get plugin version list for client_one”
These instructions go through the WordPress MCP server, which parses them into authenticated API requests. It’s clean, efficient, and game-changing for agencies.
Pro Tip for Agencies: You don’t need to build this from scratch. InstaWP provides a production-ready WordPress MCP Server implementation with WordPress-native tooling, a sample Claude Desktop configuration, and safe staging environments. You can test workflows in disposable sandboxes, then roll them out across client sites confidently, without writing custom middleware.
Why Use WordPress MCP for Your Agency?
Agencies spend countless hours on routine WordPress site management; approving updates, fixing plugin issues, publishing client content, cleaning up spam, and keeping dashboards alive. None of this is what you built your agency for. It’s the digital equivalent of babysitting dozens of sites at once.
The WordPress MCP Server, sometimes called the MCP for WordPress, changes that reality. By linking your sites to Claude or any LLM, you can offload nearly half of those repetitive tasks to AI.
If you manage 20+ WordPress sites, your team probably repeats the same tasks every week:
- Updating plugins and themes
- Publishing blog posts or drafts
- Running SEO and performance checks
- Cleaning up spam comments
- Monitoring uptime
Now, imagine delegating all of that to Claude or another AI model, using one shared MCP server for WordPress to deliver: AI-powered content engines, automated performance alerts, real-time client dashboards, and on-demand WordPress assistants.
Just as pairing AI tools with a virtual administrative assistant creates a hybrid workflow for domains like IT, HR, marketing, and so on, WordPress developers are building AI-powered website assistants for their clients using the WordPress MCP protocol. These assistants pull analytics, draft content, and even generate WordPress maintenance reports, bringing automation directly into everyday website management.
The MCP protocol does more than ping you with reminders. It executes actions:
- “Show me all draft posts from client_blog_1.”
- “Publish the top 3 articles Claude just wrote for realestate_site.”
- “Update all plugins on our WooCommerce stores.”
Your AI assistant becomes a full-service site manager.
The Bigger Picture: From Sites to Services
We’re entering an era where agencies won’t just offer “WordPress development” but will position themselves as AI-enhanced digital partners. With the right tools, agencies are becoming a smart platform provider.
The WordPress MCP server helps you cross that line.
You’re not just building websites anymore. You’re delivering:
- AI-powered content engines
- Automated performance alerts
- Real-time client dashboards
- On-demand WordPress assistants
These are not ideas for the future. Agencies are already offering them today
How to Use WordPress MCP to Monetize AI Workflows
AI in WordPress isn’t just a productivity upgrade. It’s a business model.
If you’re an agency, freelancer, or product creator, the WordPress MCP server gives you a direct path to monetize automation, without needing to build your own AI platform.
With Claude + WordPress + InstaWP’s WordPress MCP, you can sell real services, launch scalable SaaS products, or bundle prebuilt solutions into monthly retainers.
1. Sell “AI Admin Assistant” Plans to Clients
Offer clients a virtual WordPress assistant that handles:
- Blog publishing
- SEO checks
- Plugin audits
- Spam moderation
- Basic reporting
Position it as:
“Your WordPress Admin Assistant—powered by Claude, available 24/7.”
Charge: $50–$200/month per site
Run it using: InstaWP MCP Server + Claude Desktop + InstaWP’s Performance Scanner & Activity Log Viewer
2. Launch Your Own AI-Powered WaaS or SaaS
Use InstaWP templates + MCP tooling to build an AI-driven platform:
- Create demo templates with Claude prompts preloaded
- Offer clients tiered plans based on AI access (e.g., content only vs full control)
- Deploy sites instantly using InstaWP WaaS capabilities
Examples:
✔️ “Let AI manage your content calendar”
✔️ “SEO checker powered by Claude”
✔️ “AI blog package for WooCommerce store owners”
3. Productize Your Workflows as Templates and Kits
Every agency has repeatable workflows. Why not sell them?
- Build Claude-compatible prompt kits
- Package InstaWP site templates with pre-installed MCP servers
- Offer “Done-for-You” AI assistant bundles on your own site or marketplaces
Example:
“AI Assistant for Bloggers – Includes SEO prompts, content calendar, and Claude integration.”
4. Add AI Consulting to Your Retainer Packages
Most clients don’t know what’s possible with AI.
Offer:
- WordPress AI workflow audits
- Claude + MCP onboarding
- Custom prompt design
- Ongoing support
Position yourself as more than a developer—you’re an AI integration partner.
Want even more control? You can extend the WordPress MCP server by building your own custom tools.
This gives your agency the power to productize these AI interactions into services.
Security Best Practices for Live MCP Usage
As powerful as the WordPress MCP server is, it must be handled responsibly, especially in live production environments. Here’s what we recommend:

And yes, MCP for WordPress has built-in structures to handle these concerns if you configure it thoughtfully.
Using WordPress staging sites means you can fully test your WordPress MCP server in isolated environments—no risk to production, full visibility into how tools behave.
Final Thoughts: Be the First, Be the Fastest
WordPress MCP isn’t just a tool. It’s a shift in how agencies work.
You can:
- Save 100s of hours per year through automation
- Offer AI assistants as a service
- Productize workflows with a hosted WordPress MCP server
- Scale client management across 10, 100, or 1000 sites
- Become the agency that leads with AI—not the one playing catch-up
The MCP for WordPress puts your agency at the forefront of this change. And InstaWP ensures you can experiment, deploy, and scale with confidence.
Start Building AI-First WordPress Sites with InstaWP Today
Want to get hands-on with the WordPress MCP server, without worrying about setting up servers or breaking a live site?
👉 Create a free InstaWP sandbox
Spin up a WordPress site in seconds.
Test Claude + MCP integrations safely.
Clone, sell, and deploy your AI-powered templates.
All without touching cPanel.
Whether you’re a solo dev or scaling agency, MCP for WordPress + InstaWP is your new superpower.
FAQs
Q1: Do I need to know advanced coding to use WordPress MCP?
Nope! If you’re comfortable editing simple JSON and running terminal commands, you’re good to go.
Q2: Is the WordPress MCP server safe for production use?
Yes—just follow security best practices like using HTTPS, app passwords, and read-only scopes where needed.
Q3: Can I use MCP for multiple clients?
Absolutely. You can add 10, 100, or 1000 sites to your config and manage them all through a single WordPress MCP server.
Q4: Does InstaWP support MCP workflows?
Yes! InstaWP is the perfect staging + testing platform for MCP for WordPress workflows—plus you can turn those workflows into sellable templates.
Q5: Can I sell this as a SaaS product?
Definitely. Package your WordPress MCP server and tools as a hosted service, and let clients connect their sites via an API key.