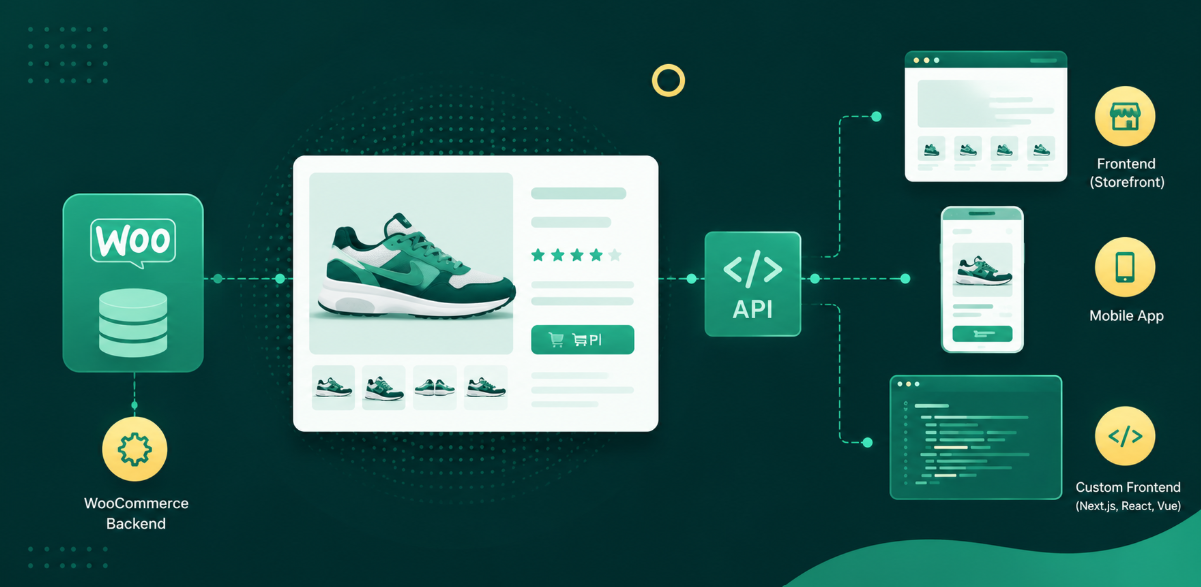
Building a WordPress eCommerce store means turning a standard WordPress site into a fully functional online shop, usually with WooCommerce, then adding products, payments, shipping, and a domain. Done in the right order, you can go from an empty site to a store that takes real orders without writing a line of code.
The hard part is not any single step; it is sequencing them correctly and testing safely before customers arrive. This guide walks through the entire process, from planning and building your store to launching it live on your own domain. It is written for agencies, developers, and store owners who want a fast, secure, and repeatable build.
Key takeaways
- ✓Build first, pay later. Develop the whole store on a sandbox, so mistakes never touch a live site or cost you a production plan.
- ✓Automate with AI. Enable InstaMCP and let Claude, ChatGPT, or Cursor create pages, add products, and organize the catalog by prompt.
- ✓Go live in place. When the store is ready, upgrade the same site to a managed hosting plan; no export, import, or migration.
- ✓One dashboard for the domain too. Map a domain you own, or buy one from InstaWP with DNS, SSL, and WHOIS privacy included.
How to Build a WordPress eCommerce Store with InstaWP
Building a successful WordPress eCommerce store takes more than picking a theme and installing plugins. You need a safe place to build, a fast way to do the repetitive work, reliable hosting, and a domain. InstaWP gives you all four in one workflow, so the same site you build on a sandbox becomes your live store. That single thread, from sandbox to live domain, is what the ten steps below follow.
In short: WooCommerce is the free plugin that turns any WordPress site into a store, and a sandbox is a private, disposable WordPress site you can build on without touching anything live. InstaWP gives you the sandbox, the AI automation, the managed hosting, and the domain in one place, so you are not stitching four vendors together.
Must Read: Tips to Build an eCommerce Website with WordPress
Step 1: Create Your WordPress Site From Scratch on InstaWP
The smartest way to build a store is on a sandbox, a private and disposable WordPress site, rather than a live server. A sandbox lets you experiment with themes, plugins, and layouts safely, so nothing you try can break a real store. Keep the site on the sandbox for the entire build and upgrade only when it is ready to sell. New InstaWP accounts start with sign-up credits, so this build phase does not cost you a production plan. You can also follow the full create a site documentation for every option.
Open the create-site flow: Log in to your InstaWP dashboard, go to the Sites page, and click Add Site. A window opens with four ways to create a site: from scratch, from a snapshot, from the store, or with AI. For a fresh store, choose From Scratch.

Configure your site: Set your WordPress version, PHP version, and server location (PHP version and location are available on paid plans). For an eCommerce build you can also pick a WooCommerce configuration preset here, then click Next Step.

Add starter plugins (optional): Preinstall the plugins you want from categories like eCommerce, Security, Speed, SEO, and Backups. This is a quick way to drop WooCommerce and your must-have extensions in from the start. Click Next Step.

Create the site: Pick a plan for the site (keep it on a sandbox plan while you build), then click Create Site. InstaWP provisions a fresh WordPress install in seconds.

Prefer to watch it done? Here is the walkthrough from InstaWP Academy.
When the site is ready, InstaWP shows the site URL and login details. Click the Magic Login button to open the WordPress dashboard in one click, with no username or password to type.

Build your store on a sandbox first
Spin up a WordPress sandbox in seconds and build your whole store risk free before you pay for hosting.
Create a WordPress sandboxStep 2: Enable InstaMCP to Automate the Build With AI
Before you start clicking through WooCommerce screens, turn on InstaMCP. It connects your WordPress site to AI clients like Claude, ChatGPT, Cursor, and VS Code, so you can build parts of the store in plain language instead of doing every task by hand. This is the fastest way to handle repetitive setup work such as creating pages, adding products in bulk, and organizing categories.
In short: MCP, the Model Context Protocol, is an open standard that lets AI assistants securely connect to real apps and act inside them. InstaMCP makes every InstaWP site MCP-ready with one toggle, so your AI can build store content for you while the site stays safely on a sandbox.
To enable it on your InstaWP site:
Open your site: In the InstaWP dashboard, go to your site detail page.
Enable MCP: Find the MCP menu in the left sidebar and click Enable MCP. The InstaMCP plugin installs automatically and generates a secure token.
Copy your MCP URL: Copy the unique MCP endpoint URL from the dashboard. It already contains your authentication token, so there are no JSON files to edit.
Connect your AI client: Paste the MCP URL into a supported client such as Claude Desktop, ChatGPT, or Cursor.
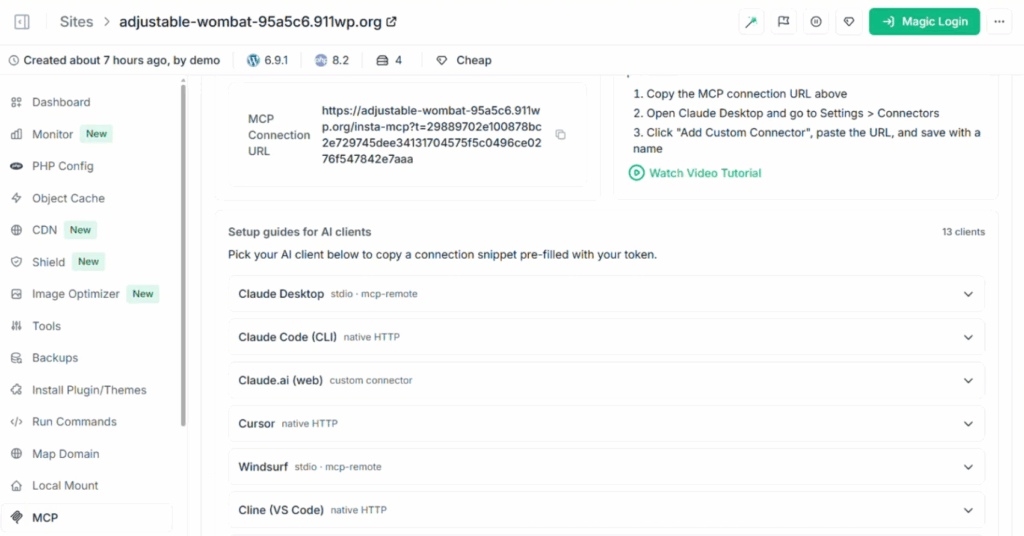
Once connected, you can ask the AI to create your core pages, draft product descriptions, upload media, and set up categories and tags, then refine the details yourself in the next steps. Keep the site on the sandbox while you do this, so any AI change is easy to undo.
Did you know? Because InstaMCP works on a sandbox, you can let AI experiment freely. If a bulk change is not right, you roll back the sandbox instead of cleaning up a live store.
Step 3: Install and Set Up WooCommerce
With the site and AI in place, add the store engine. WooCommerce is the leading WordPress eCommerce plugin and the core of your store; it adds product management, a cart, checkout, payments, shipping, and tax to any WordPress site.
In the WordPress dashboard, go to Plugins, then Add New Plugin, and search for WooCommerce.
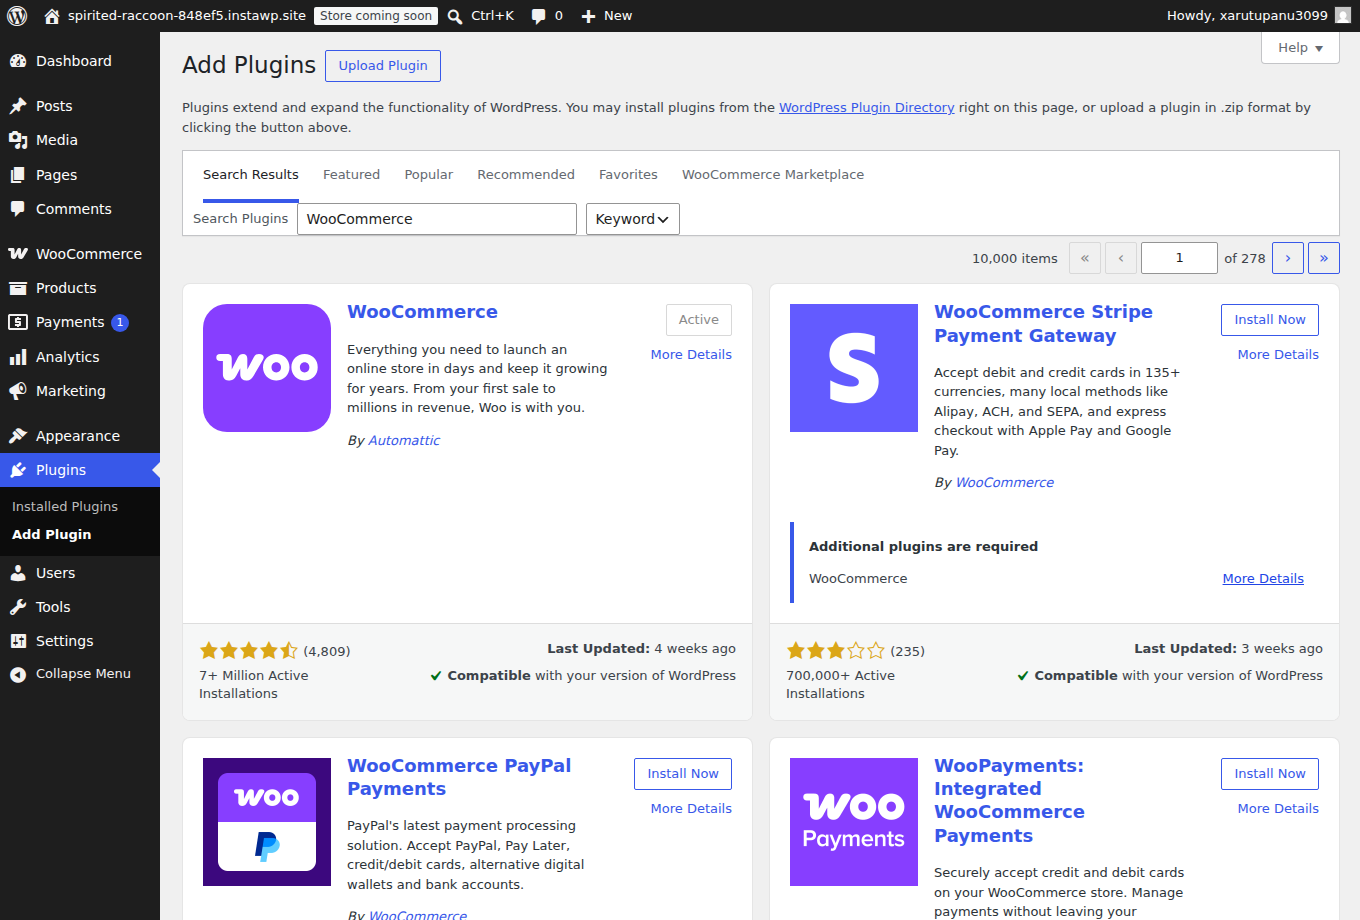
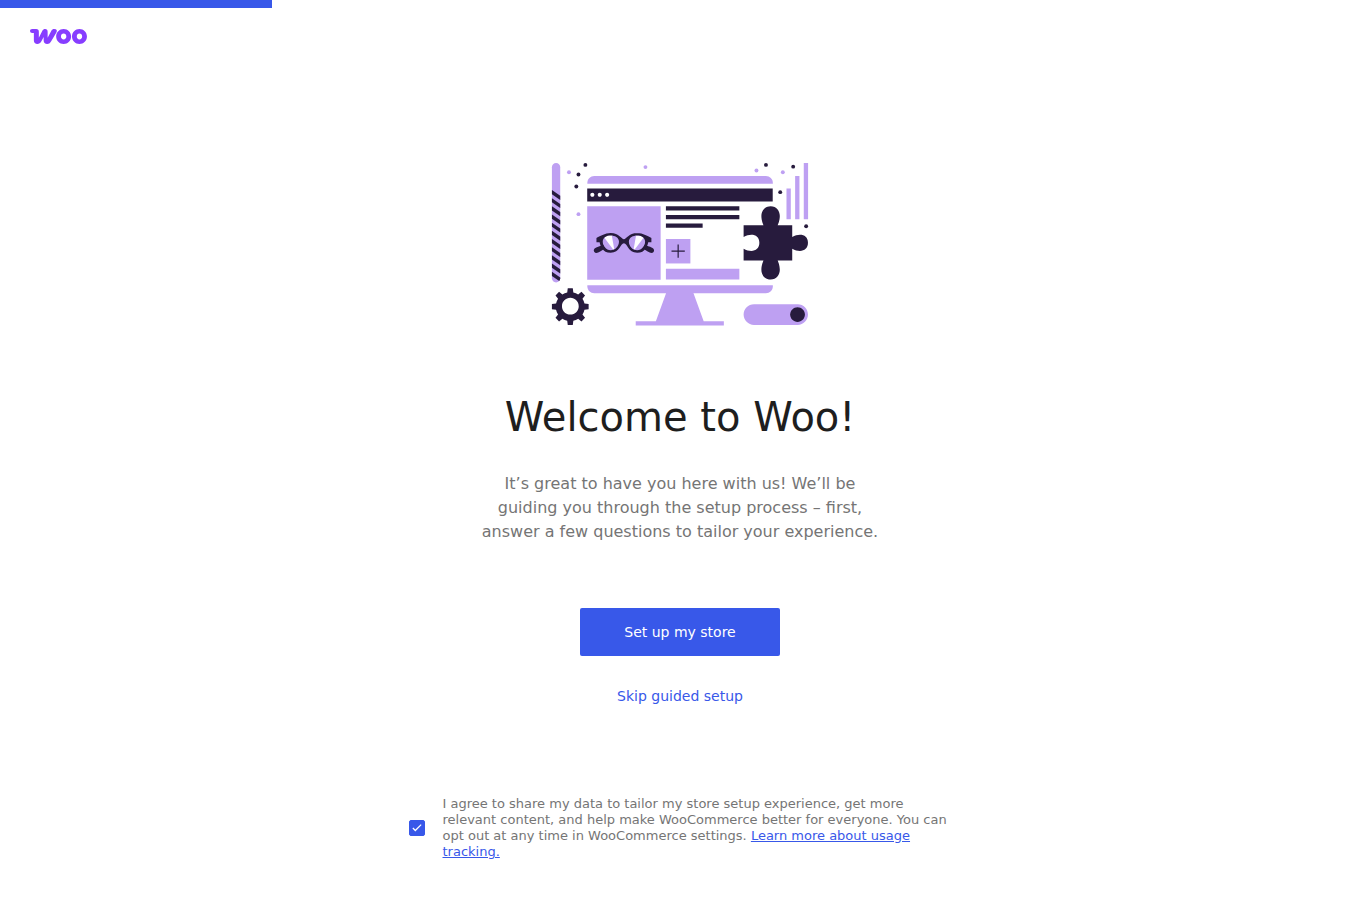
Install and activate WooCommerce, then click Set Up My Store to launch the setup wizard.
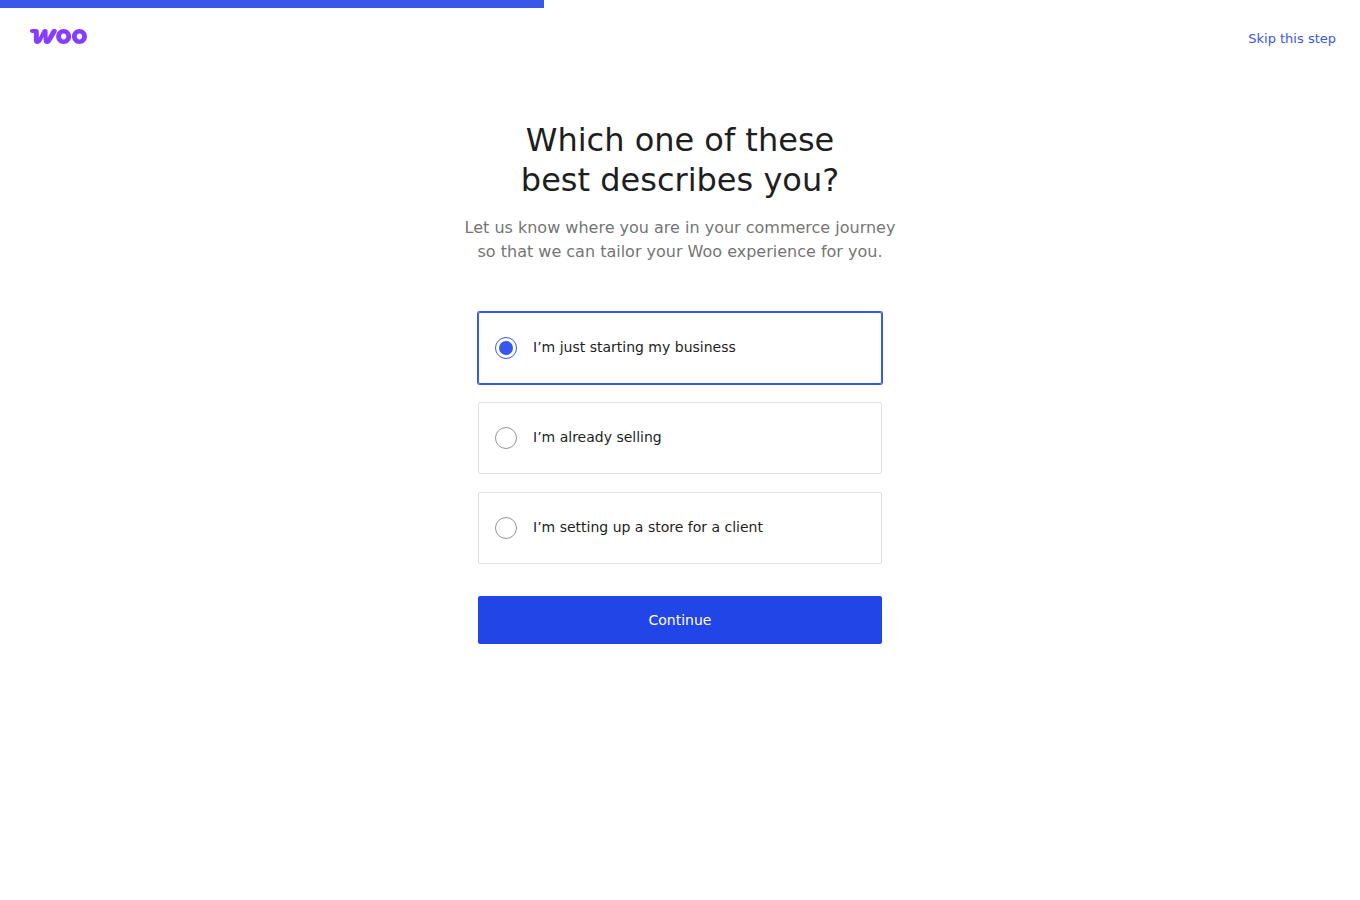
Enter the basic details about your store, such as name, industry, and location. WooCommerce uses these to preconfigure sensible defaults for currency, payments, and tax.
Want a wider view of the plugins that extend your store? See our guide to the top WordPress eCommerce plugins.
Step 4: Customize Your Theme and Layout
Your store design shapes first impressions and conversions, so choose a theme built for speed and mobile shoppers, then customize it to match the brand.
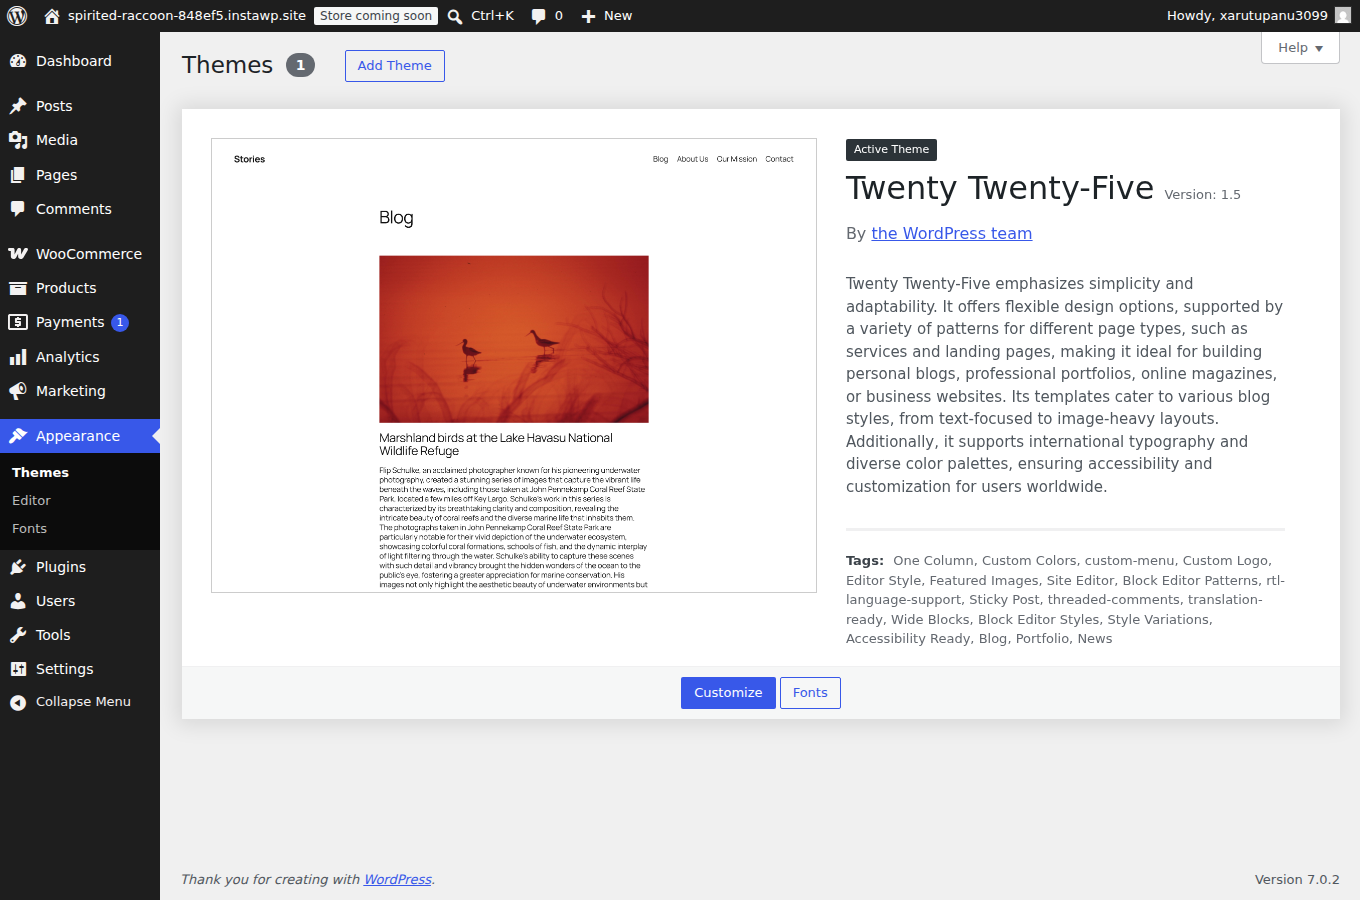
Open Appearance, then Themes, and click Customize (or Editor on a block theme) to start styling your store.
- Pick a mobile-responsive theme: A lightweight, customizable theme like Gutena is optimized for speed, which matters for conversions.
- Adjust design elements: Use the WordPress theme customizer to set colors, typography, and layout so the store matches the brand.
- Create core pages: Set up the Homepage, Shop, Product, Cart, and Checkout pages, each optimized for usability and mobile.
Pro tip: Test everything on the sandbox, from payment gateways to product listings and shipping, before you take the store live. Make final tweaks while there is zero risk.
Must Read: Complete Guide To Test a WooCommerce Website
Step 5: Add Products and Optimize Listings
Products are the heart of your store. Add them in a way that helps both shoppers and search engines. This is also where InstaMCP earns its place; ask your AI to bulk-create products from a spreadsheet, then polish the details by hand.
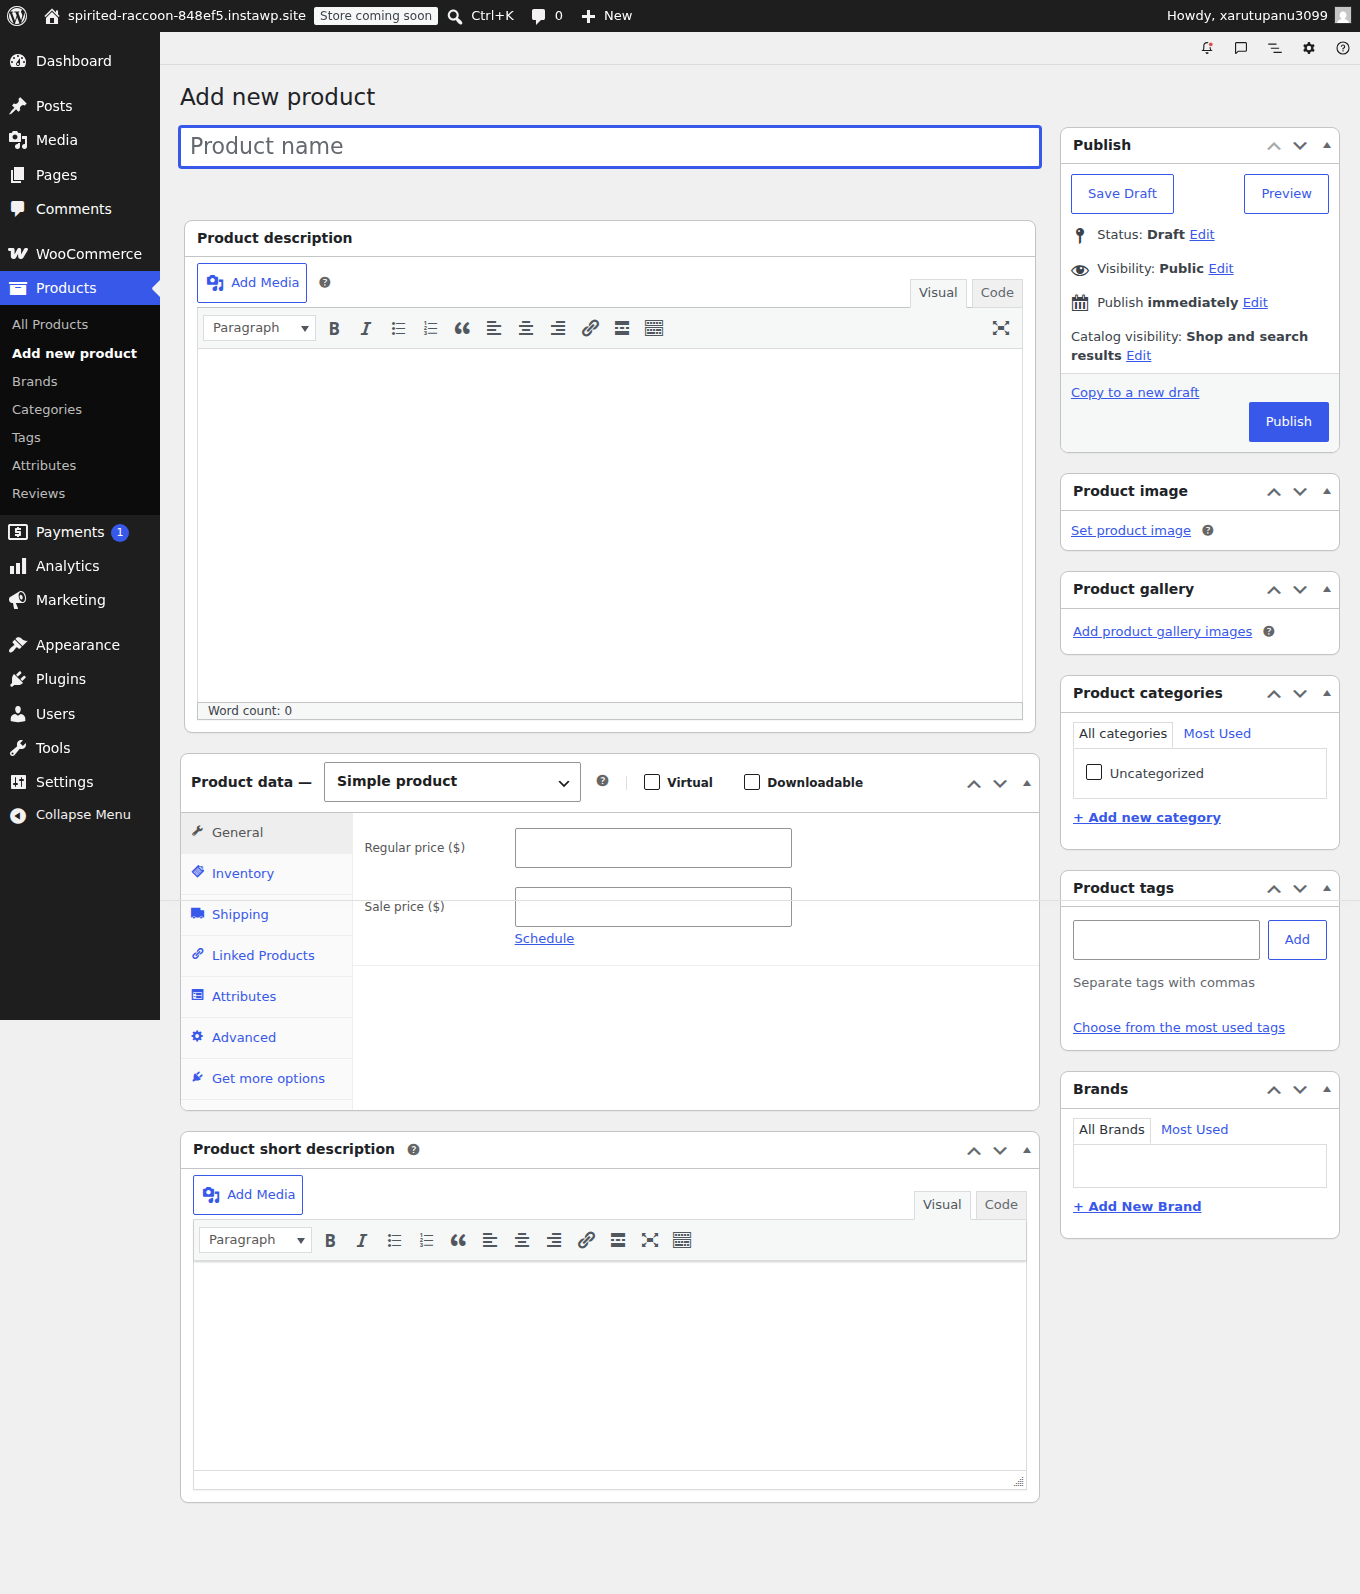
- Add products: Add them manually or import via CSV under WooCommerce, then Products, then Add New. Include clear descriptions, high-quality images, and accurate pricing.
- Organize with categories and tags: Structure the catalog so shoppers can find items fast and search engines understand your store.
- Enable inventory management: Set stock levels and low-stock alerts to avoid overselling.
- Add customer reviews: Social proof lifts conversions. See how to turn customer reviews into sales.
Step 6: Configure Payments, Shipping, and Tax
Set up a smooth, secure checkout so customers can pay with confidence.
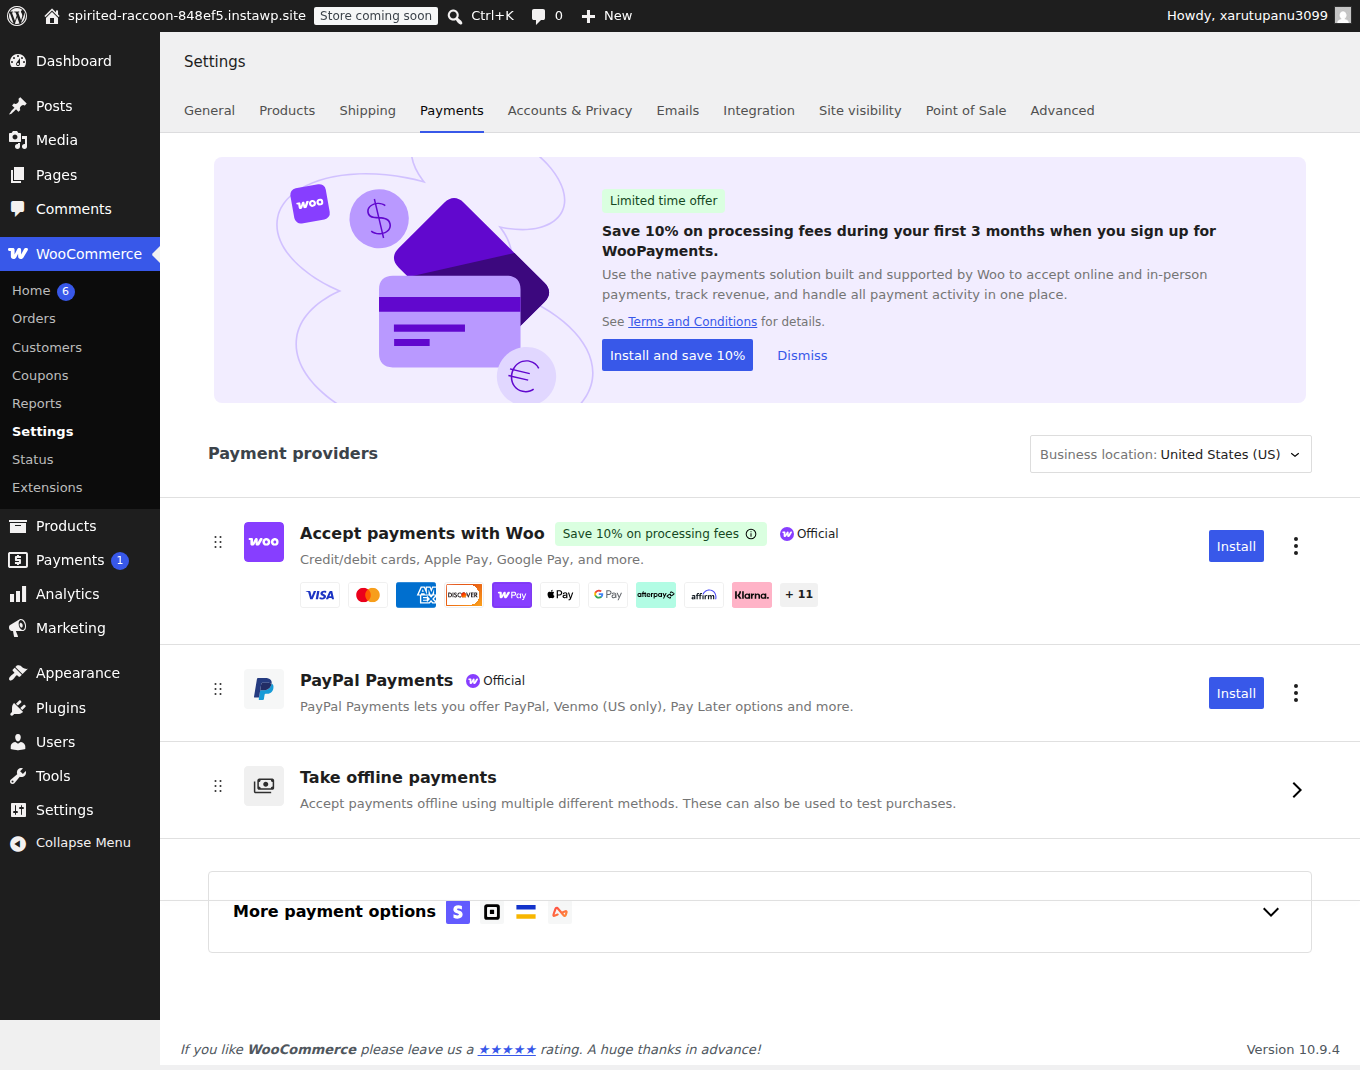
- Set up payment gateways: WooCommerce integrates with popular payment gateways such as Stripe and PayPal for secure transactions.
- Configure tax: Apply location-based tax rates to keep checkout compliant.
- Create shipping options: Offer methods that fit your market, such as flat rate, free shipping, or international.
Step 7: Optimize for SEO and Performance
A fast, well-optimized store ranks better and converts more. Handle this while still on the sandbox, so you can test changes safely.
- Install an SEO plugin: A WordPress SEO plugin like Yoast helps you optimize product pages, categories, and posts for keywords and meta descriptions.
- Optimize images and enable caching: Compress images and cache pages for faster load times.
- Reduce bloat: Remove unnecessary plugins and minimize requests to keep the store lean.
Testing safely is exactly what a sandbox is for. Learn how to test themes and plugins using staging before anything goes live, and how to prepare a fully functional demo for client sign-off.
Step 8: Upgrade Your Sandbox to a Managed Hosting Plan
When you are confident the store is ready, move the same site from a sandbox to a paid managed WordPress hosting plan. On InstaWP this is a plan change, not a separate go-live step and not a migration. The site keeps the same URL, data, and settings, and simply starts running on a production plan. See the upgrade site plans documentation for the full detail.
- Open the plan selector: On the Sites page, find your store and click the Change Plan icon on that site.

- Pick a plan: A pop-up shows the available plans with their features and pricing. InstaWP bills pay-as-you-go, so pick the plan that fits your store; agencies can match a plan to each client site.

- Confirm the change: Click Change Plan. The upgrade applies immediately, with no downtime and no URL change. Billing moves to the new daily rate from that moment, and you can downgrade again at any time.

Speed
Optimized stacks and a global CDN keep pages fast, which protects conversions.
Security
WAF, DDoS protection, and automatic SSL help keep checkout safe.
Backups
Automatic backups mean a bad update is easy to recover from.
Less maintenance
Simplified tools for updates and management, so you spend time selling, not troubleshooting.
Step 9: Connect Your Domain (Map One You Own or Buy One From InstaWP)
A live store needs a domain. InstaWP handles both cases, whether you already own a domain or need to buy one.
Option A: Map a domain you already own
Mapping needs a paid plan (Starter or higher), which is why you changed the plan in Step 8; sandbox sites cannot be mapped. Full detail is in the map a custom domain documentation.
- Open Map Domain: On the Sites page, click the ellipsis (three dots) on your site and choose Map Domain.

- Enter your domain: Type your domain, choose whether it is the Primary address or an Alias, and copy the CNAME record InstaWP shows you.

- Add the record at your registrar: In your domain registrar or DNS provider, add the CNAME record you copied (use @ for the root domain or www for the www version), then save.
- Finish mapping: Back in InstaWP, click Map Domain. Once DNS propagates, InstaWP issues and renews the SSL certificate for you, so your store loads securely over HTTPS.

Option B: No domain yet? Buy one from InstaWP
InstaWP is also a domain registrar, so you can search, buy, and connect a domain without ever opening a separate registrar account. Every domain includes managed DNS, a free SSL certificate, WHOIS privacy protection, and auto-renewal, all on one invoice with your hosting.
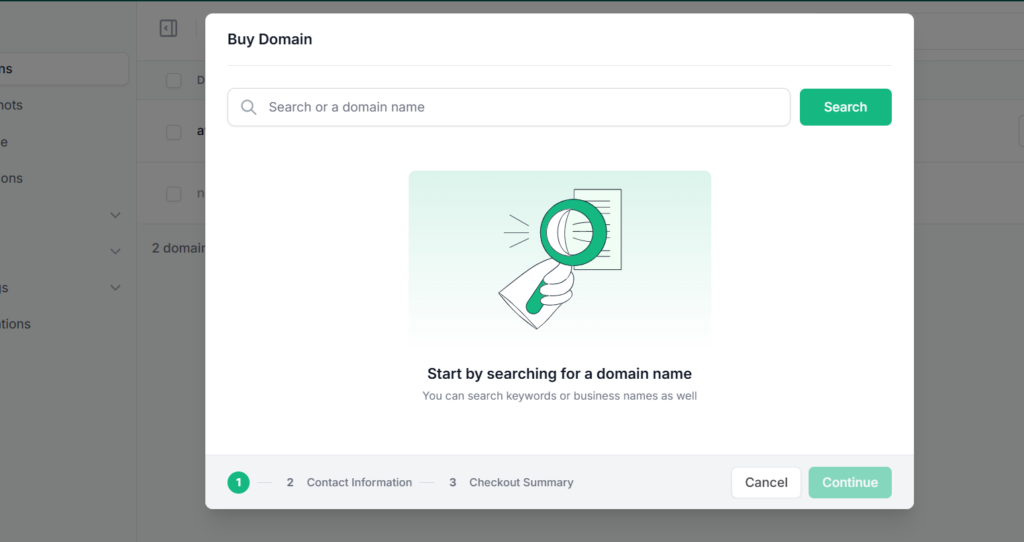
- Search: Open the Domains section and click Buy Domain, then search your desired name across available extensions with live pricing.
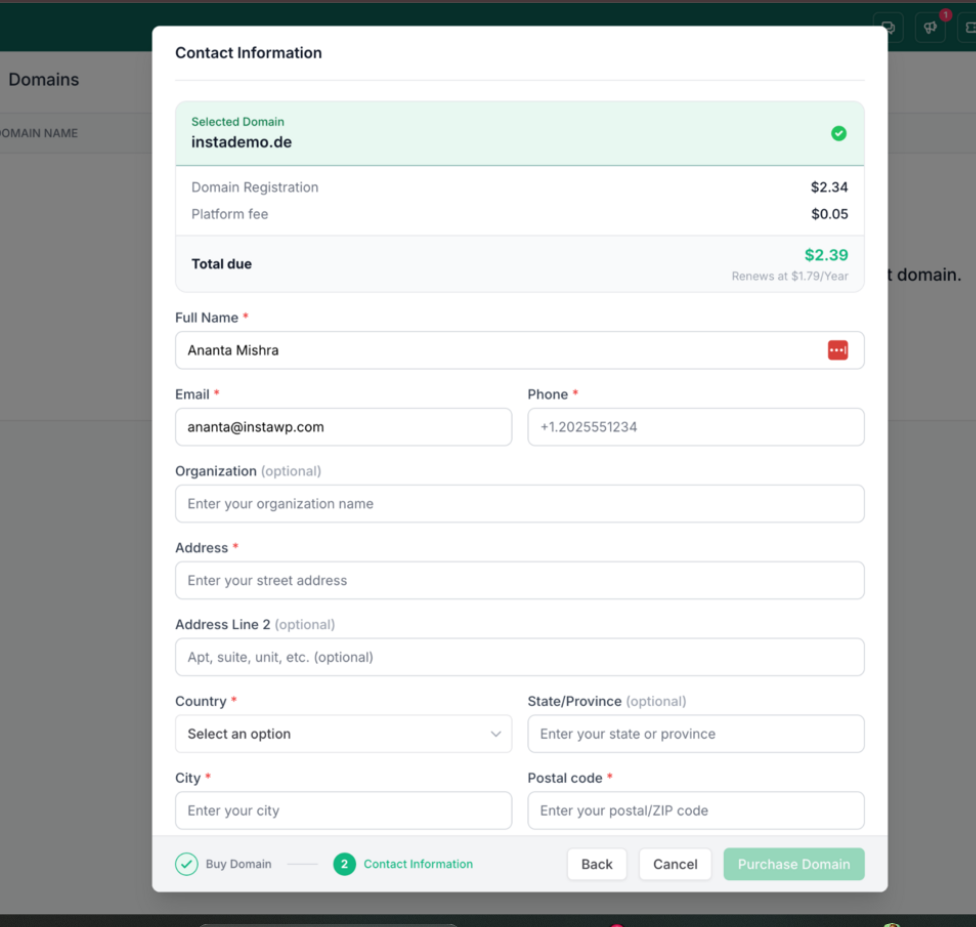
- Register: Pick an extension, enter your contact details, and register. WHOIS privacy activates automatically.
- Link your site: Open the domain, select Sites, click Link Site, choose your store from the dropdown, and confirm. The DNS record is created for you and SSL is issued automatically.
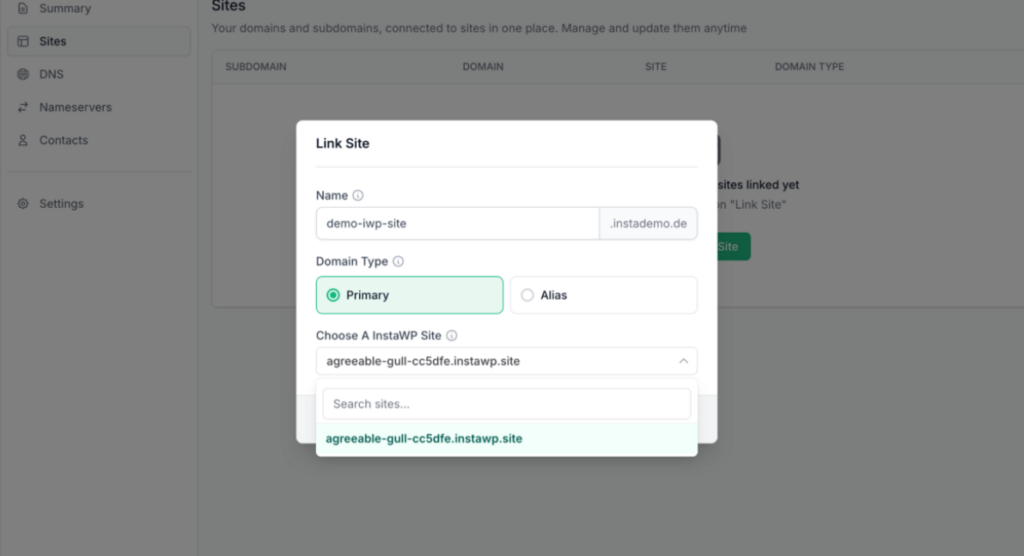
One dashboard for hosting and domains
Build, host, and buy your domain in the same place, with DNS and SSL handled for you.
Explore managed WordPress hostingStep 10: Launch Checklist and Analytics
Your WordPress eCommerce store is live. Finish with a quick checklist so you can measure and grow.
- Place a test order to confirm payments, tax, and shipping all work end to end.
- Set up Google Analytics and WooCommerce analytics to track sales, traffic, and behavior.
- Confirm SSL is active and every page loads over HTTPS.
- Submit your sitemap to Google Search Console so products get indexed.
- Turn off any maintenance mode and search engine visibility blocks left over from the build.
How Much Does It Cost and How Long Does It Take?
You can have a basic WooCommerce store built on a sandbox in an afternoon, then take it live when you are ready. New InstaWP accounts start with sign-up credits, so the build phase costs nothing extra while you develop. When you go live, hosting is pay-as-you-go, and a domain is a separate yearly registration if you buy one from InstaWP.
| Phase | Where | What it costs |
|---|---|---|
| Build and test | InstaWP sandbox | Covered by sign-up credits while you develop |
| Go live | Managed hosting plan | Pay-as-you-go, pick a plan per site |
| Domain | Map your own, or buy from InstaWP | Free to map, or yearly registration if you buy |
Exact plan pricing is shown live in your dashboard and on the hosting and domains pages.
Final Say
Building a WordPress eCommerce store does not have to be a scattered, trial-and-error process across multiple tools. With InstaWP you build from scratch on a sandbox, use AI through InstaMCP to speed up the repetitive work, then upgrade the same site to managed hosting and connect a domain, all in one place. You develop safely, launch confidently, and manage everything from a single dashboard.
Build your store the smart way
Start on a sandbox, automate the setup with AI, then go live on managed hosting and your own domain, all from one InstaWP dashboard.
Start Building on InstaWPFAQs
What are the best tools to build a WordPress eCommerce store?
WooCommerce is the top plugin for WordPress eCommerce. Pair it with InstaWP for the build and launch: a sandbox to develop safely, InstaMCP to automate setup with AI, managed hosting to go live, and a domain registrar built in.
Can I build my store before paying for hosting?
Yes. You build on a sandbox using your sign-up credits, so there is no production cost while you develop and test. You only choose a paid managed hosting plan when you are ready to take the store live.
Do I need to migrate my site to go live?
No. On InstaWP the sandbox you build becomes your live store. When you change the plan to a managed hosting plan, the same site is upgraded in place, with no export, import, or separate migration to another host.
What is InstaMCP and how does it help build a store?
InstaMCP connects your WordPress site to AI clients like Claude, ChatGPT, and Cursor. Once enabled, you can ask the AI to create pages, add products in bulk, upload media, and organize categories in plain language, which removes a lot of the repetitive setup work.
Can I buy a domain from InstaWP?
Yes. InstaWP is a domain registrar. You can search and register a domain in the dashboard, and it comes with managed DNS, a free SSL certificate, WHOIS privacy, and auto-renewal, billed alongside your hosting. You can also map a domain you already own.
Why is a staging site essential for building an eCommerce store?
A staging site is a private testing environment where you can preview changes and test themes, plugins, payments, and checkout without affecting a live store. InstaWP lets you build and refine WordPress eCommerce sites risk free before going live.