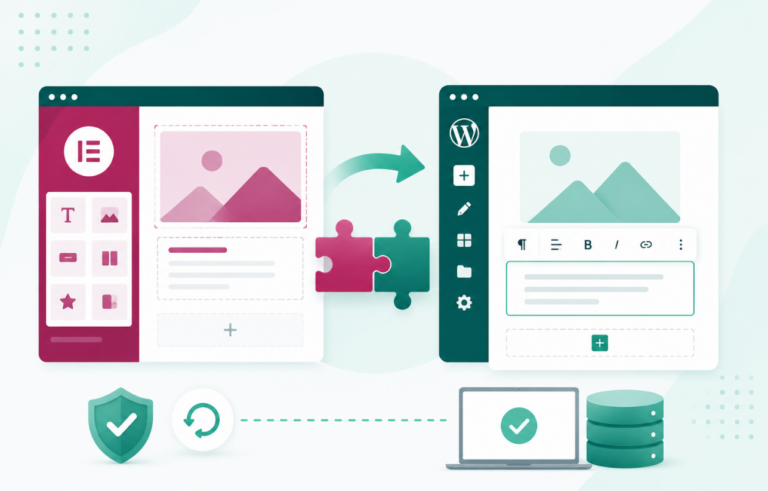
To make your WordPress site AI-agent ready, you need to open two doors: a server-side door (MCP) that lets agents operate your site like an API, and a browser-side door (WebMCP) that lets agents complete tasks on your live pages.
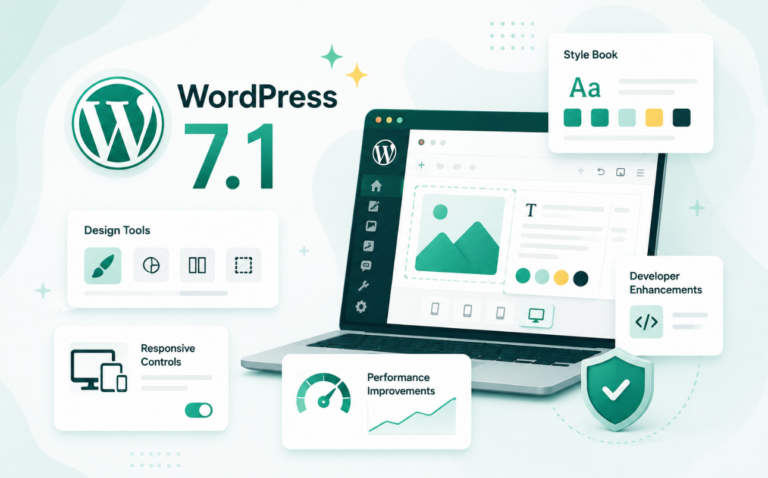
WordPress 7.0 shipped the foundation on May 20, 2026, but it does not make your site agent-ready on its own. This guide is for WordPress developers and agencies who want the practical, accurate steps, including how to skip most of the server setup entirely by hosting on a platform with a built-in MCP server.
Table of Contents
Key Takeaways
- An AI agent reaches your WordPress site through two separate doors: server-side (MCP) for managing and automating the site, and browser-side (WebMCP) for serving public visitors.
- WordPress 7.0 shipped the Abilities API and MCP Adapter for Door 1, plus a Connectors UI under Settings. The JavaScript Abilities API arrived in 7.0; the PHP version landed in 6.9.
- WebMCP (Door 2) is still an early preview, behind a flag in Chrome Canary, not yet in stable Chrome. The foundational work still pays off for every agent.
- You can skip the hardest part of Door 1 (server setup, authentication, token scoping) by hosting on a platform with a built-in MCP server. On InstaWP, one toggle enables it.
- The fundamentals that help every agent are the same ones that help humans: semantic HTML, a clean accessibility tree, stable layout, and an
llms.txtfile. - Agent workflows are non-deterministic. Test them on a staging copy, then promote the proven version to production hosting. Never test on a live store.
Why Agent Readiness Matters Right Now
For nearly two decades, you built WordPress sites for one kind of visitor: a human with eyes, a cursor, and patience. In 2026 you have a second kind of visitor, an AI agent executing a multi-step task on someone’s behalf.
It might be booking an appointment, comparing three vendors, filling out your contact form, or completing a checkout. AI shopping agents are already live across ChatGPT, Gemini, Microsoft Copilot, and Perplexity, and the browser itself is turning into an agent through Chrome’s auto-browse, Perplexity’s Comet, and Copilot Mode in Edge. Being found by those assistants is a separate job from being operated by them, and how to rank in ChatGPT covers that side.
The same shift is happening on the operator side of the business, where teams are handing routine multi-step tasks to software that plans and executes rather than waiting for a prompt each time. Much of that work now runs through an all in one AI platform instead of a separate tool per task, so the agent, the models behind it and the access controls sit in one place.
Here is the part most site owners miss. Agent traffic is largely invisible in your analytics. Pixel-based tracking like GA4 and Meta Pixel was built to fire on human browser sessions, and an agent completing a task often does not trip those tags.
A large share of AI-driven referrals get misclassified as “direct.” So the fastest-growing channel to your site is also the one your dashboard is least equipped to count. That is exactly why it is easy to ignore for one more quarter, and exactly why you should not.
~$21B
Projected US retail spending driven by AI platforms in 2026, close to 4x the 2025 figure (eMarketer).
May 20, 2026
WordPress 7.0 shipped the foundation for serving agents, including the JavaScript Abilities API and a Connectors UI.
2 doors
The number of separate paths an agent can take to reach your site. Each needs different work.
The Two Doors: How an Agent Actually Reaches Your Site
This is the single most useful mental model for the rest of this guide, and it is the part most “agent readiness” advice gets wrong by collapsing everything into one thing. An AI agent can interact with your WordPress site through two completely separate doors, and they require different work. Get this distinction right and the rest of the work becomes obvious.
| Door 1: Server-side (MCP) | Door 2: Browser-side (WebMCP) | |
|---|---|---|
| How it connects | Directly to your WordPress install as a server. No browser. | Loads your live public page in a real browser. |
| Main job | Managing and automating the site (content ops, store admin, internal workflows). | Serving public visitors (checkout, booking, contact forms). |
| Who drives it | Claude Code, Cursor, ChatGPT, custom automation operating as an operator. | An agentic browser acting for an end user who never touches a keyboard. |
| Status in 2026 | Foundation shipped in WordPress 7.0. Production-ready today. | Early preview. Behind a flag in Chrome Canary, not in stable Chrome. |
A serious site in 2026 needs both doors open. Door 1 is about who can operate your site behind the scenes. Door 2 is about who can use your site out front. Let us take them in order, starting with the one that is ready to use today.
Door 1: The Server-side Layer (Abilities API and MCP)
For years, the relationship between AI and WordPress was “AI generates code, a human pastes it in.” That is now obsolete. WordPress can describe its own capabilities to an agent, and the agent can invoke them directly. Two pieces in core make this work, and a third piece decides how painful the setup is going to be.
The Abilities API and The MCP Adapter
The Abilities API is a capability registry inside WordPress core. It registers abilities like create_post, get_post, and find_posts, and crucially, any plugin can register its own abilities too, each with an input schema, an output schema, a permission callback, and a human-readable description.
The moment a plugin registers abilities, it becomes AI-native. This is the real unlock, because it turns the entire plugin ecosystem into something agents can drive. The PHP version landed in WordPress 6.9 in January 2026, and the JavaScript counterpart shipped with WordPress 7.0.
The MCP Adapter exposes those registered abilities over the Model Context Protocol, the open standard that ChatGPT, Claude, Gemini, Cursor, and most agent tooling already speak. The adapter is one of the options InstaWP tested in its roundup of the best WordPress MCP plugins.
Connect an MCP-capable agent to your site and it can create posts, manage media, organize taxonomies, and run store operations through plain conversation, with human approval gates at each step. WordPress 7.0 also added a Connectors UI at Settings then Connectors, so site owners manage external AI connections from one screen instead of hand-editing config.
Watch How to Connect Claude to WordPress:
The Hard Part: Authentication, Scoping, and Server setup
Getting an WordPress MCP server live is more than installing a plugin. You have to handle authentication, decide your ability exposure rules, scope agent credentials narrowly, and keep humans in the loop with permission callbacks. InstaWP’s guide to WordPress MCP security walks through each of those controls on a test site.
WordPress.com handles agent auth via OAuth 2.1. Self-hosted sites currently rely on JWT tokens or application passwords, which work but demand the same discipline you would give any API key. Those decisions compound as you scale across multiple sites or onboard team members, and that is where most of the real friction lives.
The Shortcut: a Built-in MCP Server Through Managed Hosting
This is where your choice of host changes the baseline. Rather than provisioning a WordPress environment and then bolting MCP on top, you can host on a platform where the MCP server is part of the stack. On InstaWP managed cloud hosting, every site is MCP-ready from a single dashboard toggle.
When you enable it, the platform automatically installs the MCP plugin, generates a secure 64-character authentication token, and creates your unique connection URL. There is no Node.js setup, no proxy configuration, and no application password to create by hand.
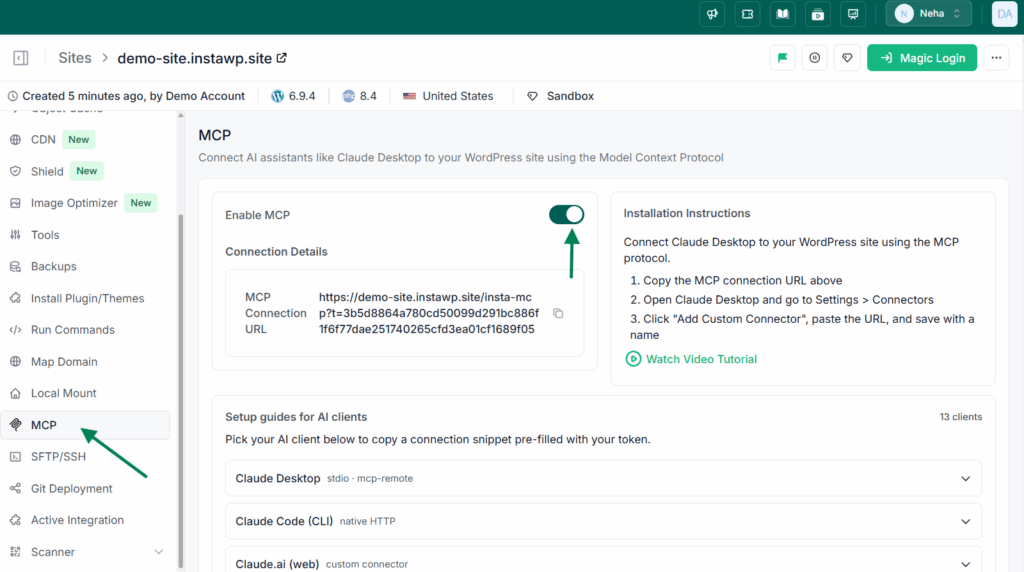
InstaMCP has setup guides for 14 AI clients, including Claude Desktop, Claude Code, Claude.ai, Cursor, VS Code, Windsurf, ChatGPT and Gemini CLI, so your site is not locked into one AI ecosystem.
For Claude Code users, connecting is a single terminal command pointed at your connection URL. The feature is available on Sandbox plans and above. If you already run your managed WordPress hosting on InstaWP, Door 1 is essentially a switch you flip, not a project you scope.
Did you know?
InstaMCP also ships with an execute_php tool that lets an AI agent run PHP directly inside WordPress. It is off by default and wrapped in four security layers: admin opt-in, an mcp:admin token scope, the manage_options capability, and a 30-second execution limit. That means you decide exactly how much power the agent gets, rather than handing it unguarded write access.
Whichever route you take, the developer to-do list for Door 1 is the same: audit what your plugins expose, register Abilities for your plugin’s core actions, get authentication right, and write capability and approval into your abilities so a human stays in the loop.
Want to see this end to end? Our walkthrough on how to connect AI agents to WordPress using MCP covers the full server-side flow with real examples.
Door 2: The Browser-side Layer (WebMCP)
The server-side door does nothing for the visitor whose AI is booking a table on your live site. That is WebMCP’s job. WebMCP is a browser-native standard from the W3C Web Machine Learning Community Group, created by engineers at Google and Microsoft.
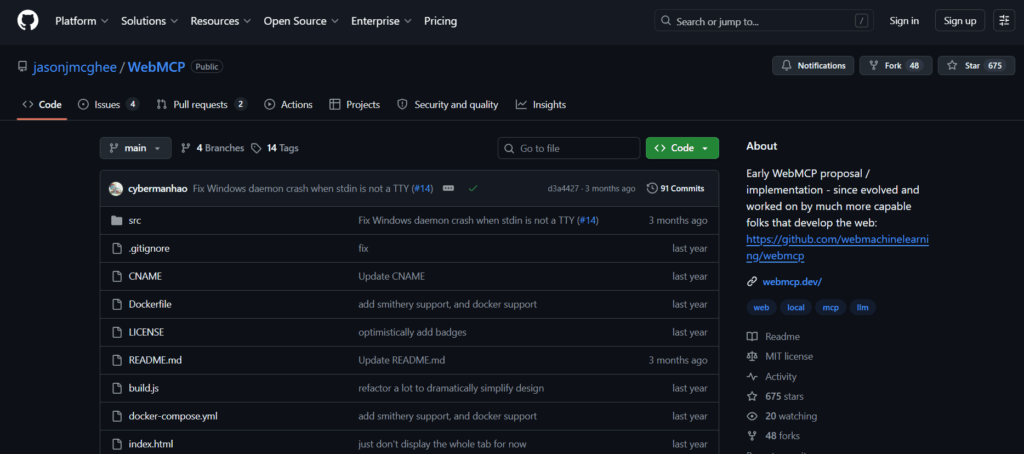
It lets a web page expose its functionality to an agent as structured tools, so the agent calls a function instead of guessing which pixel is the “Checkout” button. It is the difference between an agent that operates your form and an agent that screenshots your page and hopes.
A reality check before you build. WebMCP is still an early preview. The browser API ships behind a flag in Chrome Canary 146 and later and is not in stable Chrome yet, so today you are largely building for Gemini-in-Chrome users. The structural work still pays off for every agent, and the cost of adopting early is low. There are two ways to implement it.
The Declarative Approach, Best for Forms
If your page already has a well-built HTML form from Contact Form 7, WPForms, or WooCommerce checkout, you are most of the way there. You annotate the form element with a handful of attributes and the browser generates a tool schema from your existing fields:
<form toolname="book_appointment"
      tooldescription="Book a consultation slot on a given date and time">
  <input name="date"  toolparamdescription="Preferred date, e.g. 2026-06-12">
  <input name="time"  toolparamdescription="Preferred time in 24h format">
  <input name="email" toolparamdescription="Contact email for confirmation">
  <button type="submit">Book</button>
</form>The toolname and tooldescription attributes define the tool, and toolparamdescription on each field tells the agent what that input expects. Add toolautosubmit and the agent can complete the task without a final manual click. This is the lowest-friction path to agent-readiness on the web. A developer with edit access to a page and a working form can be done in minutes.
The Imperative Approach, Best for Custom Logic
For anything that does not map cleanly onto a form, such as real-time inventory lookups, multi-step flows, or custom plugin logic, use the JavaScript API to register tools explicitly:
if ('modelContext' in navigator) {
  navigator.modelContext.registerTool({
    name: 'check_inventory',
    description: 'Return real-time stock status for a product SKU',
    inputSchema: {
      type: 'object',
      properties: {
        sku: { type: 'string', description: 'The product SKU' }
      },
      required: ['sku']
    },
    async execute({ sku }) {
      const data = await fetch(`/wp-json/store/v1/inventory/${sku}`)
        .then(r => r.json());
      return { content: [{ type: 'text', text: JSON.stringify(data) }] };
    }
  });
}You do not have to wire all of this up by hand. Community plugins already bridge WordPress to WebMCP, exposing posts, pages, custom post types, and WooCommerce actions like cart and coupons as browser tools, and some of them bridge any registered WordPress Ability straight to the browser.
That is the point where the two doors start to share one definition, which is exactly where you want to end up.
How to Design Tools an Agent Can Actually Use
A registered tool that is technically valid can still be a bad tool. The goal is to minimize how much reasoning the agent has to spend, because wasted reasoning is where tasks fail. Three principles cover most of it.
- Accept raw input. If a user says “book 11 to 3,” let your tool take that string. Do not force the agent to convert it into “minutes since midnight,” because that is wasted reasoning and a failure point.
- Return descriptive errors. Agents self-correct, but only if you let them. “Param error” is a dead end. “Product name must be 100 characters or fewer” tells the agent exactly how to retry.
- Name things for humans. Use
shipping_express, nottype_1. Use enums for constrained choices. The description field is part of the interface, so write it like documentation.
The Foundations That Help Every Agent
Here is the good news for the large majority of sites that will not register a single WebMCP tool this year. The fundamentals below help every agent, whether it is Gemini, Claude, ChatGPT, or Comet, regardless of protocol, and they are the same things that make a site accessible to humans.
Build on the accessibility tree. Agents do not see your monitor. They consume a machine-readable representation of the page made of roles, names, and states, and the accessibility tree is the cleanest version of it.
If your theme genuinely works with a screen reader, you are already halfway to agent-ready. Use semantic HTML, real nav, header, button, and a tags instead of a pile of clickable div elements, and give every interactive element a programmatic name.
Keep your layout stable. Agents rely on things staying put, the way a shopper relies on the milk being in the same aisle each week. Layout shift caused by late-loading ads, images without dimensions, or injected content can move a button between the moment the agent finds it and the moment it clicks.
Pin your image dimensions. This is also where a managed host that handles performance delivery earns its keep, because a built-in CDN, image optimization, and caching keep your pages fast and visually stable without extra plugins.
Add an llms.txt file. A plain-text summary at your domain root tells agents what your site is, who it is for, and where the important content lives, so they do not burn time crawling to figure it out. Adoption is still uneven, but it is cheap insurance, and as you will see next, it is now audited automatically.
Did you know?
Every InstaWP site can publish an llms.txt and run on a stack that already includes a global CDN, automatic image optimization, and object caching on higher plans. Those same performance features that keep layout stable for an AI agent are the ones that keep your Core Web Vitals healthy for human visitors. Agent-friendly and human-friendly turn out to be the same checklist.
How to Measure and Test Agent-readiness Safely
You already trust Lighthouse for performance and accessibility. As of Lighthouse 13.3.0, shipped in May 2026 and now in the default config, it includes an Agentic Browsing category that scores how machine-ready your site is. Set expectations correctly though.
Unlike Performance, this category does not produce a weighted 0 to 100 score. It is a set of deterministic pass or fail checks with a fractional pass ratio, designed to drop into a CI/CD pipeline.
It covers WebMCP tool registration, accessibility-tree integrity, layout stability, and the presence of llms.txt. The category is still flagged experimental, and many sites will fail most of it today, so treat it as a directional checklist, not a grade.
The bigger principle is one most teams learn the hard way: AI agents are non-deterministic. Give the same agent the same task twice and it may take two different paths. Traditional “click here, expect that” testing does not cover it.
You need to run a workflow many times, across different inputs and different models, and check that your tools get called correctly each time. You do not want to run that loop against your live store, because non-deterministic tests on production mean real orders, real emails, and real data mutations from a process that might behave unpredictably.
This is exactly what staging is for, and it is where the full InstaWP workflow comes together rather than just the sandbox. Spin up a WordPress 7.0 environment in one click on a WordPress staging site, fully hosted with no server setup, register your Abilities and WebMCP tools there, and run your agentic tests against that copy. Break it, reset it, run it again.
When the workflow is solid, promote it to production hosting on the same platform, with the CDN, security shield, and backups already in place. Your customers should meet the version of your site that already works, not the one you are still teaching to talk to machines.
If your site lives elsewhere, you can still bring it under this workflow through the InstaWP staging setup and its Connect plugin.
The Agent-ready Checklist
Conclusion
The infrastructure shipped on May 20, 2026. The standards are still moving, and that is fine, because moving early is cheap and the foundational work pays off no matter which agent shows up. Your next thousand visitors may not have eyes.
The question is whether your WordPress site is ready to talk to them anyway. The fastest way to find out is to build, test, and host on a platform that already speaks the protocols, so you spend your time designing good tools instead of wiring up servers.
FAQs
What does it mean for a WordPress site to be AI-agent ready?
It means an AI agent can both operate your site behind the scenes through MCP and complete tasks on your live pages through WebMCP. In practice that requires exposing structured capabilities the agent can call, designing those tools clearly, and keeping your HTML and layout clean enough for an agent to navigate reliably.
Did WordPress 7.0 make my site agent-ready automatically?
No. WordPress 7.0 shipped the foundation, including the JavaScript Abilities API, the MCP Adapter path, and a Connectors UI, but it does not register your capabilities or annotate your forms for you. That part is still the developer’s job, which is what this guide walks through.
What is the difference between MCP and WebMCP?
MCP is the server-side door. An agent connects directly to your WordPress install with no browser and calls your registered abilities like API functions, which suits site management and automation. WebMCP is the browser-side door. An agent loads your live page in a real browser and uses tools you expose on the page, which suits public visitor journeys like checkout and booking.
How do I enable an MCP server on WordPress without complex setup?
The simplest route is to host on a platform with a built-in MCP server. On InstaWP, you enable MCP from a single dashboard toggle, and the platform installs the MCP plugin, generates a 64-character authentication token, and creates your connection URL automatically. There is no Node.js, proxy, or application password setup, and it has setup guides for 14 AI clients on Sandbox plans and above.
Is WebMCP ready to use in production today?
Not fully. WebMCP is an early preview and ships behind a flag in Chrome Canary, so it is not in stable Chrome yet, and you are mostly building for Gemini-in-Chrome users at the moment. The structural work is still worth doing because it is low cost and the foundations benefit every agent regardless of protocol.
Where should I test AI agent workflows?
On a staging copy, never on production. Agent workflows are non-deterministic, so the same task can take different paths and trigger real data changes if run on a live store. Spin up a disposable WordPress 7.0 staging environment, register and test your tools there across multiple runs and models, then promote the proven version to production.