Are you worried about the risks of moving your WordPress website from staging to live? You’re justified in feeling that.
After all, the process of staging to live migration is filled with real risks and can significantly impact your site’s performance and reputation. For instance, you might find yourself suddenly dealing with broken links or lost data as soon as you migrate to your live site.
Can you imagine the stress of discovering that your website isn’t functioning correctly after going live?
You’re going to have very frustrated users and lose a lot of traffic. Yes, the risks are real. The worst-case scenario? You encounter a major error that takes your site offline and costs you time, money, and credibility!
If you can relate to all this, then don’t worry. This article will help you navigate this particular challenge and give you best practices to ensure a smooth, error-free transition when you go from WordPress staging to live —via using InstaWP.
Let’s get started and make your website’s move to the live server a success.
Table of Contents
Key Takeaways
- Testing in a Staging Environment is Crucial: Before making any changes live, it’s essential to test in a staging environment. This step helps catch and fix errors, improve the quality and efficiency of your website, reduce potential costs associated with post-live fixes, and ensure a better user experience.
- InstaWP Simplifies the Staging Process: InstaWP offers a quick and easy solution to create and manage staging environments. Using the InstaWP Connect plugin, you can replicate your live site in seconds, enabling efficient testing without risking the integrity of your live website.
- Safe Deployment with 2-Way Sync: InstaWP’s 2-way sync feature facilitates the safe and selective deployment of changes from staging to live. This ensures that only the intended modifications are applied, preserving your site’s functionality and minimizing the risk of introducing new issues during the transition.
Importance of Testing Your Website in a Staging Environment
Now, why exactly do you need to create a staging site anyway? Wouldn’t it just be easier if you made all the changes on your live WordPress site directly? Won’t you have a faster workflow as a result?
Well, sadly, it’s not that simple. As we said in this article, ideally, changes you make on your website will not affect website performance, and all plugins and themes will perform well when they’re put together.
Unfortunately, that’s not how things usually pan out since it’s practically impossible to anticipate any and all errors—and that’s why you need a WordPress staging environment.
The staging environment lets you test the website in a way that is as close to real as possible and can help you see any issues that you may have missed. This way, you can fine-tune your site and ensure that everything is working well before you finally go live.
Here are a few more reasons why you need a staging environment:
You’ll be able to catch errors.
Staging environments can help you spot any errors that you may have missed during earlier phases. That’s especially since tests in a staging environment are done randomly—that’s a great opportunity to bring new issues to light that you didn’t know about at first.
You can improve production quality and efficiency.
Without a staging environment, you might have to keep updating your live site to fix new problems that pop up after launch. But with staging, you can sort out these issues beforehand and make sure your website will have fewer issues. This way, once your site is live, your team can focus on making it even better, instead of fixing unexpected problems, helping them protect their time.
You will have reduced costs.
Think about this: fixing mistakes on your WordPress site after it’s live can be more costly than sorting them out before launch. Here’s why: by the time you launch, you’ve likely put a lot of effort into marketing. Lots of people are ready to check out your site.
Now, imagine their letdown if they run into errors on your site. Chances are, they might not give it another chance. From a marketing view, winning new customers is harder and pricier than keeping the ones you already have. Plus, if you need to fix your site after it’s live, you might have to take it down, leading to lost sales.
You can avoid all this with a staging environment. You’ll be able to catch and fix those errors before your site goes live, saving you trouble and keeping your visitors happy.
You will have assured better user experience.
When you use a staging environment, you’ll have an easier time catching tricky website errors that might slip through during testing. By finding them and smoothing out all bugs and issues before you launch, you’re setting the stage for a superior user experience.
This means when your site goes live, it’s not just error-free; you also offer a more polished and enjoyable experience for all users who are also potential customers.
Now, if you’re convinced and you want to create a staging site, you might now be wondering how to go about it. Well, keep on reading!
The Best Tool for WordPress Testing & Project Delivery: InstaWP
To be honest, there are many ways you can create a staging environment. There are also many staging plugins you can use or try out. However, InstaWP is one of the best, if not THE best option you can have. Why?
Well, in terms of speed, it takes literal seconds for you to create a staging site—no long times waiting for a staging site to become complete or. You’ll be able to make a copy of your live site, too! How?
How to Create Staging of Your Live Site in Seconds Via InstaWP
To create a copy of your live site, use the InstaWP Connect plugin. But first, make sure you have already created an InstaWP account.
When you’re done, you can move on to this step-by-step guide to use InstaWP Connect and create a WordPress staging site.
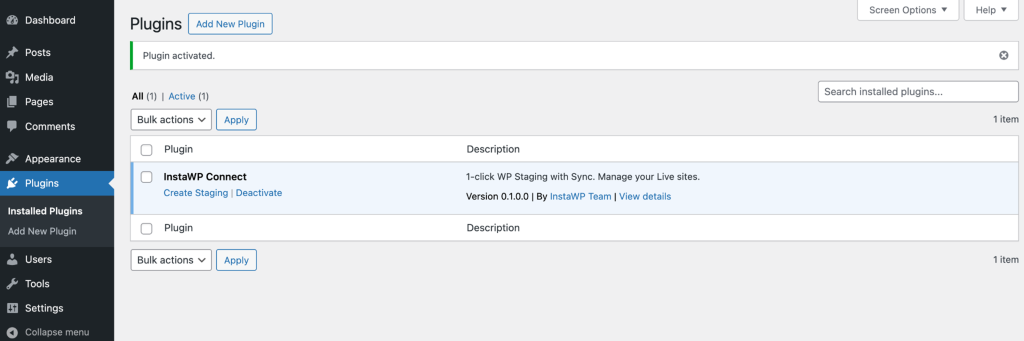
1. In your WordPress site, go to Plugins, click on Add New Plugin, then look for InstaWP Connect in the search bar.

Click Install Now and Activate.
2. You will be taken to the Plugins menu again, this time with the option to use it. Press the Create Staging option.
3. You will be taken to this menu:
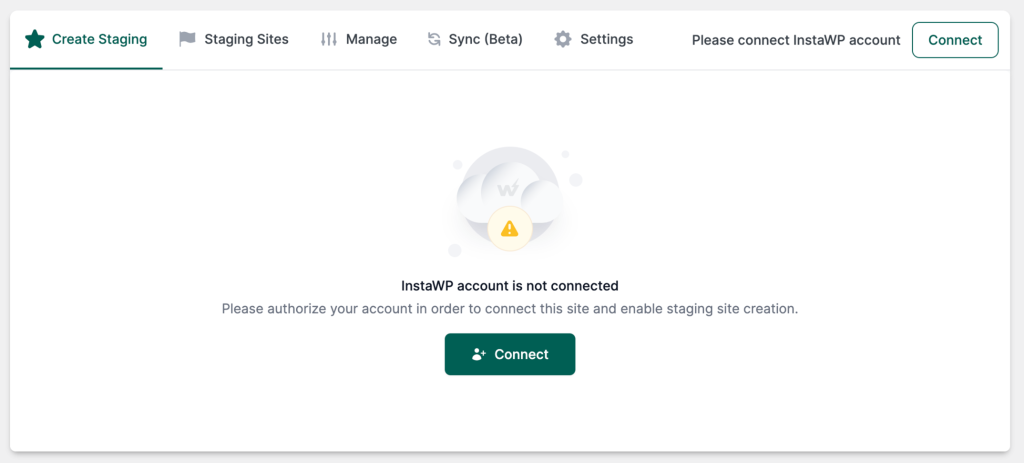
If you’ve already created an InstaWP account, this will be quick. Just press the Connect button, and when this prompt pops up:
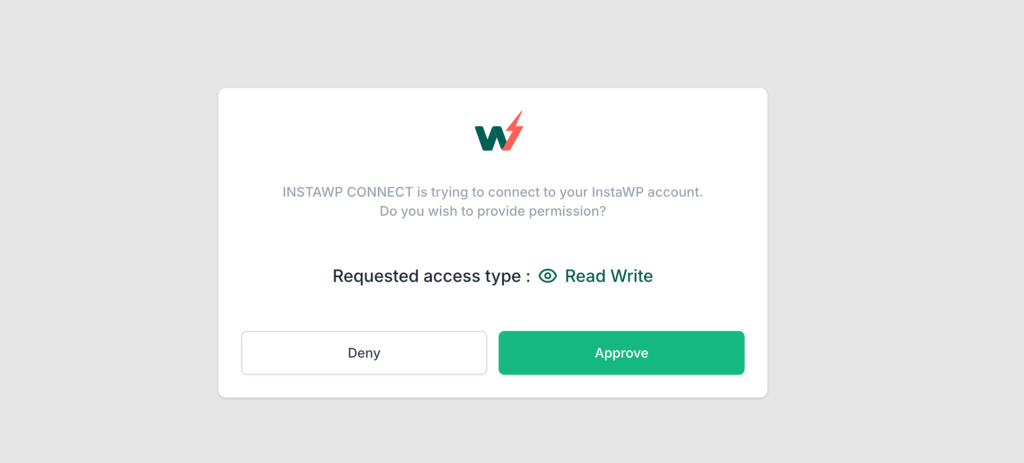
Just press Approve. InstaWP will automatically connect to your website, and you’ll be taken to this next window.
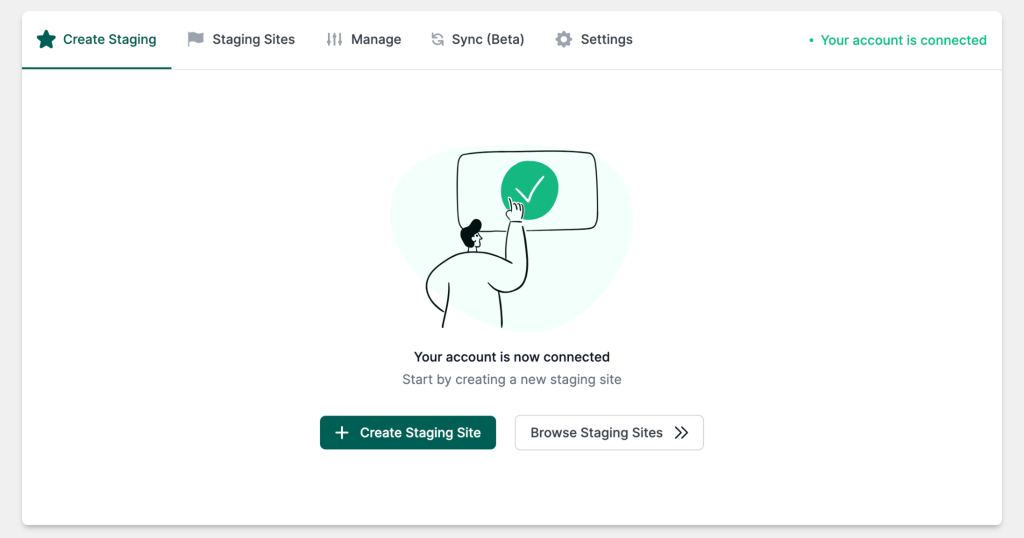
Click Create Staging Site to proceed.
4. Here’s what will appear next:
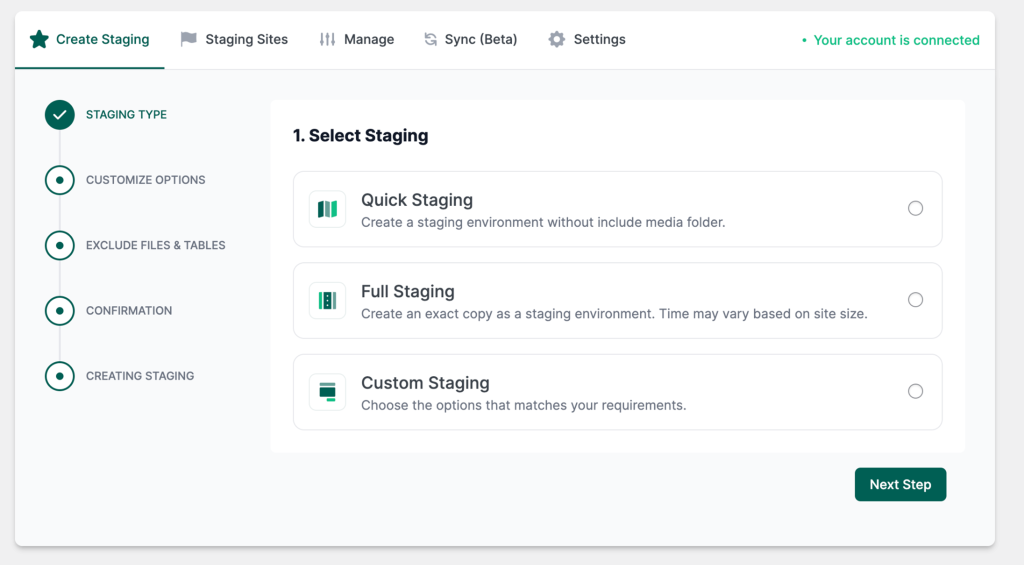
If you want to really simulate your live website, we suggest to select the Full Staging option. In the next window:
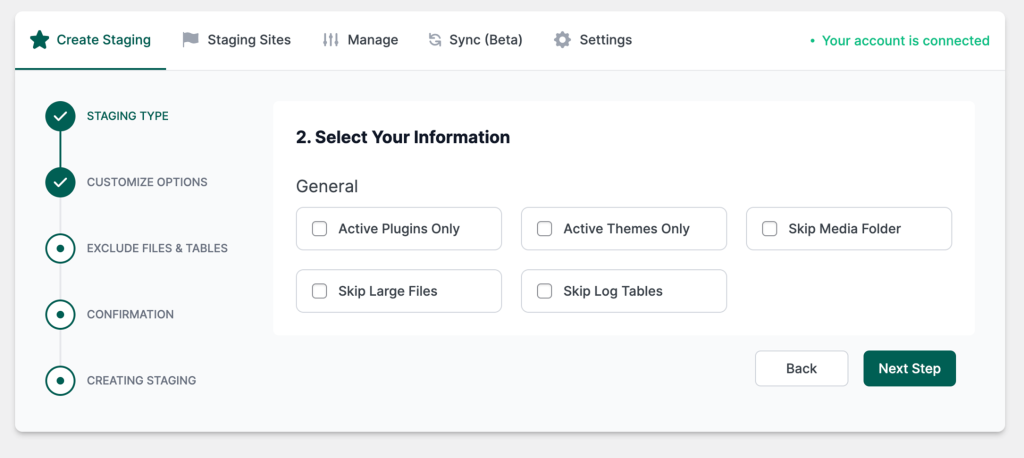
Don’t skip files, tables, or media folders, but it’s probably okay to just select only the active plugins and themes. After all, you’re supposed to be deleting those you’re not using to prevent security and space issues, right? Move on to the next step, and you’ll see this:
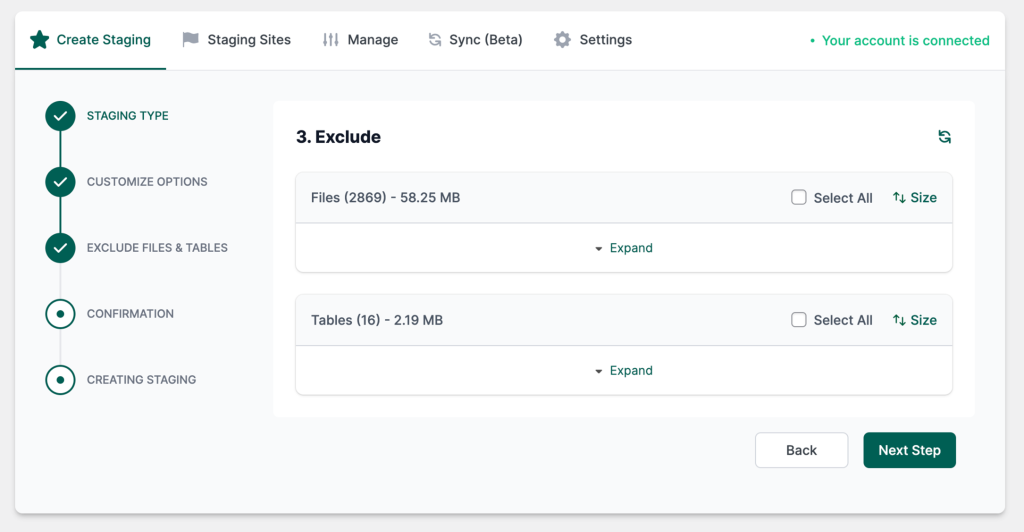
You’ll be asked if you want to exclude anything. Again, it’s not recommended if you really want the conditions to be as close to your real site. Click the Next Step button and you’ll arrive here:
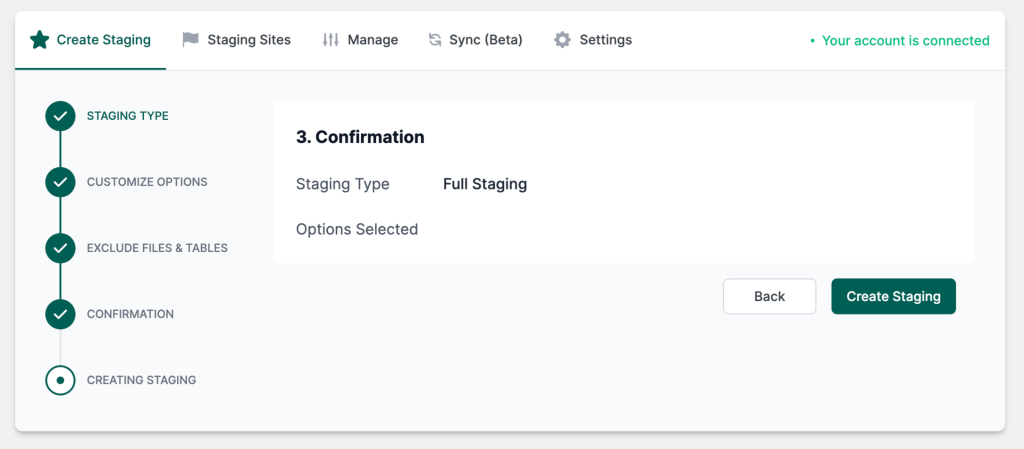
Click the Create Staging button, and InstaWP will create a copy of your live site, which will then appear in your InstaWP Dashboard.
Congratulations! Now you can do all the testing you want as if you’re doing it on your live site, but more importantly, your actual website is safe!
How to Safely Deploy your Site from Staging to Live using 2-way Sync
Let’s say you’re done testing all you want, you’re happy, and now you want the changes to reflect in your actual site. How do you do it? Well, you now use the 2-way sync feature of InstaWP—the merge operation is lightning fast, so you’ll be able to sync within seconds.
Here’s a step-by-step guide on how to do it.
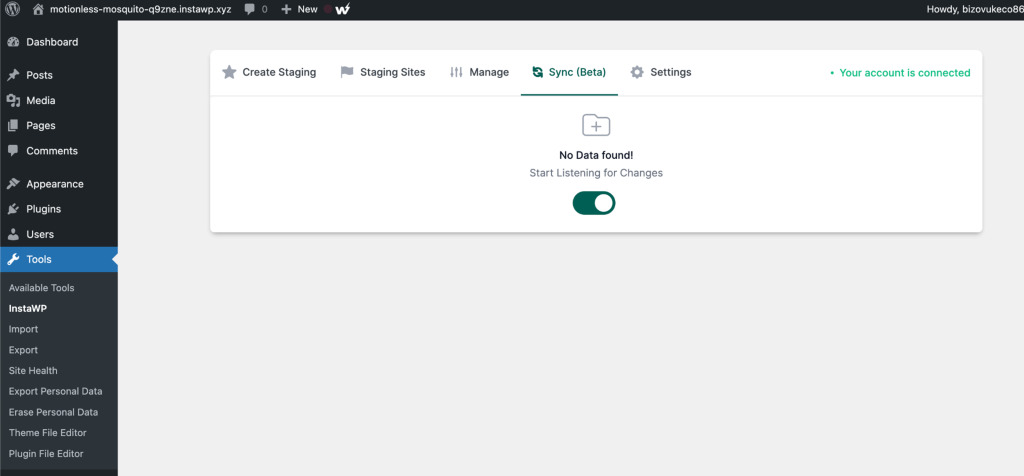
1. Go back to your WordPress site, look for the InstaWP Connect plugin, then go to the Sync option.
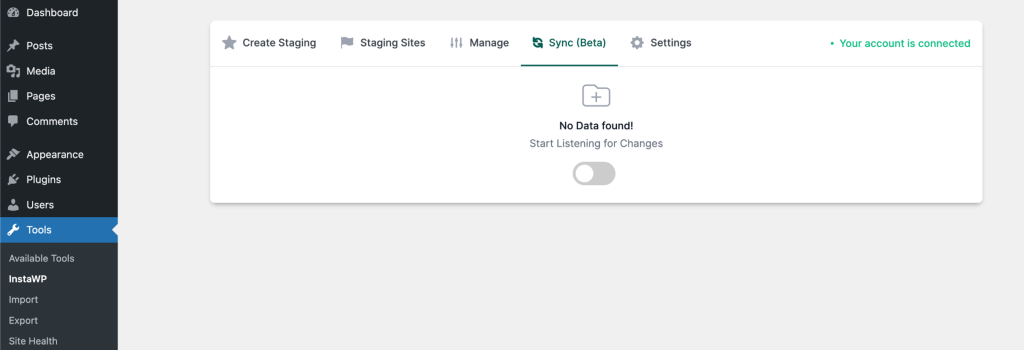
2. Slide the slot to the right to start tracking, so the plugin can start monitoring changes happening on your site, which you will merge when you’re done.
3. Start making all the changes you want to your staging site. Remember, since it’s a staging site, it won’t affect your actual site.
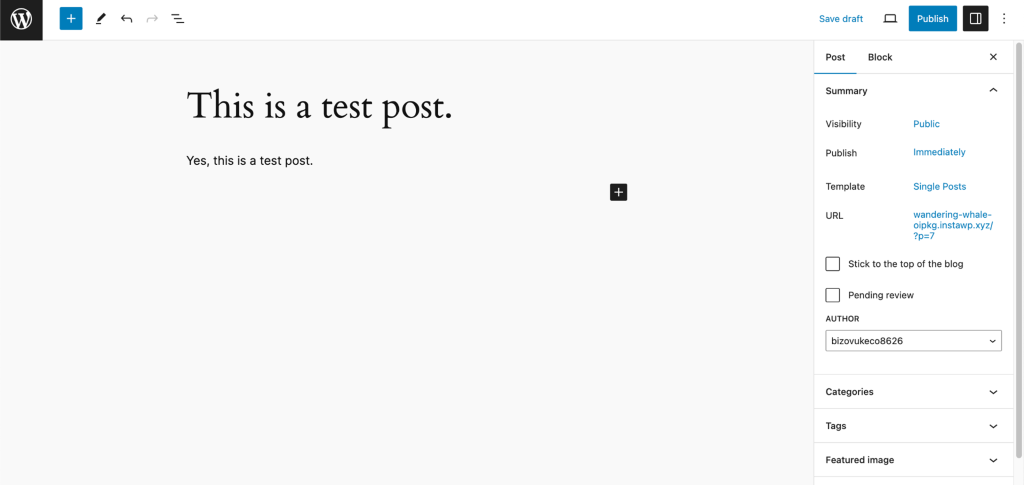
4. After making and testing all necessary changes on the staging site, you can merge them with your live site. InstaWP’s 2-way sync makes this process quick and easy, syncing only the changes without overwriting existing data.
By following these steps, you can confidently deploy changes from your staging site to your live site.
What’s great about the 2-way sync is that you can make it so that your live site will not get completely overwritten.
InstaWP’s tracking system makes sure that only changes are merged; no existing data will be touched and you’ll be able to see every single thing happens, making it very traceable. Feel free to turn this feature on or off, depending on whether you’re doing any actual changes.
Why create a Staging Environment with InstaWP
Aside from getting a staging environment in seconds, here are a few more reasons why you should make a staging environment with InstaWP:
- You can experience effortless staging site management. No matter how many staging sites you make, they’re instantly added to your InstaWP Dashboard. You’ll be able to see them all—no looking around for where the sites went or what server you used! Of course, the number you make is limited to your plan, which leads us to the next.
- InstaWP has a very low cost, starting at $6 a month, and allows you to create 5 WordPress staging sites.
- All staging sites you make will be hosted on InstaWP’s cloud servers. No need for you to worry about hosting like other methods of creating staging sites. Your staging sites are also hosted separately from your live hosting server, removing any risk on your part.
- You get constant new features, since we at InstaWP work constantly to make developing WordPress sites easier. What are already available are WordPress version supports, template creation, seamless migration, and a lot more.
- Unlike with your live site, you don’t have to think about how to protect your staging sites. This allows you to explore all possible actions you might consider for your live site within a secure environment, ensuring your actual site remains untouched and safe.
In other words, InstaWP is ideal for designers, developers, and agencies of any size aiming to streamline their workflow and deliver better WordPress sites more efficiently. If you’re any or even all of these, InstaWP is a must-install.
Things to Keep in Mind Before Pushing Changes to Live
When you’re ready to take your website from the staging environment to the live server, it’s crucial to proceed with caution. Here are some key points to consider before making that big leap:
- Ensure every aspect of your website has been rigorously tested in the staging environment. This includes checking all links, forms, and functionalities to ensure they work as expected. While InstaWP will simulate your actual website as accurately as possible, it’s still better to be safe than sorry.
- Always create a complete backup of your live site before making any changes. This safety net allows you to restore the previous version if something goes wrong during the update—and you never know what can happen, even if you’re being completely careful.
- Verify that all your plugins, themes, and scripts are compatible with the latest version of WordPress or whichever platform you’re using and that they’re all working with one another. Incompatibility can lead to unexpected errors.
- Ensure that your SEO settings and analytics tracking codes are correctly configured. You don’t want to lose valuable user data or search engine rankings because of overlooked settings. Test also your site loading speed, since slow loading times can negatively impact search engine rankings.
- Make sure your site is fully responsive and looks good on various screen sizes. You might miss out on some opportunities if you don’t cater to mobile users.
- Conduct one last security check so that you know there are no vulnerabilities that hackers or cyber criminals can exploit once your site goes live.
- Monitor your site once you have launched. This way, you’re prepared to address any issues that may arise. Pay attention to user feedback during this time.
By remembering these, you can ensure a smoother transition of your website from staging to live.
Word of Caution: Never Update your Live Site Directly
As mentioned many times in this article, changing your live website straight away is like walking on thin ice – it’s really risky. If you make changes directly on your live site and something goes wrong, your website might stop working. This can mean your visitors can’t see your site, or it looks broken to them.
In fact, even small changes can cause big problems. If you don’t have a WordPress test site to try these changes first, you might end up with a big mess on your live site. That’s why you should always use a staging environment so you can try everything you want safely, fix mistakes, and see how any changes you make will work out.
Keep your live site safe and create a staging site!
Conclusion
Going from WordPress staging to live doesn’t have to be a rocky and uneven path. By avoiding direct updates to your live site and utilizing the power of InstaWP’s staging environment, you not only protect your website’s functionality but also make the user experience better.
This approach not only saves you time and resources but also helps maintain your site’s credibility and your audience’s trust.
Take advantage of InstaWP’s technology and capabilities to make your website deployment a seamless and worry-free process. Sign up for an InstaWP account today and experience a happy launching!
FAQs
What is the importance of testing my website in a staging environment before going live?
Testing in a staging environment allows you to identify and fix errors, improve production quality and efficiency, reduce costs, and assure a better user experience by catching issues that might not be apparent in development but could affect your live site’s performance.
Why should I use InstaWP for creating a staging environment?
InstaWP stands out for its speed and ease of creating staging environments, enabling you to replicate your live site in seconds for testing. This process is streamlined through the use of the InstaWP Connect plugin, making it a preferred tool for managing staging sites.
How do I create a staging site with InstaWP?
You can create a staging site by installing the InstaWP Connect plugin on your WordPress site, connecting it to your InstaWP account, and choosing the “Create Staging” option. InstaWP allows for a quick setup, enabling full, quick, or custom staging options.
How does InstaWP ensure a smooth transition from staging to live?
InstaWP’s 2-way sync feature tracks changes made in the staging environment and allows for selective merging with the live site, minimizing the risk of data loss or site downtime and ensuring that only desired changes are implemented.
What should I keep in mind before pushing changes to my live site?
Before deploying changes, ensure thorough testing, create a backup of your live site, check for plugin and theme compatibility, confirm SEO and analytics configurations, verify responsiveness across devices, perform a security check, and monitor the site post-launch.
Why is it advised against updating my live site directly?
Direct updates to a live site can lead to unexpected errors or downtime, affecting user experience and site credibility. Using a staging environment allows for safe testing and troubleshooting, protecting your live site from potential issues.