Building and hosting a site with WordPress is an exciting journey. WordPress offers incredible flexibility whether you’re creating a personal blog, a portfolio, or an e-commerce site. Let’s break it down for you.
Building your WordPress Website
How to create a WordPress Staging site?
A WordPress staging site is a clone of your live website that you use for testing and development purposes before making changes to the production site.
It allows you to experiment with new features, test plugins, and add design changes without affecting the live site. You can push them to the live site once you’re satisfied with the changes. Think of it as a rehearsal space for your website.
For WordPress developers, there are several ways to create a staging site. In this article, I will focus on how to use InstaWP, a powerful tool that allows you to launch a WordPress website in seconds.
How to create a staging site with InstaWP?
First and foremost, you need an account on InstaWP. If you don’t have one already, visit the InstaWP website to register one.
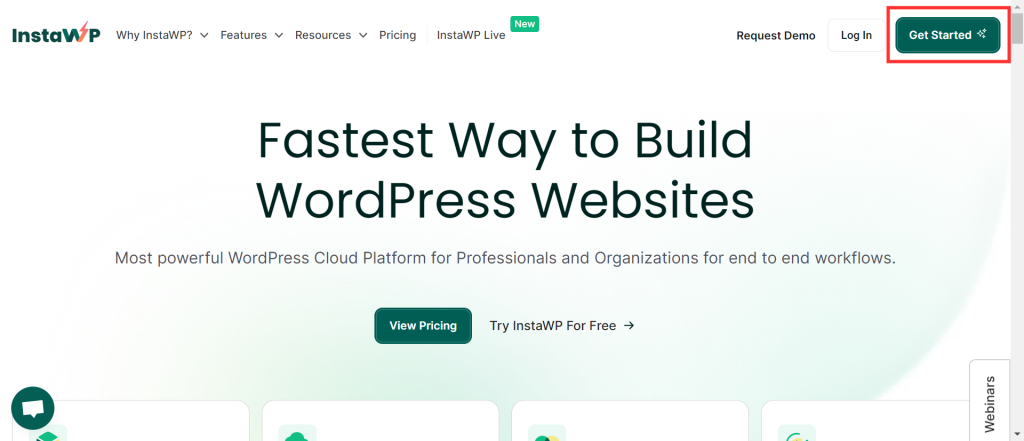
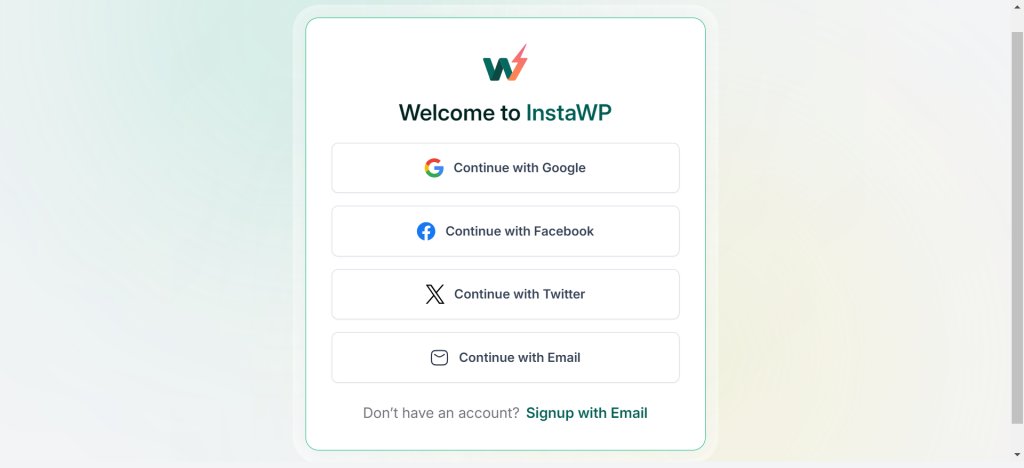
On the InstaWP site, click on the Get Started button.
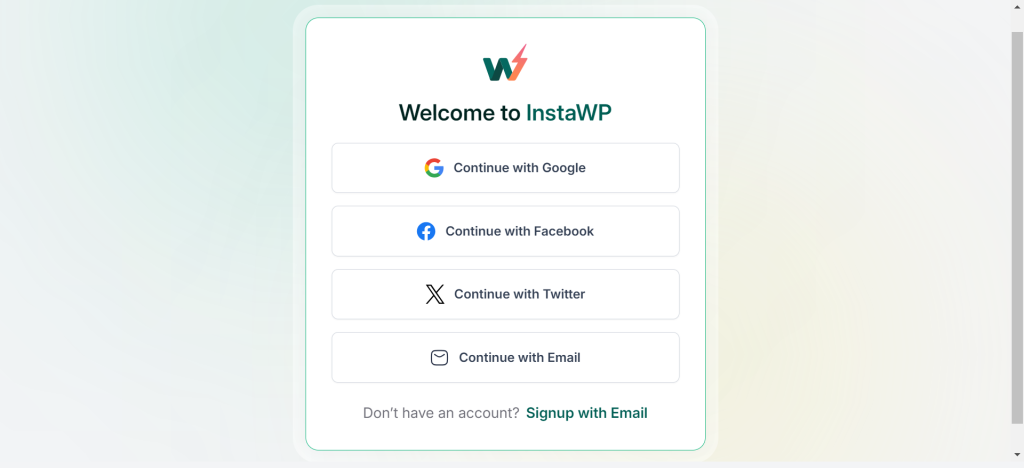
You can choose any of the signup methods listed on the screen.
Once your account has been successfully created, you can add a new staging site by clicking the Add New button.
Adding a Staging Site from Scratch.
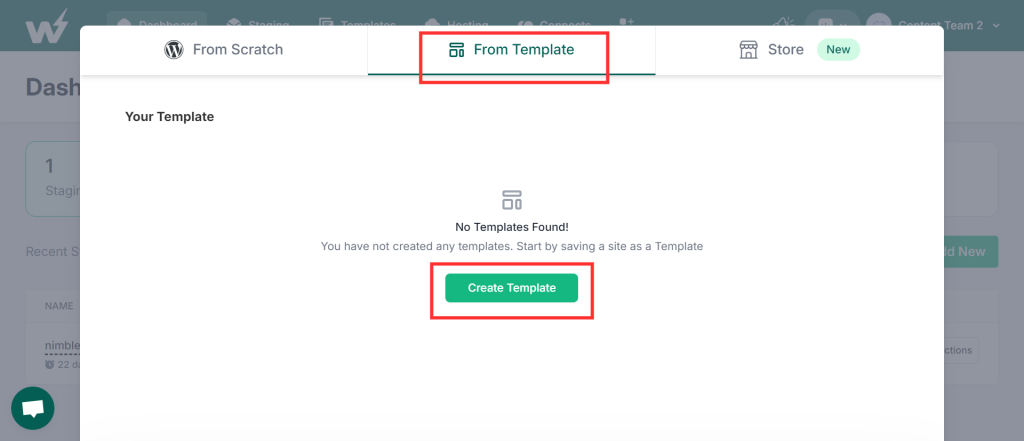
InstaWP gives you two options: add the staging site from scratch or create one from a template. Since we do not have any templates, we shall proceed with the default method from scratch.
Scroll down and click on the Create Site button to add a new staging site.
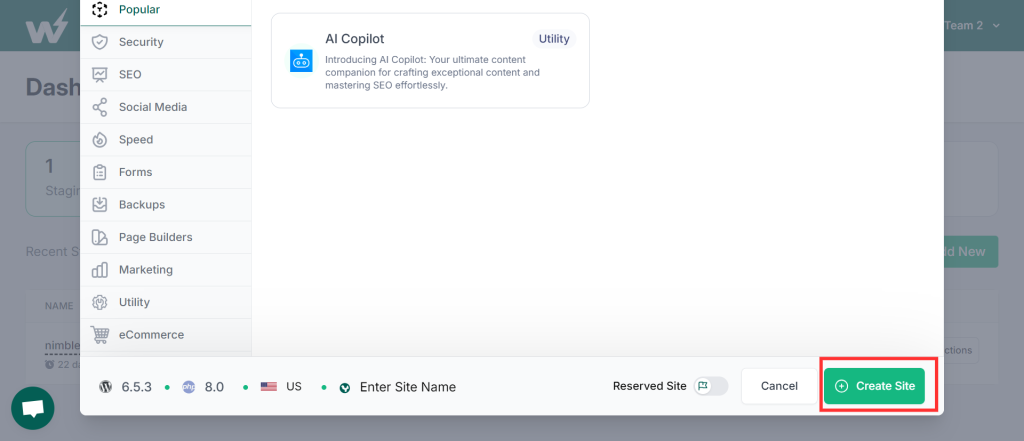
Wait for a few seconds while InstaWP does the magic. Our staging site has now been created.
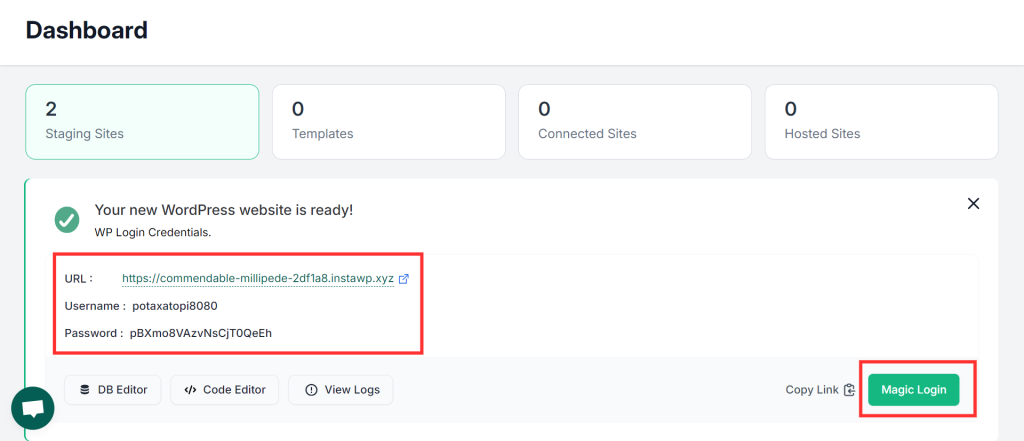
As you can see from the above screenshot, InstaWP creates a username and password for your new site.
You do not have to remember the password generated for you, just click on the Magic Login button, and you will be presented with the WordPress admin dashboard.
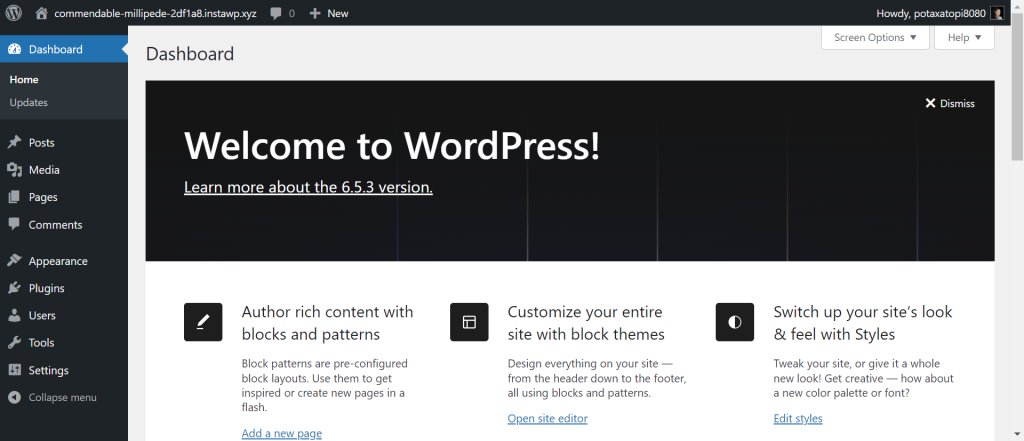
There you go! To view your new site, the sub-domain URL generated by InstaWP.
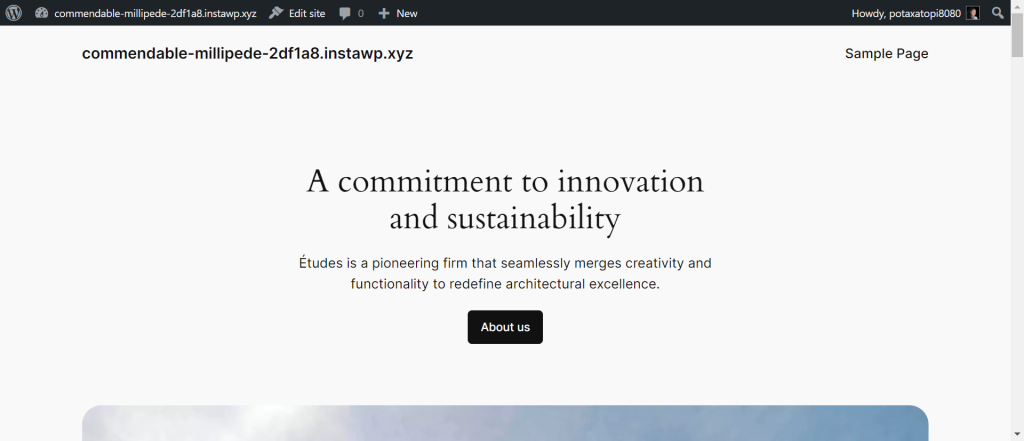
Your new staging site is up and running.
You can also create a staging site from a pre-designed template. However, you need to first create a template to be able to use it. Click on Create Template to create one.
Using the InstaWP Connect Plugin to Create a Staging Site.
If you already have a live website, you can create a staging site for it using the Instawp Connect plugin.
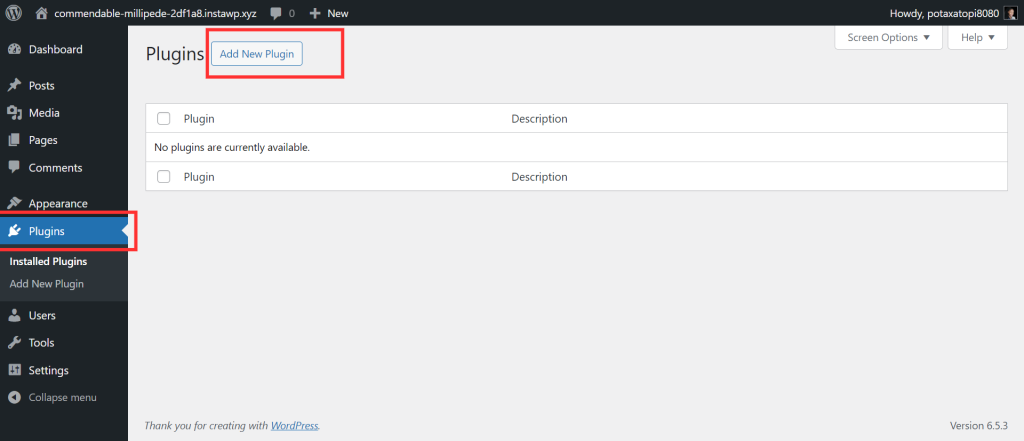
First and foremost, you need to install the InstaWP Connect plugin. Sign in to your WordPress admin dashboard, go to Plugins, and click Add New Plugin.
Search for InstaWP Connect in the plugin repository.
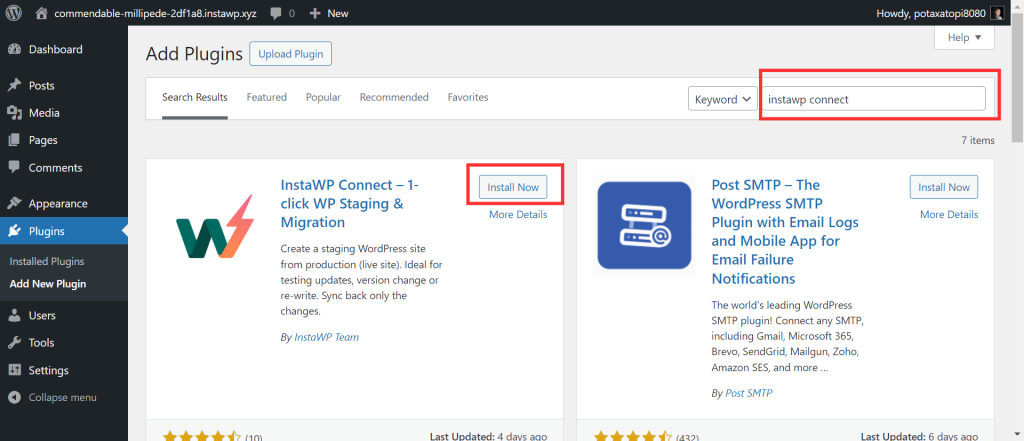
Click Install Now to install the plugin. Once the plugin has been successfully installed, you can activate it.
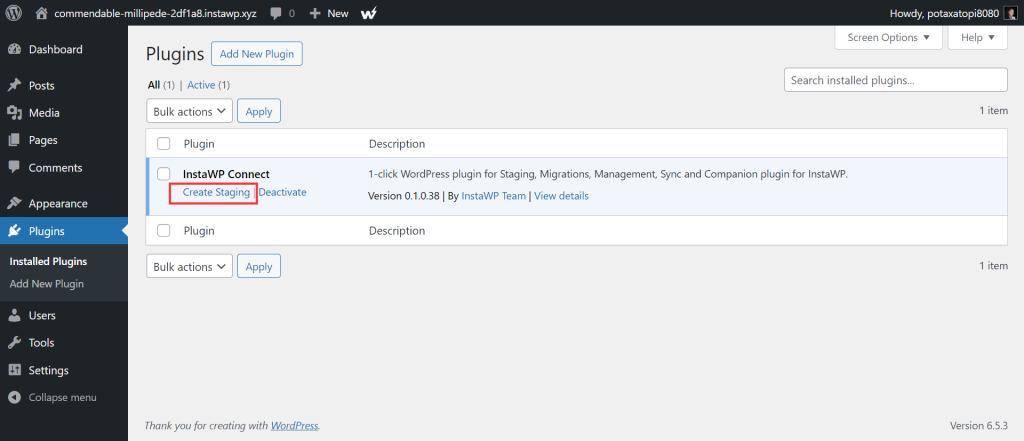
With the InstaWP Connect plugin active, click on Create Staging to create a new staging site.
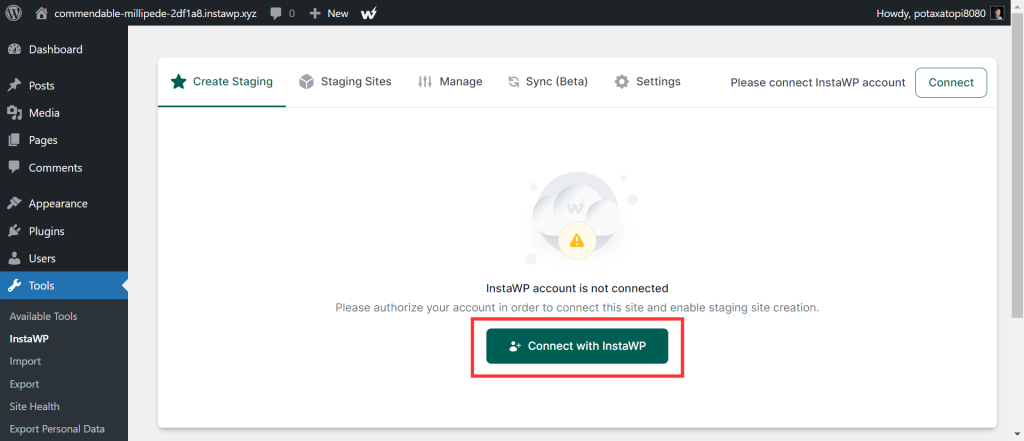
From the screenshot above, you notice that our site is not connected to the InstaWP account. To do so, click on Connect with InstaWP. You will only be able to create the staging site when InstaWP is connected to the site.
Finally, click on Create Staging Site to create a new staging website.
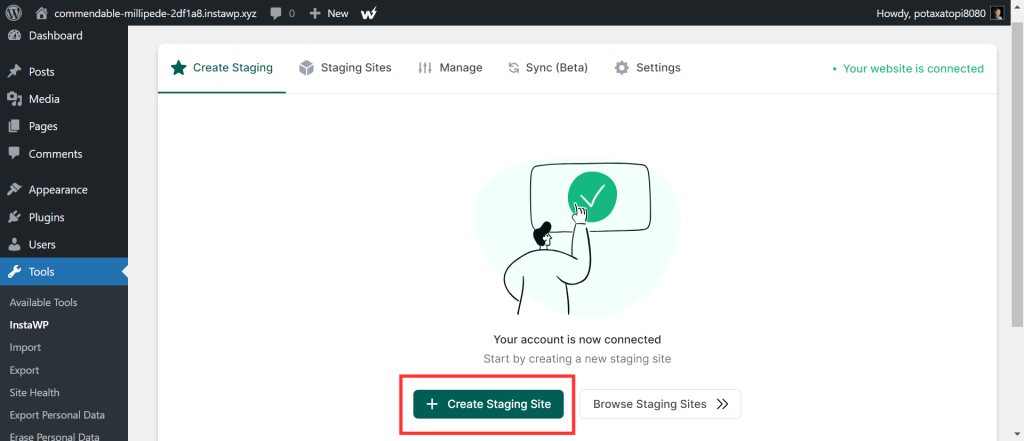
InstaWP will do its magic, and your staging site should be ready in a few seconds.
With InstaWP, you can pre-install the plugins on your staging site and use them to test out a few features. Here is a detailed guide on how to create a WordPress staging website.
How to Customize your site and make it fully functional?
Customizing a site means giving it the look you want and ensuring the site functions as expected. To customize a WordPress site, you need to install themes and plugins. Here is a step-by-step guide to get you started.
- Choose a WordPress Theme.
A WordPress theme is the design template of your website. It controls the layout, colors, fonts, and overall look of your website. A theme determines what the front end of your site will look like.
Select a theme that aligns with the style and functionality of your website. The default theme that comes with the WordPress installation is the Twenty Twenty-Four theme.
You can change the theme by going to your WordPress dashboard, then Appearance >> Themes. Type the name of the theme you want in the search bar, and click on Install to install it.
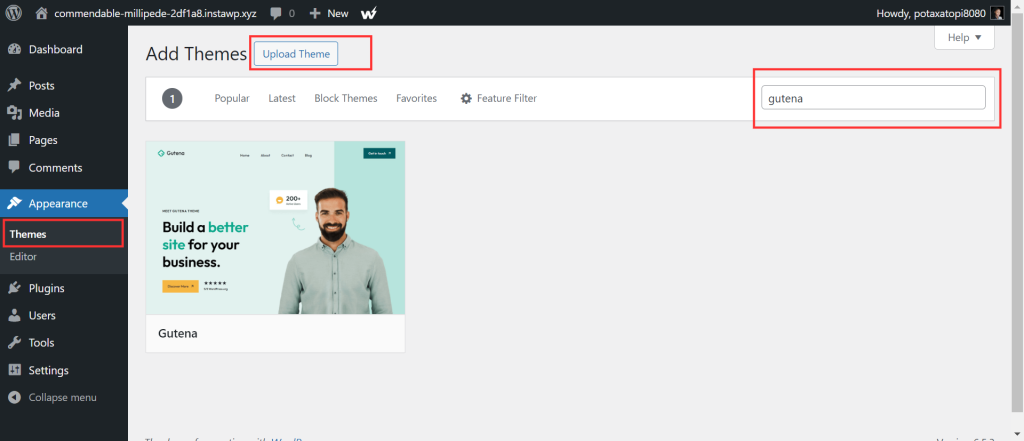
If you already downloaded the theme, you can click on the Upload Theme button to upload it to your website.
- Install WordPress Plugins.
A WordPress plugin is a piece of software that extends the functionality of your website. Imagine it as an app on the website that can add new features or enhance the existing ones.
Whether you need SEO tools, contact forms, or e-commerce capabilities, there’s a plugin for it.
To install a WordPress plugin, go to your WordPress admin dashboard, then click on Plugins >> Add New Plugin.
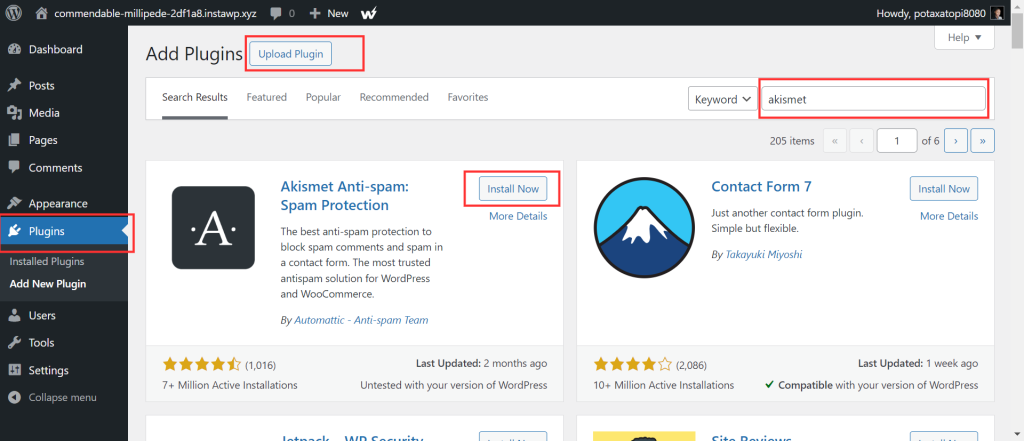
If you have the plugin downloaded, you can click on Upload Plugin to upload it to your website.
- Use the Customizer.
Most WordPress themes offer a range of options in the WordPress customizer. Access it by going to Appearance >> Customize.
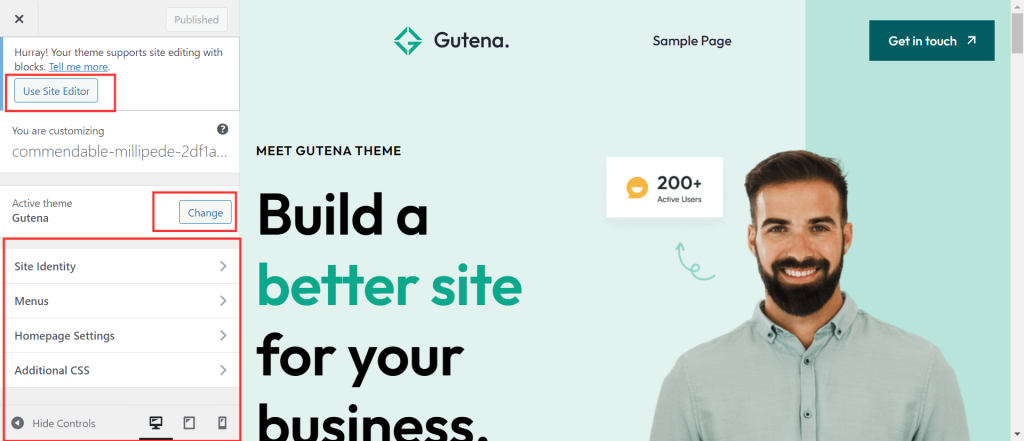
If you’re using a block theme, go to Appearance >> Edit Site. You can also access the site editor by clicking on Use Site Editor.
- Create Widgets and Menus.
To customize your site’s sidebars and navigation menus, go to Appearance>> Widgets and Appearance >> Menus.
- Add Content to your website.
Content is the most important thing on your website and it is quite easy to do that. This involves adding text, images, videos, and so on. With WordPress, they’re two main ways to add content to your site.
Method 1: Using the Gutenberg Editor.
Gutenberg, commonly known as the Block Editor is the default editor that comes with your WordPress website. You can use Gutenberg to add text, images, buttons, and other elements to your web pages and posts.
Method 2:Using Page Builders.
If you are not familiar with the Block editor, consider using a page builder like Elementor or SeedProd. They offer drag-and-drop interfaces and additional features for designing your web pages.
- Add Custom CSS Styles.
If you like to add specific CSS styles, you can do this by going to Appearance >> Customizer >> Additional CSS.
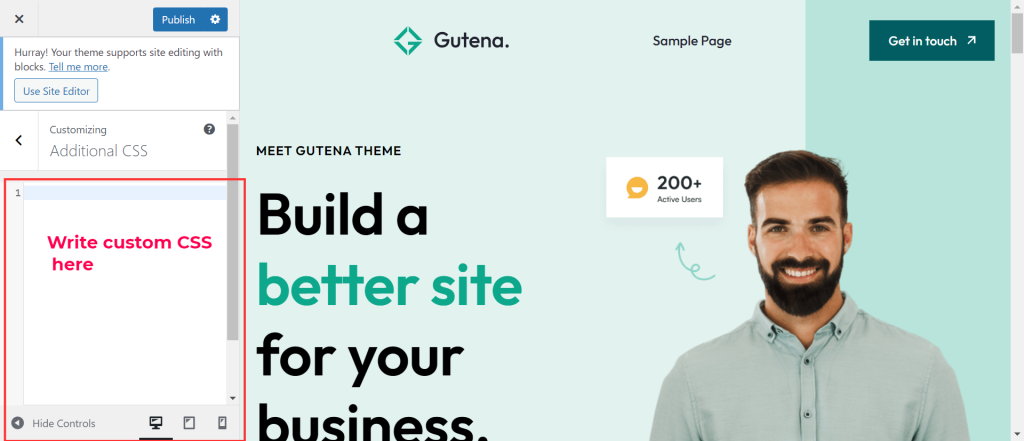
Install all the plugins that you need to test them out before pushing the changes to the live website.
Tips for Building a Great Site
Building a great site does not only involve a pleasant design but also a good functionality and exceptional user experience. Here are five tips to help you create an outstanding site.
- Keep your Home Page Minimalistic. Your home page is the welcome page to your site. It should communicate your core message without overwhelming the visitors. Remember to use white spaces in your content to make it neat to the user’s eye and ensure to have a navigation to ease movements on your site.
- Consider the Visual Hierarchy. Arrange your content in a way that naturally guides the visitors. Consider using child pages for related content. The most important elements should take the top positions on your navigation menu.
- Ensure Easy Navigation.
Your site should be easy to navigate, with a clear menu structure that allows visitors to find what they need quickly.
- Create Easy to Read Content. Ensure that you create structured content. Use legible fonts and organize your text into headings and small paragraphs. Include sub-sections within the main sections.
- Stay Mobile friendly. With the increasing use of mobile devices, ensure your site is responsive and gives a good user experience on all screen sizes.
Remember, the goal is to make your site visually appealing, user-friendly, and fully functional. Keep testing and improving your site while on staging before you push your new changes to the live website.
Hosting your Website
How to host your WordPress site with InstaWP?
Once you feel satisfied with your changes, it’s time to push these changes to the live website. InstaWP hosting is a great managed service to host your website, in case you are looking for fast WordPress hosting.
To host your site with InstaWP, sign in to your InstaWP dashboard.
Click on the Go Live rocket icon for the staging site.
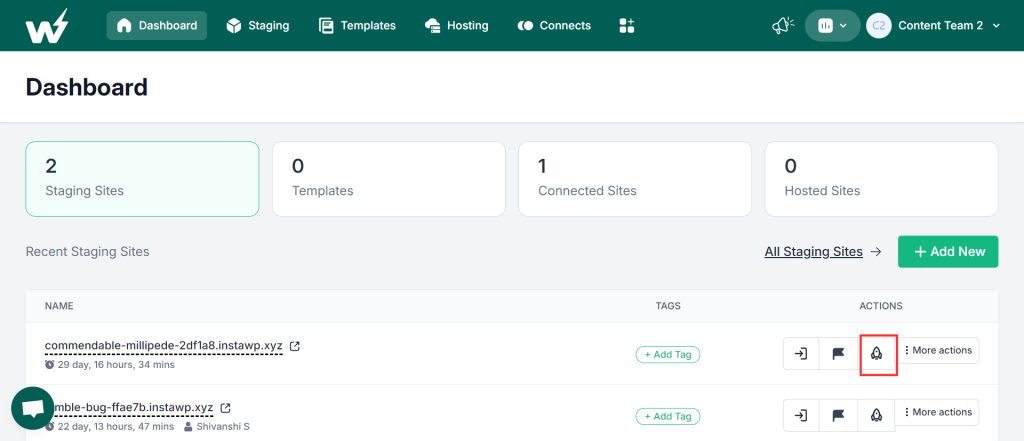
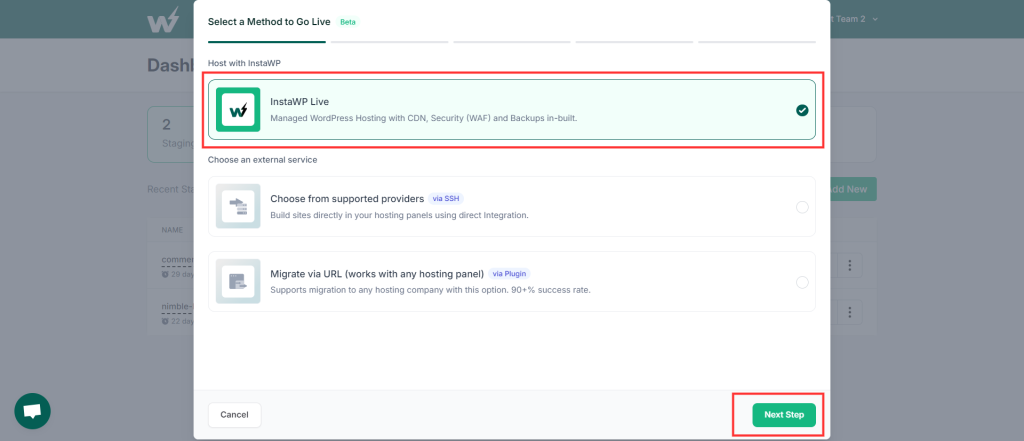
Select the InstaWP hosting option from the pop-up menu and click on the Next Step button.
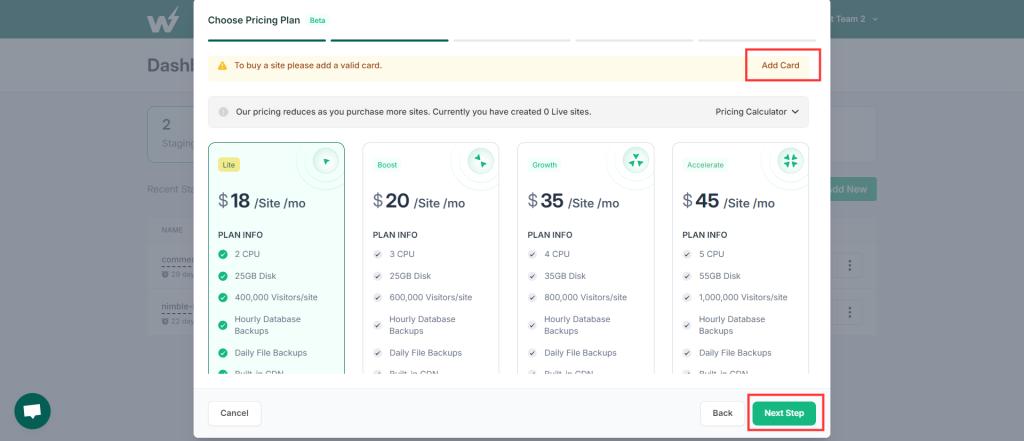
You will be presented with payment options to choose from. Click on Add Card to add your payment details and then click on the Next Step button to proceed with the payment
Once your payment is successfully done, you will have your site powered up by InstaWP hosting.
Rather, if you want to transfer your site from a different hosting provider to InstaWP, the InstaWP migration tool will ensure a seamless migration process.
Tips for Choosing your WordPress Hosting Provider
Choosing the right WordPress Hosting provider is crucial for the smooth running of your website. Here are a few tips to help you make an informed decision.
- Assess your Site Needs. Understand the requirements of your website, including storage space and expected growth. This will help you determine the type of hosting that you need, whether it is Shared, VPS, Dedicated, Cloud Hosting, or Managed WordPress Hosting.
- Staging Environment. Developers are always adding new changes to the site. Consider a hosting provider that offers a staging environment. With staging sites, you can experiment and preview changes before deploying them to your live website.
- Performance and Speed. A fast-loading website provides a better user experience and is search engine friendly. Look for a hosting provider that offers optimized performance with features like caching, and content delivery network(CDN), and supports the latest PHP versions.
- Security Measures. Ensure that the hosting provider has strong security protocols in place to protect your website from malware and hackers. Features like regular backups, firewalls, and SSL certificates are essential for the safety of your website.
- Pricing and Value. Compare pricing plans of different hosting providers and evaluate the features they’re offering. Look for transparent pricing without hidden fees and consider the value that you’re getting for your money.
- Customer Support. Good customer support is inevitable, especially if you’re not tech-inclined. Choose a hosting provider that provides 24/7 support through various channels like chat, email, etc.
Conclusion
In conclusion, InstaWP makes it easier for Agencies, Freelancers, or Hosting providers to build, host, and manage your sites with WordPress.
With the ability to create a staging site, you do not have the flexibility to install different plugins and test out the features without affecting the live site and you can only push these changes to production when you’re sure of what you have implemented.
FAQs
Why should I build and host a site with WordPress?
WordPress is an incredible Content Management system (CMS) that powers almost half of all the websites on the internet. It allows you to create any website from a blog, portfolio, e-commerce, etc. Its vast ecosystem of Themes and Plugins makes customization easy.
What is a staging site in WordPress?
A staging site is a copy of your live website. It’s the testing ground for changes you would love to make to your WordPress site, to see how they work before publishing them. Staging sites allow you to test new features, themes, and plugins conveniently without affecting the live site. With InstaWP, setting up a staging site is quite a breeze.
What is unique about using InstaWP for staging?
InstaWP hosting: Their managed hosting service is optimized for WordPress. Shifting from staging to live is as simple as clicking the Go Live icon.
Seamless Transfers: Instawp lets you migrate sites to its managed WordPress hosting platform with just a few clicks.
What steps should I take to build a WordPress site?
- Choose a WordPress hosting provider. Selecting a good hosting provider is crucial for performance and reliability.
- Set Up your site. Install WordPress, and choose a theme and plugins to work with. Configure essential settings. You can do all this in a staging environment like InstaWP.
- Design and Customize. Customize your site’s appearance with themes, plugins, and widgets.
- Secure your WordPress site: Protect your site against threats by installing a security plugin.
- Enhance your site’s performance. Optimize the images, use caching, and consider a Content Delivery Network (CDN).
- Monitor and evaluate: Regularly update your themes and plugins, monitor analytics, and back up your website.
What factors should I consider when choosing a WordPress hosting provider?
- Assess your site’s needs.
- Check to see if the hosting provider offers a staging environment.
- Performance and speed.
- Consider the pricing value.
- 24/7 customer support is inevitable.
What security measures should I take for my WordPress website?
- Keep WordPress themes and plugins updated.
- Install a security plugin.
- Use strong passwords.
- Regularly back up your website.