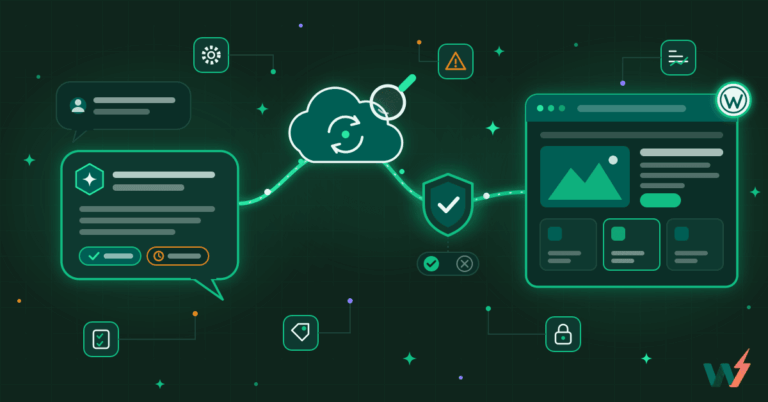
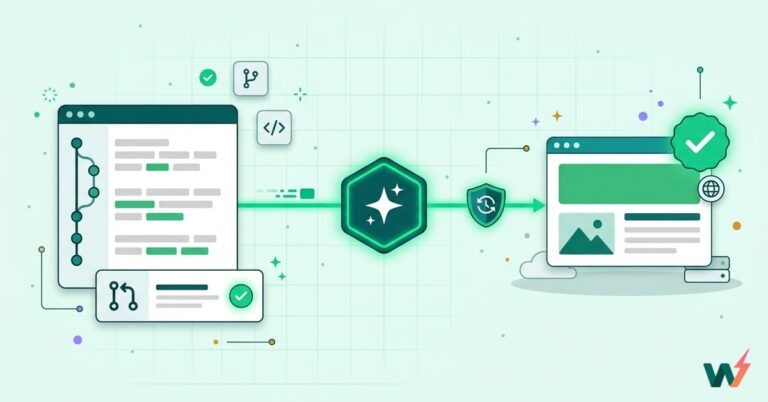
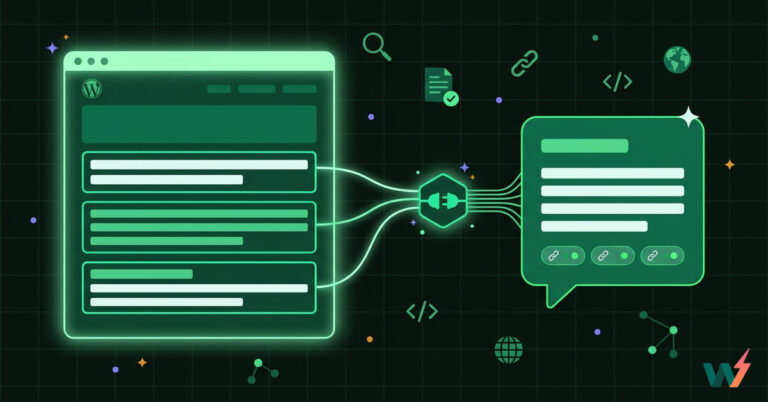
When I started InstaWP, my mission was simple: remove the friction that developers and agencies face every single day in WordPress. Over the years, I’ve seen the pain points firsthand: local dev setups that break, manual staging that eats up hours, and deployments that feel more like a gamble than a process.
Now we’re at a turning point. WordPress AI isn’t some abstract future; it’s already here. And it’s transforming the way we build, test, and deliver websites.
For agencies, AI for WordPress is a game-changer. It means you can launch sites faster, optimize SEO automatically, and deliver smarter websites to clients who expect more for less. AI for WordPress gives agencies the competitive edge they need in 2026.
In this guide, I’ll show you exactly how agencies and developers can start with WordPress AI development.
Table of Contents
What Does WordPress AI Development Mean?
When people hear AI for WordPress, the first thing they usually think of is content: auto-generated blog posts or AI writing assistants. That’s just the tip of the iceberg. WordPress AI development goes much deeper. It’s about rethinking how we build websites, themes, plugins, and workflows using AI as a core development partner.
Here’s how I define it:
- Close to WordPress: AI for WordPress should work inside real WordPress environments, not abstract sandboxes or theory. If it doesn’t run on an actual site, it’s just a demo.
- Close to Code: AI isn’t just generating text; it’s scaffolding plugins, refactoring codebases, running tests, and automating deployments.
That’s the real difference. We’re not talking about “AI sprinkled on top” in the form of a plugin that spits out text. We’re talking about AI woven into the entire WordPress lifecycle—from idea → code → staging → testing → production.
For agencies, this means delivering faster without adding more headcount. For developers, it means skipping the boring boilerplate and focusing on building features that matter. And for the ecosystem as a whole, it means WordPress stays competitive in an AI-first web.
So when I say “WordPress AI development,” I mean bringing AI directly into the heart of how we work with WordPress every day; whether that’s generating content, optimizing SEO, automating QA, or pushing code to production with confidence.
The Stack You Need to Start Your WordPress AI Development Journey
When I talk about WordPress AI development, I don’t mean “install a plugin and call it a day.” I mean setting up a stack that brings AI into every stage of the workflow, from writing code to testing and deploying it.
Here’s the stack I personally recommend if you want to get started the right way:
1. InstaWP (WordPress Cloud Environments)
InstaWP is an all-in-one cloud for WordPress, where you get everything from hosting to managing sites under one roof. This is the spine of every successful WordPress AI development workflow because it lets you spin up real WordPress sites instantly.
The stepping stone to WordPress AI development is having fully secured staging and production environments, and InstaWP delivers both of these seamlessly.
For a temporary tagging environment, the free plan is ideal, but if you’re into some serious business, better to get the Sandbox plan.
The Sandbox plan is lightweight, disposable, and inexpensive. I recommend using it as a staging environment, where AI-generated code can be tested safely before touching a live site.
Every time Claude scaffolds a plugin or I refactor a block theme with Cursor, I push the changes into a sandbox. Because WordPress sandboxes can be reset or rebuilt instantly, they’re ideal for experimenting with AI code without risk.
This is where you should validate ideas, run quick Playwright MCP tests, and ensure the AI isn’t breaking anything. For agencies, it means you can show clients a preview environment in seconds. For developers, it’s your safety net.
Once everything checks out in staging, you should upgrade your plan to a Starter plan for the production environment. Starter plans are more stable, persistent, and optimized for real-world usage. It’s where the code that survived testing actually goes live.
This mirrors a professional dev workflow: cheap, flexible staging (Sandbox) → reliable production (Starter). No manual migrations, no downtime, just a clean handoff.
The secret sauce in this stack is the Local Mount feature of InstaWP. Normally, working with staging and production means juggling FTP clients, manual database syncs, and version mismatches. Local Mount eliminates all that.
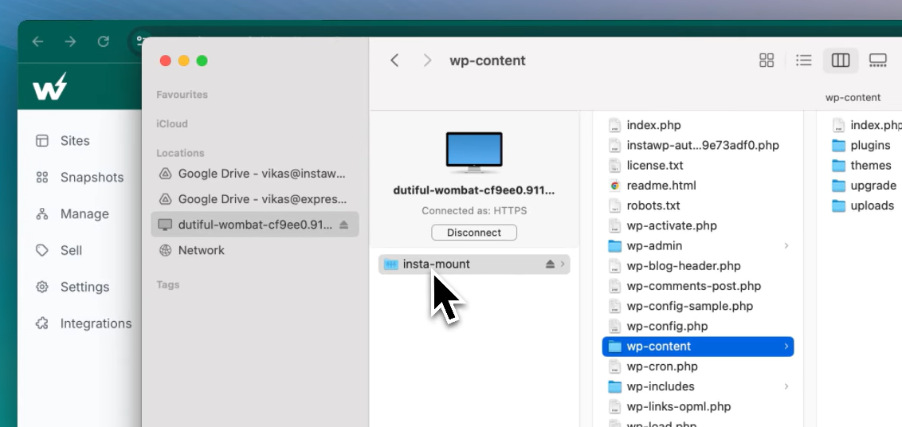
Here’s how it will work in your WordPress AI setup:
- You’ll mount your sandbox site locally on your laptop.
- Every change you make, whether written by me or suggested by Claude, syncs back to WordPress in real time.
- You can open the actual site in a browser and see the result instantly.
This “close to WordPress” workflow means you’re never guessing. If the AI generates a new function, you don’t wait until deployment to test it. You can run it inside a sandbox, tweak it locally, and only then promote to production.
This workflow is a game-changer for agencies and developers tapping into the world of WordPress AI development.
- Agencies: Spin up a staging site in a Sandbox plan, let AI assist with content or code, and demo to your client. Once approved, deploy directly into a Starter plan production site.
- Developers: Use Local Mount to test AI-generated code in a sandbox, refine it, then push to GitHub and auto-deploy to production. While AI tools can accelerate parts of the development process, companies building complex AI-powered products often rely on specialized teams offering generative AI development services from Leobit to design, build, and scale custom solutions.
This workflow is efficient, safe, and cost-effective. You’re not locked into a heavy hosting plan just to experiment with AI; you pay only for what you use, and you can scale up when the project demands it.
2. Claude CLI (Your AI Coding Partner)
Anthropic’s Claude in the command line is a game-changer. Instead of hunting Stack Overflow for snippets, you can ask Claude to:
- Scaffold a new plugin or theme.
- Refactor legacy code.
- Generate functions and tests with context awareness.
3. Cursor Editor (AI-Powered IDE)
Cursor is an IDE built for AI-assisted coding. Pairing it with Claude means:
- Whole-project awareness for large refactors.
- Instant fixes for bugs and optimization suggestions.
- “Pair programming” with an AI that knows your WordPress codebase.
4. GitHub (Version Control + CI/CD)
Every agency and developer needs proper version control. In this AI workflow, GitHub does more than store code:
- Push commits and trigger automated deployments.
- Keep track of AI-generated changes.
- Roll back instantly if something goes wrong.
5. Playwright MCP (AI-Driven Testing)
Quality assurance is where most WordPress projects cut corners. With Playwright MCP connected to Claude:
- You can write tests in plain English.
- Example: “Go to the checkout page, add an item, confirm order completes.”
- Playwright runs the test, reports back, and integrates with your deployment pipeline.
This isn’t just a random set of tools; it’s a complete ecosystem. You’re covering:
- Environments (InstaWP)
- Coding (Claude + Cursor)
- Collaboration + Deployment (GitHub)
- Testing (Playwright MCP)
With these in place, you’re ready to stop thinking about how to use AI in WordPress and actually start building AI-augmented workflows today.
How to Start Your WordPress AI Development Journey (Step by Step)
So, let’s start the real talk, understanding how you can kick-start your WordPress AI development journey with InstaWP.
We’ve a webinar to explain things better. Watch it to see how the brain behind InstaWP, Vikas, was able to create a plugin using the right WordPress AI development stack without any hassle.
Step 1: Set up a Sandbox and Production Sites in InstaWP
Every journey starts with a safe space, that’s a WordPress Sandbox site inside InstaWP. This becomes the staging environment where you can freely test AI-generated code, new plugins, or custom workflows without worrying about breaking a live site.
The beauty of sandboxes is their disposability; you can spin them up in seconds and reset them just as quickly.
Did you know?
You can create a complete sandbox site in InstaWP using just AI prompts; no setup needed. Whether you’re building a Pipedrive WordPress integration demo, testing forms, or recreating a client workflow, you can:
- Launch a WordPress site from scratch, using AI, or from a store
- Instantly import a saved Snapshot to reuse prebuilt forms or plugins
- Test your CRM flow in a live preview environment
- Share a staging URL with your client or team
It’s like having a fully-configured WordPress lab, ready in seconds.
To create a sandbox inside InstaWP, follow the regular steps of creating a site and choose the Sandbox plan.
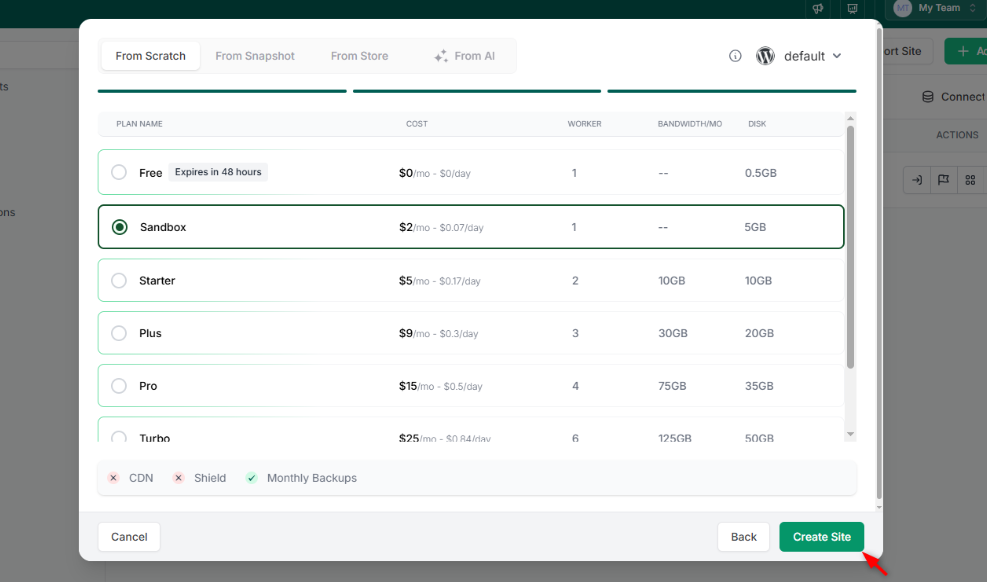
Once the sandbox site is ready, you need to enable the Local Mount and access your cloud WordPress sandbox site locally. You can easily enable it on Windows, macOS, and Linux devices.
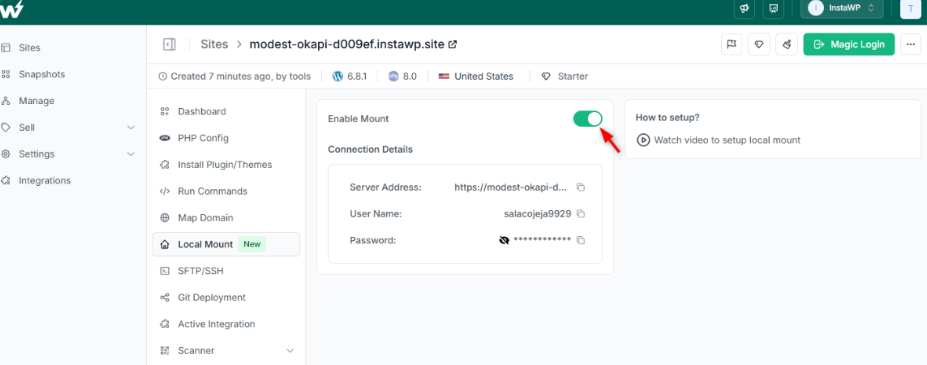
Watch the video below to understand the entire process.
Next, you need to set up the production environment, and the best part about using InstaWP is that you don’t have to do it the hard way. Instead of juggling different tools, you can manage multiple WordPress staging and production sites under one central dashboard.
For a properly functioning WordPress production environment, we recommend InstaWP’s Starter plan and above, because all these plans come with:
- Built-in CDN for faster global delivery
- Security Shield with WAF and DDoS protection
- Higher disk space to support growing websites
- More PHP workers for handling traffic and dynamic requests efficiently
- Daily backups to ensure data safety
- Uptime monitoring so you’re instantly alerted if your site goes down
This combination gives you a production-ready hosting setup where performance, security, and scalability are already taken care of, without needing extra plugins or third-party services.
Step 2: Connect With AI Tools (Claude, Cursor, Playwright)
AI tools like Claude, Cursor, and Playwright are required to begin the WordPress AI development journey. Here is how you can connect with all these tools.
1. Setting Up Claude CLI
Claude CLI (sometimes called Claude Code) is Anthropic’s command-line interface for its AI model. It lets you work directly with your WordPress project in a terminal.
Steps to set up:
a. Install Node.js if you haven’t already (Claude CLI runs on it)
brew install node   # macOS
sudo apt-get install nodejs npm # Ubuntu/Debianb. Install the Claude CLI globally:
npm install -g @anthropic-ai/claude-codec. Generate an API key from your Anthropic account and export it as an environment variable:
export ANTHROPIC_API_KEY="your_api_key_here"d. Navigate to your WordPress project folder and launch Claude CLI: claude
Now you can ask Claude to scaffold a plugin, edit functions, or refactor files directly inside your codebase.
2. Setting Up Cursor Editor
Cursor is a lightweight IDE (similar to VS Code) but designed for AI-assisted coding.
Steps to set up:
- Download Cursor from cursor.sh.
- Install it like any desktop app (macOS, Windows, or Linux).
- Open your WordPress project folder inside Cursor.
- Connect your Claude or OpenAI key inside the Cursor settings (Preferences → API Keys).
This is where Claude CLI and Cursor connect: you generate bulk scaffolding with Claude, and then refine/debug with Cursor inside your IDE.
3. Setting Up Playwright MCP
Playwright is a browser automation framework. MCP for WordPress (Model Context Protocol) is what lets Claude “speak” to Playwright in plain English.
Steps to set up:
a. Install Playwright globally:
npm init playwright@latestb. Choose browsers (Chromium, Firefox, WebKit) when prompted. Install the Playwright MCP server package:
npm install -g @modelcontext/playwright-mcpc. Configure Claude to use the MCP server by editing your claude.config.json:
{
"mcpServers": {
    "playwright": {
      "command": "playwright-mcp"
    }
  }
}
d. Run a natural language test:
claude
> "Open mysite.test, click Contact, verify form appears."Playwright will spin up a browser, follow the steps, and return results
Step 3: Experiment with a Small Project
Now that you have the basic WordPress AI development environment ready, let’s start the development.
You don’t have to start big. In fact, for teams that need more tailored functionality, custom AI development allows you to build AI-powered workflows, plugins, or automation scripts specifically designed for your WordPress projects.. For the sake of this guide, we created a job board with a listing submission form.
We first created a prompt to build this plugin using ChatGPT. Here is the sample of that prompt.
# WordPress Project: Artisan Shop
Next, we pulled Claude into the workflow. Here are the steps you need to follow for this.
Want to see these steps in action? Watch this part of the tutorial.
3.1 Open the mounted site and your editor
- Open the InstaWP staging site you mounted in Step 1.
- In your file browser, confirm you see the WordPress root (wp-content, wp-admin, wp-includes).
- Open the mounted folder in Cursor so you can watch files appear in real time.
3.2 Create a project context file for Claude
- In the mounted project root, create cloud.md.
- Add a short brief that Claude will follow:
# Goal
Build a WordPress Job Board plugin:
- CPT: job
- Taxonomy: job_category
- Front-end submission shortcode: [job_submit]
- Listing shortcode with pagination: [job_list]
# Dev environment
You are in a mounted InstaWP sandbox at the WordPress root.
Plugin path: wp-content/plugins/instawp-job-board/
# Deliverables
- Lean, class-based PHP
- WordPress coding standards
- Nonces, sanitization, capability checks
- Minimal HTML markup
# Prefix
instajob_Tip: Keep it short, then update it as you learn. This reduces “AI drift.”
3.3 Start Claude CLI and log in
- Open a terminal at the mounted WordPress root.
- Run Claude to launch the CLI.
- Complete the OAuth login. Vikas used the subscription login for predictable usage.
- Paste the top of cloud.md into the session so Claude has the right north star.
Helpful controls we used:
Shift+Tabtwice toggles Plan mode. Use it only if you need Claude to outline tasks./compactwhen the context gets large./clearto reset, then re-seed with cloud.md.
3.4 Ask Claude for the initial plugin scaffold
“Create a WordPress plugin in wp-content/plugins/instawp-job-board/. Include a proper plugin header. Add a class-based loader. Register a job custom post type on init. Use prefix instajob_. Split code into small files under includes/.”
This is how we did:
- Claude proposed a file plan.
- Pressed Enter to accept the changes.
- Optionally press 2 to “accept for this session” so you do not confirm every change.
- Kept Cursor open to watch files appear under
wp-content/plugins/instawp-job-board/.
3.5 Activate and sanity-check the CPT
- In wp-admin, go to Plugins and activate the new plugin.
- Confirm Jobs appears in the sidebar.
- If single or archive URLs 404, go to Settings → Permalinks → Save Changes to flush rules.
3.6 Add the meta you will need later
In the same plugin, register post meta for the job CPT: company_name, location, salary, job_type, logo_media_id. Use register_post_meta, sanitize callbacks, and show_in_rest: true. Keep code split in includes/
3.7 Add a front-end submission shortcode
Add a shortcode [job_submit] that renders a basic form with title, content, company_name, location, salary, job_type, and logo upload. On submit, create a job post with status pending. Add nonce, sanitize inputs, capability checks for logged-in users, and error messages.
What we did to test:
- Created a page called Submit a Job and inserted [job_submit].
- Submitted a simple test job.
- If data did not save, he re-checked nonce placement and sanitized callbacks.
- If the upload failed, he confirmed that media handling used WordPress functions and validated file types.
3.8 Add a listing shortcode with pagination
Add a shortcode [job_list] that queries published job posts. Show title, company_name, location, and link to the single page. Add pagination and support per_page as an attribute. Keep HTML minimal for later theming.
How we verified:
- Created a Jobs page and inserted [job_list].
- Published it and checked that the submitted job appeared.
- If the single template lacked meta output, he noted to handle that in the theme step.
3.9 Keep Claude on track while iterating
Here is how we maintained workflow hygiene while coding live:
- Use /compact when you see context warnings.
- Use /clear and then re-seed with cloud.md if the session loses track.
- Maintain a lightweight CHANGELOG.txt and ask Claude to update it at checkpoints.
- Keep prompts small. One task per prompt keeps the code readable and makes it easier.
3.10 Watch everything in real time through Local Mount
- Files saved in wp-content/plugins/instawp-job-board/ appear instantly in the sandbox.
- You can activate, submit, list, and iterate without leaving the mounted site.
- Teammates can open the same sandbox URL to see progress during the session.
Step 4: Refine the Job Board into Something You Can Actually Use
Once you have done with WordPress AI development, it’s time to refine the output. Here are our recommendations.
4.1 Surface your meta fields in the block editor
Right now, meta like company, location, salary, and job type exist, but authors cannot see or edit them easily.
- Add editor UI for meta. Ask for either:
- A classic meta box in the sidebar, or
- A small block-editor panel using register_post_meta with show_in_rest: true.
- Include sensible labels, placeholders, and help text.
- Save and reload a Job edit screen. Change values and update the post.
- Verify meta saves by reloading the editor and checking the values.
- Add basic validation in the save callback so empty or invalid input is rejected cleanly.
4.2 Fix the front-end submission UX
The submission form works, but we want fewer support tickets.
- Make key fields required: title, description, company, location, job type.
- Add inline validation messages that are clear and short.
- Harden file uploads: limit image types, max file size, and store logo_media_id safely.
- Add a honeypot field and keep the nonce check. Optionally add a basic rate limit for anonymous users.
- Decide what happens on success:
- Set status to pending for moderation, or
- Publish for trusted roles only.
- Show a success message with the job title and a link to “View job” or “Back to listings.”
4.3 Make the listing shortcode useful
The listing renders, but we can make it navigable and predictable.
- Keep the HTML minimal and semantic. Title as a link, company, location, job type, and a short excerpt.
- Add pagination through the paged query var so back and forward work correctly.
- Add shortcode attributes:
- per_page for results per page
- category to filter by taxonomy
- order and orderby for control
- Add empty-state messaging. Example: “No jobs found. Try different filters.”
- Make basic accessibility passes: proper heading levels, link text that makes sense, and form labels.
4.4 Output meta on single job pages
Seeing a single job without a company or location is confusing.
Two simple options
- Plugin template parts: Add a small template loader in the plugin that includes single-job.php and archive-job.php from your plugin’s templates/ folder when the active theme does not provide them.
- Theme step later: If you plan a custom theme in Step 4, keep it minimal here and move full styling to the theme.
4.5 Permalinks and slugs that behave
Links can 404 until rules are flushed.
- Visit Settings → Permalinks → Save Changes to flush rewrite rules.
- If you want custom slugs like /careers/ instead of /job/, set them in the CPT args and re-flush.
- Verify: a job single, the archive page, and pagination all return 200.
4.6 Admin usability for your team
Make the wp-admin list page work like a simple CRM for your jobs.
- Add admin columns for company, location, job type, and status.
- Make company and location sortable.
- Add row actions for “View on site” and “Quick approve” if you moderate.
- Optionally add filters by job category or status.
4.7 Notifications that close the loop
People need to know when a job is submitted or approved.
- On submission, send a concise email to the site admin with the job title and a link to review.
- On status change from pending to publish, notify the submitter if you collected an email.
- Keep emails short and branded, use wp_mail, and escape data.
Step 5: Promote to Staging and Automate Testing with Playwright MCP
You have something that works in the WordPress sandbox. Now we graduate to a stable staging environment and let AI run repeatable tests for us. At this stage, we recommend that you upgrade your Sandbox plan to the Starter plan and wire up Playwright MCP inside Claude.
Why Starter
- You get CDN, Shield, daily backups, more PHP workers, and uptime monitoring
- This is the environment clients should see and where tests must pass before deploys
5.1 Add Playwright MCP to Claude
You will run these commands from your mounted project root.
- Open a terminal at the WordPress root of your mounted staging site
- Start Claude CLI if it is not already running
- Add the Playwright MCP server
Example
claude mcp add playwrightIf your setup expects NPX
claude mcp add playwright npx- Choose the scope
- Local keeps the MCP server tied to this project
- Global makes it available to all Claude sessions on your machine
Our Tip: When the permission dialogue appears, use the option to allow forever. This saves a JSON policy so you are not asked again
5.2 Resume the Claude session with your project context
If you exited earlier, bring the session back with context.
- In your terminal, run
claude --resume- Pick the session tied to your job board work
- Paste the top of cloud.md again if you cleared the context, so Claude remembers paths and goals
5.3 Let Claude open the browser and navigate your staging site
Give Claude a short, clear instruction that includes real URLs.
Example:
Open <your-staging-url>/submit-a-job and <your-staging-url>/jobs.Verify both pages load and that the Jobs listing shows any published entries. If anything fails, describe the error and suggest a fix.
5.4 Turn manual checks into an automated test script
You want a repeatable test that anyone on the team can run.
Ask Claude
Create a Playwright test that:
- Visits the Submit a Job page
- Fills the form with title “Senior Developer”, sample description, sample company, location, job type, optional logo
- Submits the form and expects a success message
- Navigates to the Jobs listing and expects to find “Senior Developer” in the results
Save the test in a tests/e2e/ folder and include basic assertions.
5.5 Run the tests locally through Claude
You’ve two approaches to do so:
A. Ask Claude to run the test directly through this command: Run the new Playwright test and show me a summary report
B. Run with NPX if you prefer the command line: npx playwright test tests/e2e/job-flow.spec.ts
Step 6: Wire GitHub and Auto-Deploy to Production with InstaWP
Your job board works in staging, and the tests pass. Now we make deployments boring in the best way. You need to push the plugin to GitHub using InstaWP’s WordPress Git integration feature. Also, you need to use a webhook so that every push lands live without manual uploads.
6.1 Prepare your plugin for a clean repo
In your mounted staging site:
- Open wp-content/plugins/instawp-job-board/.
- Create a .gitignore inside the plugin folder:
# Composer/npm artifacts if you add them later
node_modules/
vendor/
build/
dist/
# Editor and OS files
.DS_Store
*.log
Optional: add a README.md with a short description and install notes.- Optional: add a README.md with a short description and install notes.
6.2 Initialize Git and make the first commit
From a terminal inside wp-content/plugins/instawp-job-board/:
git init
git add .
git commit -m "Initial commit: job CPT, meta, submit and list shortcodes"You can also do this from the Cursor Git panel if you prefer a UI.
6.3 Create a GitHub repository
- Go to GitHub and click New repository.
- Name it something like instawp-job-board.
- Choose Public or Private.
- Do not add any starter files on GitHub (no README, no license) to avoid conflicts.
- Copy the repo URL.
Connect your local repo to GitHub:
git remote add origin https://github.com/<your-username>/instawp-job-board.git
git branch -M main
git push -u origin main6.4 Point the InstaWP production site at your repo
On your production site in InstaWP:
- Open the site in the dashboard.
- Go to Git Deployment.
- Click Add repository and fill in:
- Repository: <your-username>/instawp-job-board
- Branch: main
- Deploy path: wp-content/plugins/instawp-job-board/
- Build commands: leave empty for now (you can add npm run build or composer install later if needed)
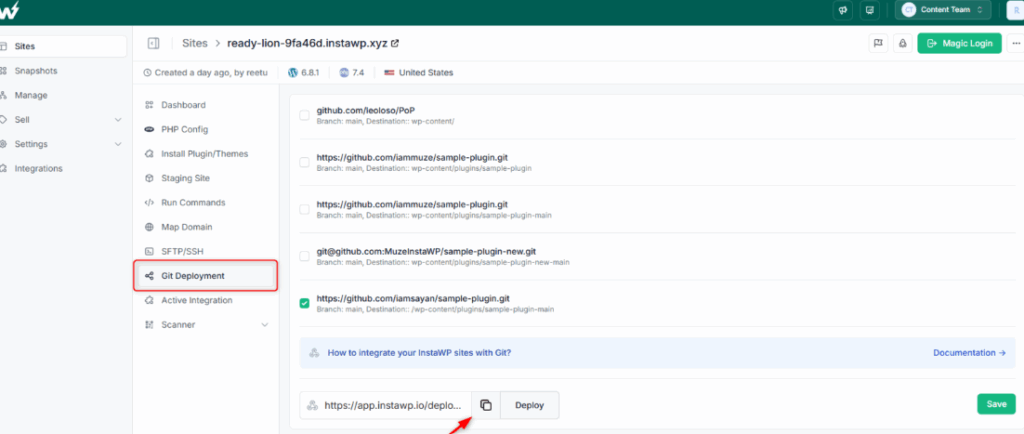
- Save.
This tells InstaWP where to fetch code and where to place it inside WordPress.
6.5 Add the InstaWP webhook to GitHub
Still on the Git Deployment screen in InstaWP:
- Copy the Webhook URL that InstaWP shows for this site.
- In GitHub, open your repo → Settings → Webhooks → Add webhook.
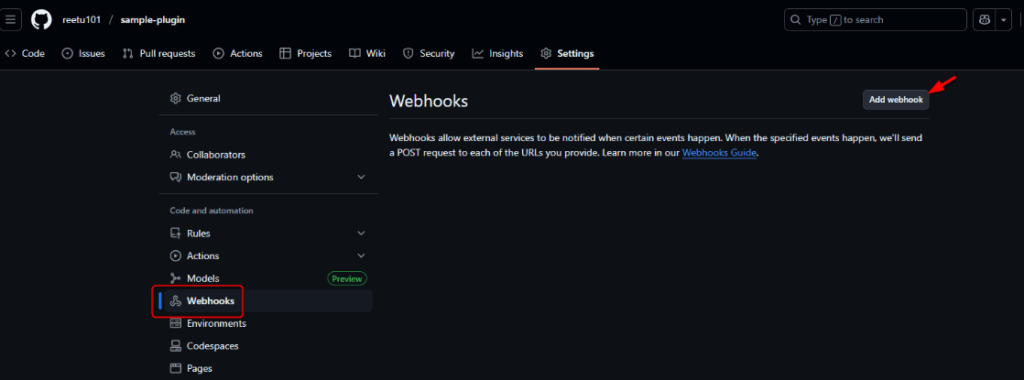
- Paste the URL.
- Content type: application/json.
- Which events: choose “Just the push event”.
- Save.
Now every push to main will notify InstaWP to pull and deploy to your production site.
Need more help? Our guide on WordPress Git Deployment is the best help.
How to Use AI in WordPress
When people ask me how to use AI in WordPress, I usually answer with this: don’t think of AI as just another plugin; think of it as a co-developer, a content strategist, and a QA engineer all rolled into one. The real power of WordPress AI comes from weaving it into multiple touchpoints of your workflow, not just one.
1. AI-Powered Content Creation
For agencies, client content is always a bottleneck. AI writing assistants built into WordPress can generate blog drafts, product descriptions, FAQs, or even support docs. The key is not to let AI write blindly; it should align with your client’s brand voice. A workflow I’ve seen work well is:
- Generate a first draft with AI.
- Run it through an AI SEO tool to optimize for keywords and structure.
- Finalize with human editing to polish tone and fact-check.
This cuts content turnaround from weeks to days.
2. AI-Assisted Coding
Developers can now scaffold plugins, create custom blocks, or refactor old code using tools like Claude CLI and Cursor. Imagine asking AI to spin up a boilerplate plugin, and instead of writing repetitive functions, you immediately start fine-tuning logic. Pair that with InstaWP sandboxes, and you’re testing real code inside a live WordPress site within minutes.
3. AI for SEO and Optimization
AI SEO assistants can automatically generate meta tags, create schema markup, suggest internal links, and even cluster content ideas around a topic. For agencies, this means you can hand clients not just a website, but an SEO-ready growth engine.
4. AI-Driven Testing
Quality assurance often gets ignored in WordPress projects. With Playwright MCP connected to Claude, you can literally say: “Go to the checkout page, add a product, and confirm the order completes successfully.” The AI runs the test in a browser and reports back. That’s automated QA without writing a single test script.
Conclusion: Your AI-First WordPress Workflow Starts Here
What you’ve built is more than just a job board. You’ve stitched together a repeatable workflow where AI scaffolds the code, staging sandboxes keep it safe, Playwright MCP validates it, GitHub tracks it, and InstaWP pushes it live. That’s what real WordPress AI development looks like; not gimmicky plugins, but AI woven directly into your dev lifecycle.
For agencies, this means you can deliver projects faster, wow clients with live previews, and scale without burning your team out. For developers, it means skipping boilerplate and spending your time on features that matter. And for the ecosystem, it keeps WordPress relevant in an AI-first web.
The next move is simple: don’t just read about it. Spin up a sandbox in InstaWP, connect Claude, and try scaffolding your first plugin. The sooner you start, the sooner you’ll see how much smoother your workflow becomes.
? Launch a free sandbox on InstaWP and start experimenting with WordPress AI workflows today.
Your future WordPress projects don’t need to be slow, fragile, or repetitive. With the right stack, AI makes you faster, safer, and more competitive.
FAQs
Q1. Do I need coding experience to start WordPress AI development?
Some basics help, but AI tools like Claude can scaffold most of the boilerplate. You still need to review, refine, and understand the code — AI is a partner, not a replacement.
Q2. Can I build real client projects with this workflow?
Yes. The sandbox → staging → production pipeline means you can safely demo, test, and deploy client-ready projects without risking downtime.
Q3. Why use InstaWP instead of local environments?
Local setups break, eat time, and aren’t easy to share. InstaWP gives you instant sandboxes and production-ready hosting in one dashboard. Clients and teammates can preview your work instantly.
Q4. How does Playwright MCP improve WordPress testing?
It turns plain-English instructions into automated browser tests. Instead of manually clicking forms, you can run repeatable tests that confirm every key flow (submit, list, approve, publish) still works.
Q5. What if AI generates insecure or bloated code?
That’s why we test and review. Use Claude for scaffolding, then run security and performance passes. The stack — sandboxes, staging, Playwright — makes sure bad code never hits production.