Vibe coding has taken the developer world by storm. The idea is simple: instead of writing code line by line, you describe what you want in plain English, and an AI tool generates the code for you. Developers are using tools like Claude Code, Cursor, and GitHub Copilot to build entire applications in minutes. Collins Dictionary even named “vibe coding” the Word of the Year for 2025.
But here’s the problem nobody talks about: vibe coding generates the code. It doesn’t give you a place to run the code.
If you’re building a WordPress plugin, theme, or full site with AI, you still need a live WordPress environment to test whether it actually works.nding pages. Use AI to generate a full landing page with a hero section, testimonials, pricing table, and CTA — all as a custom WordPress template.
Setting up that environment, installing Docker, configuring MySQL, wrestling with local server settings, can take longer than the AI took to write the code in the first place.
In this guide, we’ll walk through the entire workflow to vibe coding a WordPress plugin with an AI tool, to testing and deploying it. Even if you’ve never used a terminal before, you’ll be able to follow along.
Table of Contents
What is Vibe Coding (And Why Does It Matter for WordPress)?
Vibe coding is a term coined by AI researcher Andrej Karpathy in early 2025. It describes a way of building software where you tell an AI what you want in everyday language, and the AI writes the actual code. You focus on the what, and the AI handles the how.
For example, instead of writing PHP code to create a WordPress contact form plugin, you’d type something like:
“Build me a WordPress plugin that adds a contact form with name, email, and message fields. Store submissions in a custom database table and show them in the WordPress admin.”
The AI generates all the PHP, HTML, and SQL code needed to make that plugin work. That’s vibe coding in a nutshell.
Why Vibe Coding + WordPress is a Big Deal
WordPress powers over 43% of all websites on the internet. It has a massive ecosystem of plugins, themes, and tools. But traditionally, customizing WordPress beyond basic page builders required PHP knowledge, theme development skills, and a local development setup. Vibe coding removes those barriers.
Now, anyone with an idea can describe a WordPress plugin, a custom theme modification, or a full website, and an AI will build it.
The Missing Piece: Where Do You Test Your Code?
Here’s where most vibe coding tutorials stop. The AI generates your plugin or theme files, and then you’re left with a question: “Where do I actually run this?” You need a live WordPress installation to install the plugin, activate it, and see if it works. Traditionally, that meant:
- Downloading and installing Docker Desktop (which uses a lot of memory)
- Setting up a local WordPress environment with MySQL and Apache
- Configuring wp-config.php, creating databases, and managing file permissions
- Spending 20–30 minutes on setup before you can even test your AI-generated code
InstaWP CLI eliminates all of that. One command gives you a running WordPress site. That’s the missing piece in the vibe coding workflow.
What You’ll Need Before We Start Vibe Coding for WordPress
Before we dive in, let’s make sure you have everything ready. You only need three things:
1. Node.js (Version 18 or Higher)
Node.js is a program that lets you run JavaScript tools on your computer. InstaWP CLI is built with Node.js, so you need it installed. Don’t worry; you’ll only install it once.
How to check if you already have it: Open your terminal (on Mac, search for “Terminal”; on Windows, search for “Command Prompt” or “PowerShell”) and type:
node --version
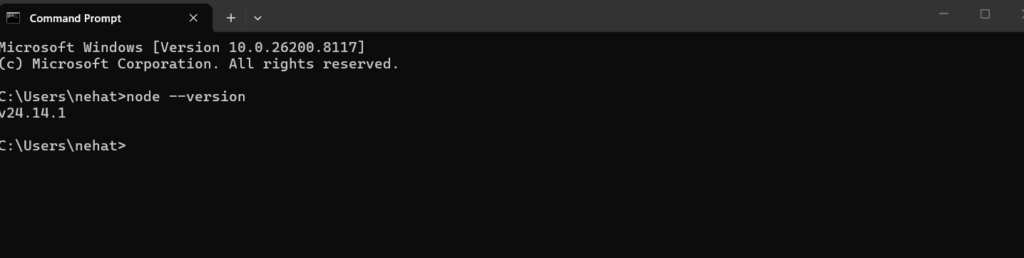
If you see something like v18.0.0 or higher, you’re good. If not, download Node.js from nodejs.org and install it. Choose the LTS (Long Term Support) version.
Beginner Tip: If you’re on a Mac, the easiest way to install Node.js is through Homebrew. Just run: brew install node.
2. A Free InstaWP Account
Go to app.instawp.io and create a free account. You’ll get $25 in free credits, which is enough to create multiple cloud WordPress sites for testing. You won’t need a credit card.
3. An AI Coding Tool (Any One Will Do)
You need an AI tool to generate your WordPress code. Any of these work:
- Claude Code: Anthropic’s AI coding assistant (works in the terminal)
- Cursor: an AI-powered code editor based on VS Code
- GitHub Copilot: built into VS Code and other editors
- ChatGPT: you can use the chat interface and copy the code it generates
For this tutorial, we’ll use Claude Code because it works directly in the terminal alongside InstaWP CLI. But the workflow is the same regardless of which AI tool you choose.
Why This Matters: The beauty of this approach is that you’re not locked into any single AI tool or platform. Use whatever AI you’re most comfortable with. InstaWP CLI just gives the code a place to run.
How To Vide Code a Website: Step-by-step Guide

Here is how you can vibe code a website. built on WordPress.
Step 1: Install InstaWP CLI
Open your terminal and run this single command:
npm i -g @instawp/cliThat’s it. This installs InstaWP CLI globally on your computer, which means you can use it from any folder. The entire installation takes about 30 seconds.
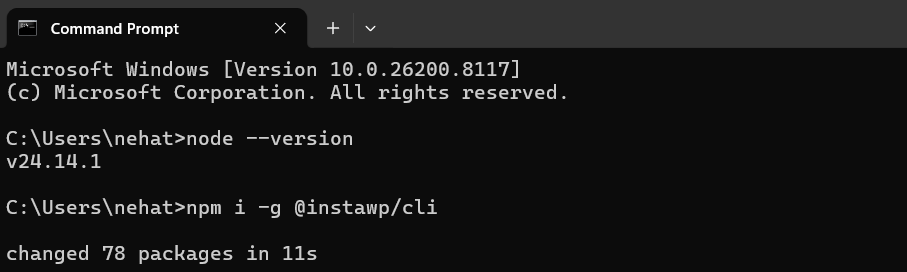
To confirm it worked, type:
instawp --help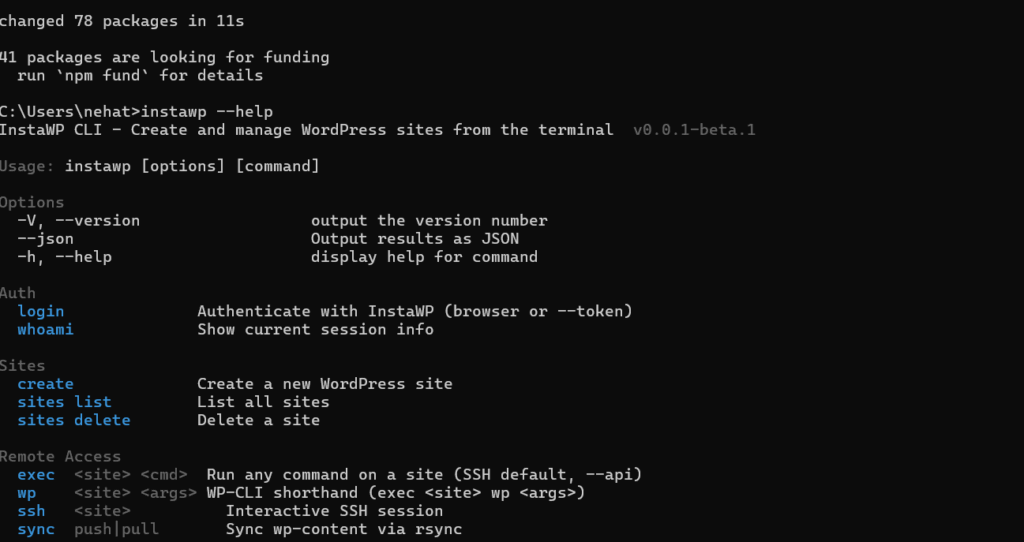
You should see a listl of all available commands. If you do, you’re ready to go.
Beginner Tip: If you see a “permission denied” error on Mac/Linux, try running: sudo npm i -g @instawp/cli. This gives the installer the permissions it needs.
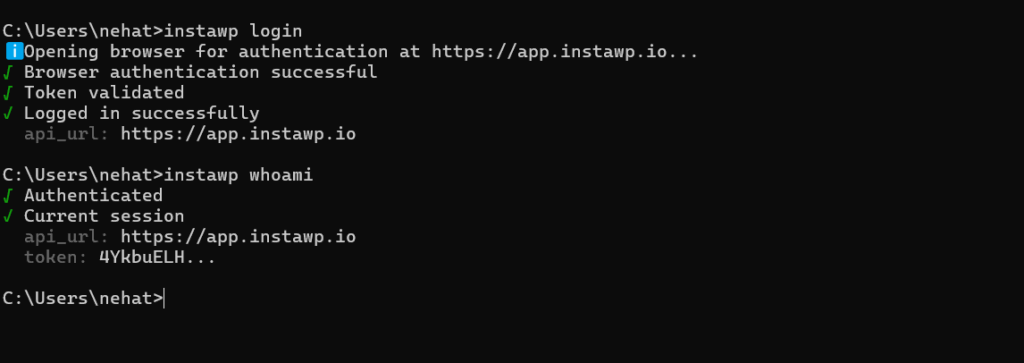
Next, link the CLI to your InstaWP account:
instawp loginThis opens your web browser and asks you to authorize the connection. Click “Allow,” and you’re connected. The CLI remembers your login, so you only need to do this once.
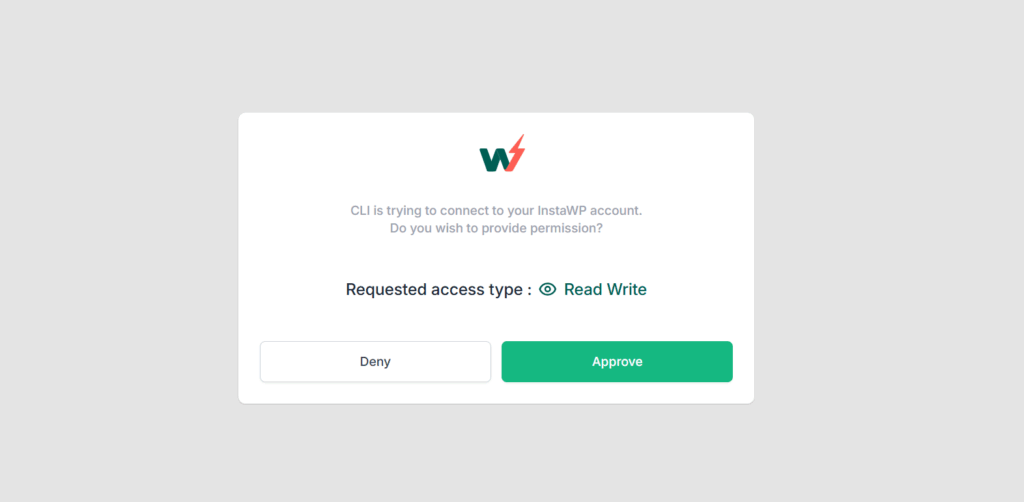
To verify your connection:
instawp whoamiThis shows your username, active team, and session status. If you see your information, you’re all set.
Step 2: Create a WordPress Site in 40 Seconds
Now for the magic. Run this command to create your WordPress site for vibe coding.
instawp create --name my-vibecoded-site --php 8.4Watch your terminal. You’ll see real-time progress as InstaWP provisions your site:
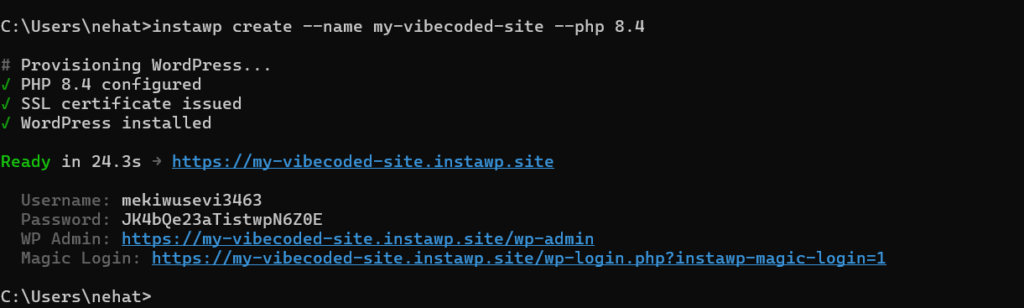
In about 40 seconds, you have a fully live WordPress site with SSL encryption, admin credentials, and a one-click login link. Click the Magic Login link, and you’re inside the WordPress dashboard. No installation. No configuration. No waiting.
Key Takeaway: Compare this to traditional local development: install Docker Desktop (5–10 minutes), configure docker-compose.yml (10 minutes), wait for containers to start (2–5 minutes), troubleshoot port conflicts (unpredictable). InstaWP CLI: one command, 40 seconds, done.
What About Local Development? (No Internet Needed)
If you want to work offline or just prefer running WordPress on your own machine, InstaWP CLI has you covered:
instawp local create --name my-local-siteThis creates a WordPress site that runs entirely on your computer using a technology called WordPress Playground. There’s no Docker. No MySQL database to install. No Apache web server to configure. It all runs inside Node.js using a special version of PHP compiled for the web (called WebAssembly).
Your browser opens automatically, and you’re logged in as admin. Start editing immediately.
Beginner Tip: Local sites are completely free with no limits. You can create as many as you want. Cloud sites use your InstaWP credits ($25 free on signup).
Step 3: Vibe Code Your First WordPress Plugin
Now that you have a running WordPress site, let’s build something for it using AI. We’re going to vibe code a custom WordPress plugin; a booking form that lets visitors schedule appointments.
Open Your AI Tool
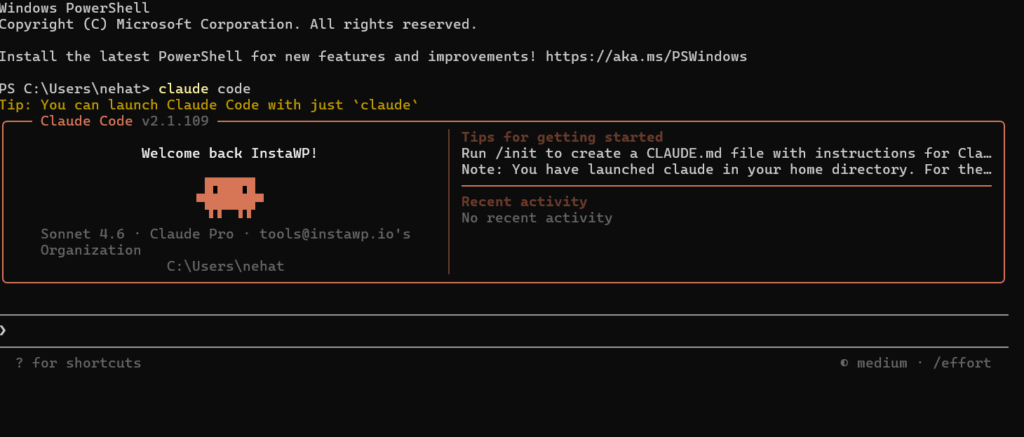
If you’re using Claude Code, open a new terminal window (keep the InstaWP one open too) and start Claude Code. If you’re using Cursor or another editor, open your preferred tool.
If you’re using ChatGPT or any other chat-based AI, you can just type your prompt in the chat window and save the generated code as files on your computer.
Write Your Prompt
Here’s the key to vibe coding: the more specific your prompt, the better the result. Don’t just say “make me a plugin.” Describe exactly what you want. Here’s an example prompt:
Example Prompt: “Build me a WordPress plugin called Simple Bookings. It should add a booking form to any page using the shortcode [simple-booking]. The form should have these fields: Full Name, Email, Phone Number, Preferred Date (date picker), Preferred Time (dropdown with hourly slots from 9 AM to 5 PM), and a Service Type dropdown (Consultation, Follow-up, Demo).
When someone submits the form, store the booking in a custom database table. Create an admin page under the WordPress menu called ‘Bookings’ that shows all submissions in a table with columns for each field plus the submission date. Add a delete button for each row. Make sure the plugin follows WordPress coding standards and includes proper security (nonces, input sanitization, capability checks).”
Notice how specific this prompt is. It describes the form fields, the shortcode name, the admin interface, the database structure, and even the security requirements. The more detail you give the AI, the closer the output will be to what you actually want.
Let the AI Generate the Code
After you submit the prompt, the AI will generate the plugin code. This typically takes 1–3 minutes depending on the complexity. You’ll get one or more PHP files that make up your WordPress plugin.
Save these files in a folder on your computer. The structure should look something like this:
simple-bookings/
├── simple-bookings.php (main plugin file)
├── includes/
│ ├── class-booking-form.php
│ └── class-admin-page.php
└── assets/
└── style.css
Beginner Tip: Don’t worry if the file structure looks different from this. Every AI tool generates code slightly differently. What matters is that you have a main plugin PHP file with the WordPress plugin header at the top.
Tips for Better Prompts
Here are a few things that help you get better results from any AI coding tool:
- Be specific about field names and types. Say “a date picker” instead of “a date field.” Say “a dropdown with options: X, Y, Z” instead of “a selection.”
- Mention WordPress-specific details. Say “use a shortcode,” “add an admin menu page,” “use a custom database table with $wpdb.” The AI understands WordPress concepts.
- Ask for security. Always include “use nonces, sanitize inputs, and check user capabilities” in your prompt. AI-generated code sometimes skips security measures unless you explicitly ask.
- Iterate. If the first result isn’t perfect, tell the AI what to fix. “The date picker isn’t showing up. Can you use the HTML5 date input type instead?” Vibe coding is a conversation, not a one-shot.
Step 4: Deploy Your Plugin to the WordPress Site
You have a running WordPress site (from Step 2) and a vibe-coded plugin (from Step 3). Now let’s connect them. There are two ways to do this.
Option A: Upload Through WordPress Dashboard
This is the simplest method if you’re a complete beginner:
Open your WordPress site’s admin dashboard (use the Magic Login link from Step 2).; Go to Plugins → Add New Plugin → Upload Plugin. Zip your plugin folder (right-click the folder → “Compress” on Mac, or “Send to → Compressed folder” on Windows).
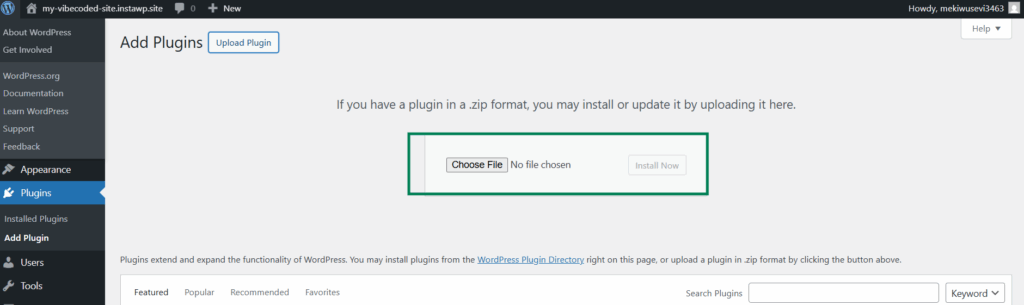
Upload the zip file and click Install Now. Click Activate Plugin
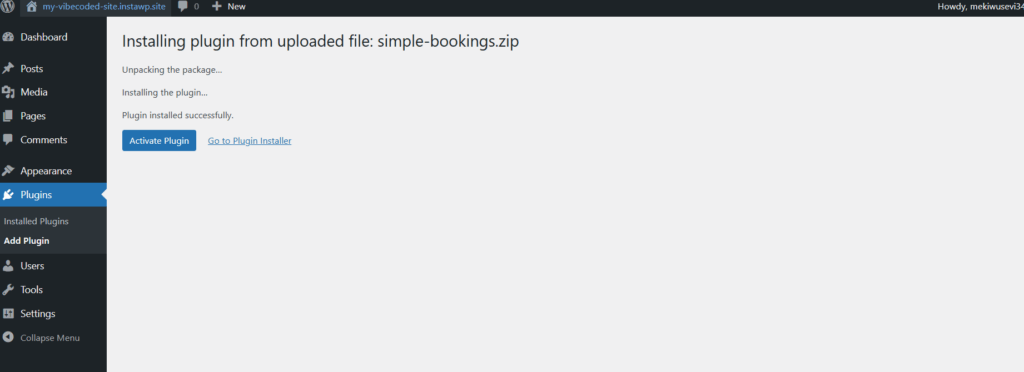
Option B: Deploy From the Terminal (The Power Move)
If you want the full developer workflow, and this is where InstaWP CLI truly shines, use the sync command:
instawp sync push my-vibecoded-siteThis pushes your local files to the cloud site using incremental sync. Only changed files are transferred. No full re-uploads. No FTP clients. No dragging and dropping files.
Key Tip: You need rsync on local machine for this command to work.
Then activate the plugin remotely:
instawp wp my-first-site plugin activate simple-bookingsThat’s it. Your vibe-coded plugin is now live and active on your WordPress site. You never opened a browser. You never touched a file manager. Everything happened from the terminal.
Key Takeaway: The instawp wp command is a remote WP-CLI shorthand. It lets you run any WP-CLI command on any InstaWP site without setting up SSH keys manually. The CLI handles all of that behind the scenes.
Step 5: Test Your Plugin (And Fix What’s Broken)
Here’s the reality of vibe coding: the AI-generated code will probably not be perfect on the first try. And that’s completely normal. Studies show that AI-generated code has a higher rate of bugs and security issues compared to human-written code. The point of having a fast test environment is so you can catch and fix those issues quickly.
Open Your Site and Test
Go to your WordPress site and test the plugin. Create a new page in WordPress and add the shortcode [simple-booking]
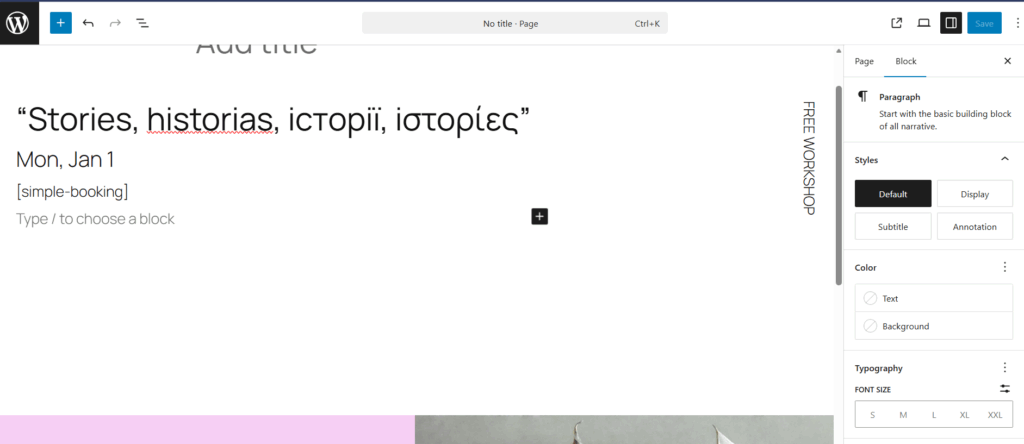
Publish the page and view it on the frontend. Fill out the form and submit it.
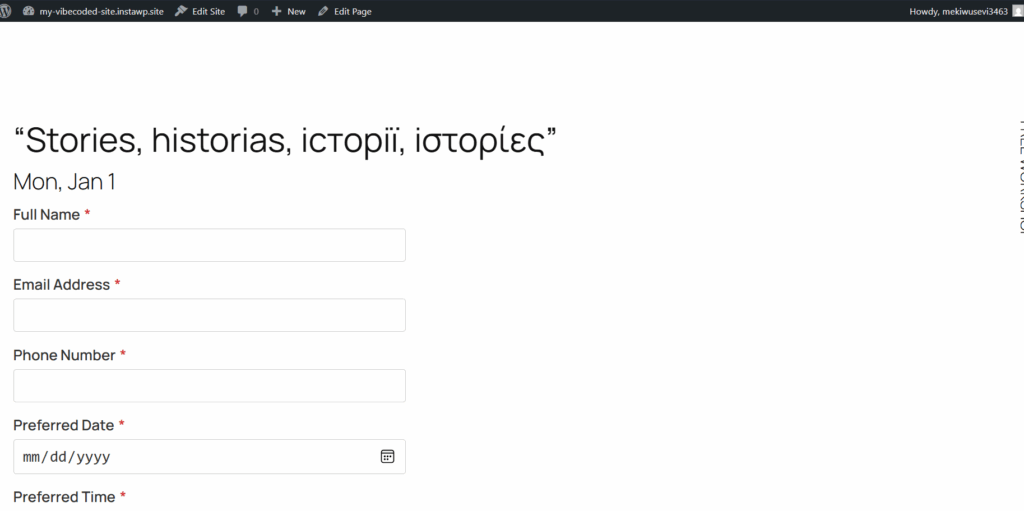
Go to the Bookings admin page and check if the submission appears. Try the delete button. Test with invalid inputs (empty fields, wrong email format) to see if validation works
When Something Breaks
If the form doesn’t show up, or the submissions don’t save, go back to your AI tool and describe the problem:
“The form renders but when I submit it, I get a white screen. The bookings are not being saved to the database. Can you check the form handler and make sure the database table is being created on plugin activation?”
The AI will suggest fixes. Apply them, push the updated code to your site, and test again:
instawp sync push my-first-site
instawp wp my-first-site plugin deactivate simple-bookings
instawp wp my-first-site plugin activate simple-bookingsThis cycle — prompt → generate → deploy → test → fix → repeat — is the core loop of vibe coding. The faster your test environment spins up, the more iterations you can do, and the better your final result will be. That’s why InstaWP CLI’s speed matters so much.
Before you consider using your vibe-coded plugin on a real website, run InstaWP’s vulnerability scanner on your site.
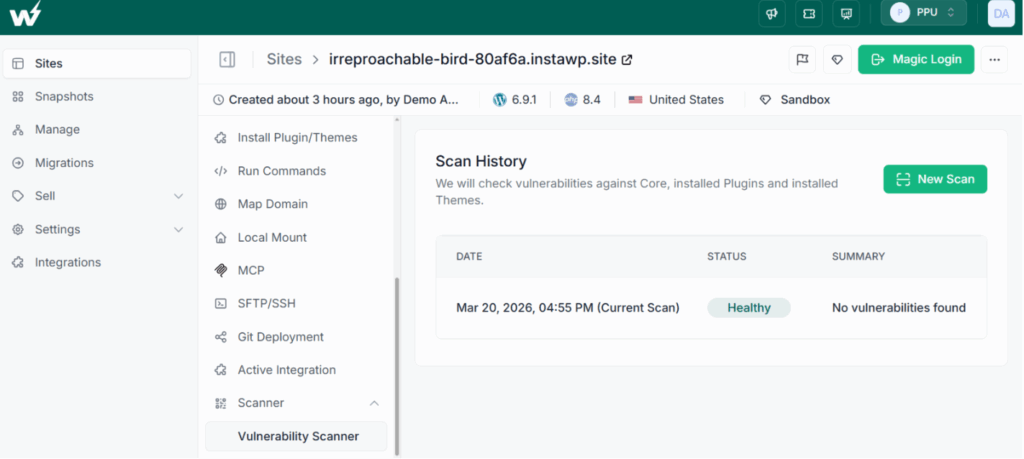
AI-generated code is notorious for missing security best practices. InstaWP’s tools can catch issues like missing input sanitization, exposed database queries, and improper access controls before they become real problems.
Step 6: Save Your Work With Snapshots
Once your plugin is working correctly, save the current state of your site as a snapshot. Think of a snapshot as a “save point” in a video game; you can always come back to this exact state.
You can create snapshots from the InstaWP dashboard. Go to your site, click on Snapshots, and create a new one. Give it a descriptive name like “Booking plugin v1 — working.”
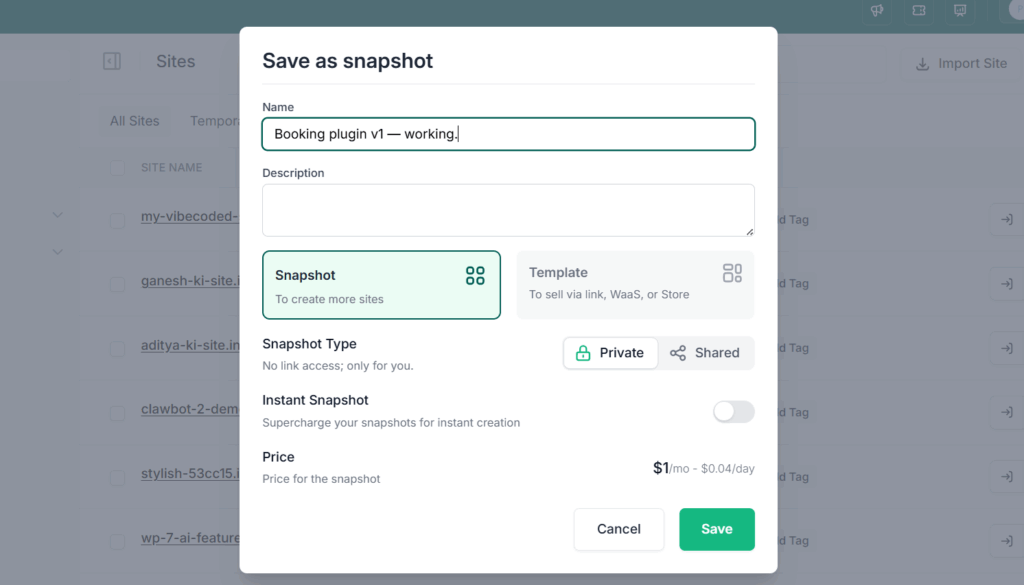
Why this matters for vibe coding:
- Safe experimentation. Want to try a major change? Take a snapshot first. If the change breaks something, restore the snapshot and you’re back to the working version in seconds.
- Version control for non-developers. Snapshots act like a simple version history for your entire WordPress site.
- Reusable templates. Turn a working site into a template. Next time you need a similar setup, create a new site from that template instead of starting from scratch.
Step 7: Work Offline With Cloud-to-Local Cloning
One of InstaWP CLI’s most impressive features is bidirectional sync between cloud and local. Here’s a real-world scenario:
You’ve been building your site on InstaWP’s cloud. Now you want to work on it during a flight with no Wi-Fi. Run:
instawp local clone my-first-siteThis single command does everything:
- Exports the MySQL database from your cloud site
- Converts it to SQLite (so it can run locally without MySQL)
- Downloads all your plugins, themes, and uploads
- Replaces all URLs (from the cloud domain to localhost)
- Starts the local site and opens it in your browser
You now have an exact copy of your cloud site running on your laptop. Make changes, test new AI-generated code, and when you’re back online:
instawp local clone my-first-siteYour local changes are synced back to the cloud. No manual database exports. No search-and-replace scripts. No broken URLs.
What Else Can You Vibe Code With This Workflow?
We used a booking plugin as our example, but this same workflow works for anything you can build with WordPress:
- Custom themes. Describe the look and feel you want, and have the AI generate a WordPress theme. Deploy and preview it on InstaWP instantly.
- WooCommerce stores. Vibe code custom product pages, checkout flows, or shipping logic. Test with real WooCommerce data on your InstaWP site.
- Custom Gutenberg blocks. Describe a block you want in the WordPress editor, generate the React and PHP code with AI, and test it on a live site.
- Landing pages. Use AI to generate a full landing page with a hero section, testimonials, pricing table, and CTA; all as a custom WordPress template.
- API integrations. Need your WordPress site to talk to a third-party service? Describe the integration, vibe code the plugin, and test it with real API calls on a sandboxed InstaWP site.
Bonus: InstaWP CLI Works With AI Agents Too
Here’s something that sets InstaWP CLI apart from every other WordPress development tool: it’s designed to be used by AI agents directly.
Every InstaWP CLI command supports a –json flag that outputs machine-readable data. This means AI coding tools like Claude Code can programmatically create a WordPress site, deploy code to it, run tests, and read the results.
For example, a WordPress AI agent can:
- Create a site: instawp create –name test-site –json
- Deploy a plugin to it: instawp sync push test-site –json
- Run WP-CLI to check if the plugin activated: instawp wp test-site plugin list –json
- Delete the site when done: instawp sites delete test-site –force –json
This makes InstaWP CLI the perfect tool for CI/CD workflows where every pull request gets its own isolated WordPress site for testing, and for AI-powered development environments where the AI agent manages the entire build-test-deploy loop automatically.
InstaWP also offers MCP (Model Context Protocol) integration, which means AI assistants like Claude can directly create, edit, and manage content on your WordPress sites; right from the chat interface.
Get Started Today
InstaWP CLI is open source (MIT license) and free to install. Local development with WordPress Playground is completely free with no limits. Cloud sites come with $25 in free credits when you sign up; no credit card required.
- Install InstaWP CLI now: npm i -g @instawp/cli
- GitHub: GitHub – InstaWP/cli: InstaWP CLI – Create and manage WordPress sites from the terminal · GitHub
- Documentation: https://docs.instawp.com/
- npm: @instawp/cli
Ready to vibe code WordPress? Create your first site from the terminal today with $25 in free credits.


