For most WordPress developers, the terminal is already where a lot of real work happens. You use it to run commands, manage files, update plugins, automate tasks, test changes, and move faster without clicking through dashboards all day.
But WordPress development still has a few slow parts: setting up local environments, connecting to servers, finding SSH details, running WP-CLI on hosted sites, cloning sites, and pushing changes live.
That is where InstaWP CLI fits in.
In this guide, we will look at five practical WordPress tasks you can run from the terminal using InstaWP CLI, from building with AI to cloning sites locally, running WP-CLI without SSH, managing multiple client sites, and creating preview sites for pull requests.
Table of Contents
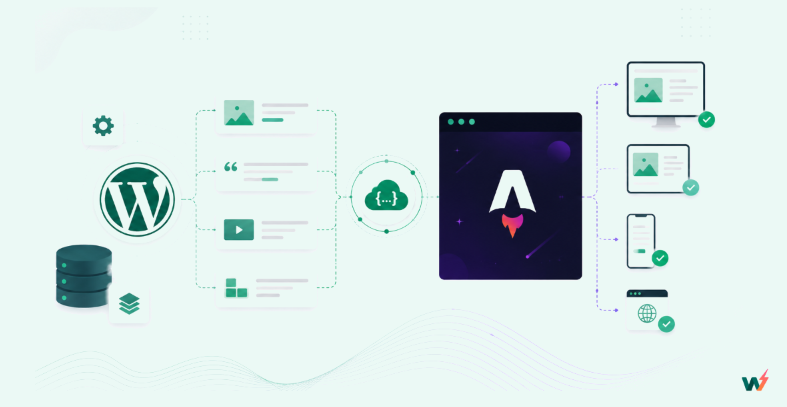
The InstaWP CLI turns one binary into four bridges that connect AI agents, your laptop, WP-CLI, and your whole InstaWP account to real, hosted WordPress.
- Install once:
npm i -g @instawp/cli@beta(needs Node.js 18+, MIT licensed). - AI-first: every command supports
--jsonplus a singleINSTAWP_TOKEN, so agents and CI can run it headlessly. - No setup tax: local sites use WordPress Playground (WASM PHP + SQLite), so there is no Docker or MySQL to configure.
- Local and cloud: bidirectional sync clones a live cloud site to your machine and pushes only the changes back.
What is the InstaWP CLI?
The InstaWP CLI is a Node-based command line tool that creates and manages WordPress sites from the terminal. You install it once with npm, authenticate through your browser or with an API token, and from there a single instawp binary handles everything from local development to production-grade cloud hosting on InstaWP infrastructure. It is open source under the MIT license, requires Node.js 18 or higher, and is published to npm as @instawp/cli.
How to install the InstaWP CLI
Installation is a single npm command, and authentication takes one more. Here is the full setup, step by step.
Step 1: Install the binary
Open your terminal and install the CLI as a global npm package. This puts the instawp binary on your system so you can run it from any directory.
npm i -g @instawp/cli@beta
If you use yarn instead:
yarn global add @instawp/cli@betaConfirm it worked by listing the available commands:
instawp --helpWatch our step-by-step InstaWP CLI video to see how to install it and run real WordPress workflows from your terminal.
Step 2: Authenticate with your account
Connect the CLI to your InstaWP account. The default flow opens your browser and walks you through a quick OAuth authorisation, then stores your credentials locally.
instawp loginIf you are setting this up inside a CI/CD pipeline, a Docker container, or any environment without a browser, use token-based authentication instead. You can generate an API token from your dashboard under Account > API Tokens. See the InstaWP API docs for details.
Interactive token login:
instawp login --token <your-api-token><br><br>INSTAWP_TOKEN environment variable is all it takes to make every command run non-interactively. That one variable is what lets an AI agent or a GitHub Actions runner use the CLI with no browser and no manual login.
Step 3: Create your first local site
You do not need a cloud site to start. Local sites run entirely on WordPress Playground, which is PHP compiled to WebAssembly with a SQLite database, so the only system requirement is Node.js 18 or higher. Local development is completely free with no limits.
instawp local create --name booking -1
You will have a running WordPress site in seconds, with no Docker daemon, no MySQL service, and nothing to uninstall later.
Five things you can do with the InstaWP CLI
The CLI is a general purpose tool, but five workflows show off what only InstaWP can do. We are leading with the AI workflow on purpose, because giving an AI agent a real, disposable WordPress environment is the single biggest thing the CLI changes about how WordPress gets built.
1. Let an AI agent build a real WordPress site, then ship it live
The hardest part of AI-built WordPress has never been the writing. Agents like Claude Code can write a plugin happily. The catch is that the agent has nowhere to run what it writes, because WordPress needs a real install, a database, and a server, and standing that up with Docker, MySQL, and PHP is exactly the friction that breaks the flow.
The InstaWP CLI removes it. The agent gives itself a real WordPress in seconds, builds against it, and when the code works, ships it to a live, shareable URL without a human ever opening a hosting panel.
Here is how the workflow works step by step.
Step 1: Create a local WordPress sandbox
First, the AI agent creates a local WordPress site using InstaWP CLI.
instawp local create --name booking -1This creates a local WordPress sandbox called booking-1. The important part is that you do not need Docker, MySQL, or a full local server setup. InstaWP CLI uses WordPress Playground, so the site runs locally with WASM PHP and SQLite.
In simple words, this command gives the AI agent a working WordPress site where it can build and test.
Step 2: Open the local WordPress site
Once the local site is created, open it in your browser.
open http://127.0.0.1:9400
This lets you or the AI agent check the WordPress site locally. For example, if you asked Claude Code to build an event booking plugin, this is where the plugin can be tested inside a real WordPress site.
The AI can now see whether the plugin loads correctly, whether the form appears, whether there are errors, and whether the feature works as expected.
Step 3: Let the AI write the WordPress code
Now the AI agent writes the plugin, theme, or custom code inside the local WordPress files. For example, if you are building a plugin, the AI can create it inside:
wp-content/plugins/This means the code is not just sitting in a random folder. It is being written directly inside a working WordPress environment. That makes the workflow much more practical because the AI can build against the actual WordPress structure.
Step 4: Test, fix, and repeat
After writing the code, the AI agent can check the site, read errors, fix issues, and test again. This is where the workflow becomes powerful.
Instead of manually copying code into a WordPress install again and again, the AI can keep improving the code inside the same local site. For example, it can:
- Check whether the plugin is active.
- Fix PHP errors.
- Update files.
- Test the frontend.
- Check the WordPress admin area.
- Repeat until the feature works.
So the AI is not just generating code. It is working inside a real WordPress development environment.
Step 5: Push the local site to InstaWP Cloud
Once the local site works, you can push it to InstaWP Cloud.
instawp local push bookingThis command takes the local WordPress site and deploys it to a real InstaWP cloud site. In simple words, your local build becomes a live, hosted WordPress site with a shareable URL. This is useful when you want to show the work to a client, test it on a hosted environment, or continue from a cloud site.
Step 6: Check the live site using WP-CLI over API
After the site is pushed live, you can run WP-CLI commands on the cloud site without SSH. For example, you can check whether the plugin is active:
instawp wp booking-cloud plugin list --apiHere, booking-cloud is the cloud site name. Replace it with the actual site name returned by InstaWP CLI. The --api flag is important because it runs the WP-CLI command through the InstaWP API. That means you do not need SSH access or server login details.
This is the connective tissue between an AI agent and a real, hosted WordPress site: prompt to live URL using nothing but commands the agent runs itself. If you want the no-code version of the same idea, where you talk to WordPress in plain language from inside your AI client, that is what InstaMCP is for. The CLI and InstaMCP are two complementary on-ramps to the same idea: WordPress that AI can actually operate.
2. Run WP-CLI on any site, with no SSH and no server login
Every WordPress developer knows WP-CLI, and every one of them knows the pain of reaching it on a managed host: find the SSH details, set up keys, and hope the network allows port 22. On a locked-down corporate VPN, or inside a CI runner, SSH is often simply blocked. The CLI solves this with an --api transport that sends your WP-CLI command over HTTPS to the InstaWP API, which runs it on the site for you. No SSH, no keys, no firewall fight, and you address the site by name rather than an IP.
Step 1: Run a basic WP-CLI command
Start with a simple command to check if everything is working.
instawp wp acme-site option get siteurl --api
Here, acme-site is the name of your InstaWP site. This command gets the site URL from WordPress. The important part is --api. It tells InstaWP CLI to run the WP-CLI command through the InstaWP API instead of SSH. So you do not need server login, SSH keys, or an IP address.
Step 2: Preview risky changes before applying them
Some WP-CLI commands can make big changes to your site. For example, search-replace commands can update URLs inside the database. These are useful during migrations, domain changes, or staging-to-live workflows, but they should be tested carefully.
That is why you can use --dry-run.
instawp wp acme-site search-replace http://old.test https://acme.com --dry-run --apiThis command checks what would change, but does not actually apply the change yet. For a beginner, this is a safer way to understand the impact before running the real command. Once you are sure the result is correct, you can run the command again without --dry-run.
Step 3: Run maintenance commands
You can also use this workflow for regular WordPress maintenance. For example, you can update a plugin directly from your terminal.
instawp wp acme-site plugin update woocommerce --apiThis command updates WooCommerce on the site named acme-site. Again, this runs through the API, so you do not need to log into the server or open the WordPress dashboard.
This is useful when you want to update plugins, check plugin status, flush cache, manage users, update options, or run other WP-CLI tasks quickly.
Step 4: Get structured output for automation
If you are building scripts or internal tools, you may want command output in JSON format. For example, you can list WordPress users like this:
instawp wp acme-site user list --json --api | jq '.data'This command returns the user list in JSON format and passes it to jq, which helps you filter or format the output. This is useful when you want to automate reporting, audits, maintenance checks, or agency workflows across multiple sites.
This is effectively WP-CLI as an API across your whole account. If you would rather run commands in the dashboard, InstaWP also gives every site a built-in terminal for running WP-CLI and shell commands, and full SFTP and SSH access when you want it. The point of the --api bridge is that you no longer have to choose, because it works behind firewalls and inside CI where SSH is not even available.
3. Clone a live site to your laptop, edit offline, and push it back
The worst part of WordPress development has always been local setup: Docker, MySQL, a matching PHP version, exporting the database, search-replacing URLs. It is why “just pull the site down and fix it” is never just. The CLI collapses the whole ritual into one command.
It clones a live cloud site, including the database, plugins, themes, and uploads, into a Docker-free Playground site on your laptop, ready to edit on a plane with no Wi-Fi. Back online, it syncs only what changed back to the same cloud site.
Step 1: Clone the live site locally
Start by running the clone command:
instawp local clone client-storeHere, client-store is the name of the live InstaWP site you want to clone. This command pulls the site from the cloud and creates a local version of it on your laptop.
It brings over the database, plugins, themes, uploads, and other WordPress files needed to run the site locally. The best part is that you do not need Docker, MySQL, or a separate local server setup. The cloned site runs locally using WordPress Playground.
Step 2: Work on the site offline
Once the site is cloned, you can work on it locally. This is useful when you want to edit theme files, test plugin changes, update layouts, debug issues, or make code changes without touching the live cloud site.
You can even work without internet after the site is cloned. For example, you can be travelling, on a weak connection, or working from a place where you do not want to depend on server access. Your local copy still runs on your laptop.
Step 3: Preview what will change
Before pushing anything back to the cloud site, you can preview the changes.
instawp local push client-store --dry-runThe --dry-run flag shows what would be pushed, but does not actually move anything yet. This is useful because you can review the changes before they affect the cloud site. For beginners, this is a safer habit. Always run a dry run first when you are not fully sure what will be updated.
Step 4: Push the changes back to the cloud site
Once you have checked the dry run and everything looks correct, push the changes back:
instawp local push client-storeThis syncs the changed files from your local site back to the same InstaWP cloud site. So your workflow becomes simple:
- Clone the site.
- Work locally.
- Preview the changes.
- Push them back.
The export, the MySQL to SQLite conversion, the URL rewrite, and the sync are all automatic. That is the glue that normally eats an afternoon. It is the same idea behind InstaWP’s one-click WP staging and 2-way sync, now available as a terminal workflow you can script.
Try it next: spin up a free sandbox in your dashboard, then instawp local clone it to feel the round trip. Create your free account →
4. Manage dozens of client sites with a single WP-CLI loop
Agencies do not manage one site. They manage dozens, sometimes hundreds. The recurring nightmare is anything that has to happen on all of them at once: a security patch, a plugin audit, a cache flush. By hand, that is dozens of logins and a lost morning.
Because the CLI turns your entire account into a machine-readable inventory and can run WP-CLI on each site via the API, your whole fleet becomes a single shell loop. This is the practical way to manage multiple client sites without a control panel.
Step 1: List all sites in your InstaWP account
First, get a list of all site names in your account.
instawp sites list --json | jq -r '.data[].name'This command does two things.
instawp sites list --jsongives you the list of sites in JSON format.
jq -r '.data[].name'filters that list and prints only the site names.
Step 2: Audit a plugin across all sites
Now, let’s say you want to check which WooCommerce version is installed on every site. You can run:
for s in $(instawp sites list --json | jq -r '.data[].name'); do
  instawp wp "$s" plugin get woocommerce --field=version --api
doneHere is what happens.
- The first part gets the list of site names.
- The loop picks one site at a time.
- Then InstaWP CLI runs a WP-CLI command on that site through the API.
- The command checks the WooCommerce plugin version.
This is useful when you want to audit plugins, check versions, confirm settings, or review site status across many client sites.
Step 3: Update a plugin across all sites
Once you know what needs updating, you can run the update command across the whole list.
for s in $(instawp sites list --json | jq -r '.data[].name'); do
  instawp wp "$s" plugin update woocommerce --api
doneThis loops through every site and updates WooCommerce on each one.
- You do not need to open every WordPress dashboard.
- You do not need SSH for every site.
You run one loop from the terminal, and InstaWP CLI sends the WP-CLI command to each site through the API.
Step 4: Use this for repeat maintenance tasks
This same pattern can be used for many recurring tasks. For example, you can:
- Check plugin versions.
- Update plugins.
- Flush cache.
- List users.
- Check site URLs.
- Run search-replace checks.
- Audit settings.
Then, run the WP-CLI command you need. This pairs the account bridge, where sites list --json enumerates your hosted fleet, with the WP-CLI bridge, where wp --api runs on each one. One terminal, one loop, every site you manage. A native flag to run a command on every site at once is on the roadmap, so for now this scripted loop is the way to do it, and it works today.
5. Spin up a real WordPress site for every pull request, created and destroyed by CI
Code review for WordPress has always had a gap. Reviewers can read a diff, but they cannot click the change. Shared staging turns into a bottleneck and “it worked when I tested it.” The CLI closes the gap.
Every pull request gets its own real WordPress site, provisioned headlessly from CI with a token, deployed with the branch, posted back as a link, and destroyed automatically when the PR closes. Instant provisioning and per-site daily billing make a real preview cost pennies and live only as long as the PR. This is the Git and CI/CD story, made real for WordPress.
Step 1: Install InstaWP CLI inside the CI runner
In your GitHub Actions workflow, install the InstaWP CLI.
npm i -g @instawp/cli@betaThis makes the CLI available inside the GitHub Actions runner. You also need to authenticate using an InstaWP token.
Usually, this token is stored as a GitHub repository secret, for example:
INSTAWP_TOKENThis allows the CI runner to create and manage InstaWP sites without anyone logging in manually.
Step 2: Create a preview site for the pull request
Next, create a new InstaWP site for the pull request.
instawp create --name pr-${PR_NUMBER} --jsonHere, PR_NUMBER is the pull request number. So if the pull request number is 42, the preview site can be named something like:
pr-42The --json flag returns structured output, which is useful because your CI workflow can read the site details and use them in the next steps. This creates a real WordPress site with a shareable URL.
Step 3: Push the branch changes to the preview site
After creating the preview site, deploy the branch files to it.
instawp sync push pr-${PR_NUMBER} --path ./wp-content/This pushes the relevant WordPress files from the pull request branch to the preview site. For example, if you are reviewing plugin or theme changes, the files inside wp-content can be deployed to that temporary site. Now the reviewer has a real WordPress environment where they can test the PR.
Step 4: Post the preview URL back to the pull request
Once the preview site is created, your CI workflow can post the site URL as a comment on the pull request.
This makes review easier. Instead of asking reviewers to pull the branch locally, set up WordPress, install dependencies, and test manually, they can click the preview link and test the change in a real WordPress site.
Step 5: Delete the preview site when the PR closes
When the pull request is closed or merged, delete the preview site.
instawp sites delete pr-${PR_NUMBER} --forceThis keeps your account clean and avoids keeping temporary sites active longer than needed.
Headless token provisioning, instant spin-up, and per-site daily billing make a real WordPress preview per PR economically trivial. It is a real server, not a static export, created and destroyed entirely from CI with no human in the loop. Read the official GitHub Actions docs if you want to wire the trigger to PR open and close events.
InstaWP CLI command reference
Here is a quick reference for the commands you will reach for most often. Every command accepts --json for machine-readable output, and the <site> argument accepts a numeric ID, a site name, or a domain.
| Command | What it does |
|---|---|
instawp login | Authenticate via browser, or add --token for headless use. |
instawp local create --name <name> | Create a free local Playground site (WASM PHP + SQLite). |
instawp local clone <site> | Clone a live cloud site down to a runnable local copy. |
instawp local push <site> | Push local changes up, auto-provisioning a cloud site if needed. Add --dry-run to preview. |
instawp create --name <name> | Create a real cloud site with SSL on infrastructure. |
instawp sites list | List every site in your account, ideal with --json. |
instawp sites delete <site> --force | Delete a site, used to tear down ephemeral previews. |
instawp exec <site> <command> | Run any shell command on a site via SSH, or add --api for HTTPS. |
instawp wp <site> <wp-cli> | WP-CLI shorthand that prepends wp. Add --api to skip SSH. |
instawp ssh <site> | Open an interactive SSH session, with keys managed for you. |
instawp sync push / pull <site> | rsync-based sync of wp-content between local and cloud. |
How the CLI fits the wider InstaWP platform
The CLI is not a separate product. It is a terminal-shaped door into the same all-in-one WordPress cloud platform that runs in the dashboard, organised around four workflows.
- Build. Instant environments for development, testing, and demos. The CLI’s
local createandcreatecommands are the scriptable version of the dashboard’s create a WordPress site flow, including the ability to create sandbox sites in seconds. - Host. Production cloud hosting with a global CDN, automatic SSL, a WAF, and automated backups. Sites you create from the CLI are real hosted sites, not throwaway demos.
- Manage. Remote management for any WordPress site through the InstaWP Connect plugin, plus uptime monitoring, scans, and client-ready PDF reports. The
sites listpluswp --apiloop is how you manage your WordPress site fleet from the terminal. - Sell. Launch your own hosting business with WaaS. Because site creation is fully scriptable, the CLI is a natural fit for automating the kind of provisioning that sits behind website reselling and helps agencies resell hosting at their own margins.
Sitting across all four is InstaWP’s AI layer. The CLI is the agent-and-terminal on-ramp, and InstaMCP is the conversational one: every site is Model Context Protocol ready with a single toggle and no server setup, connecting AI clients like Claude Desktop, Claude Code, Cursor, and others directly to a real WordPress install. Use the CLI when you want deterministic, scriptable commands, and InstaMCP when you want to talk to your site in natural language.
InstaWP CLI vs traditional local WordPress development
The clearest way to see what the CLI changes is to put the classic local stack next to it.
| Task | Traditional local stack | InstaWP CLI |
|---|---|---|
| Start a site | Install Docker or a stack, configure MySQL and PHP | One command, no Docker or MySQL |
| Pull a live site down | Export DB, import, search-replace URLs by hand | instawp local clone, conversion automatic |
| Run WP-CLI on a host | Find SSH details, set up keys, hope port 22 is open | instawp wp <site> ... --api over HTTPS |
| Manage many sites | Log in to each one separately | One scripted loop over the whole account |
| AI agent support | No clean machine-readable output | --json on every command, one token |
Conclusion
The InstaWP CLI takes the parts of WordPress development that used to demand a control panel, a local stack, or an SSH session and turns them into commands you can run, script, or hand to an AI agent. One binary bridges your agent, your laptop, WP-CLI, and your whole account to real, hosted WordPress, which means a prompt can become a live URL and a pull request can become a clickable preview. If you build, host, manage, or sell WordPress sites, it is the fastest path from idea to running site that does not ask you to set up a server first.
FAQs
Is the InstaWP CLI free?
The CLI itself is open source under the MIT license and free to install. Local development on WordPress Playground is completely free with no limits. Cloud site provisioning uses your InstaWP account, and new accounts get $25 in free credits to start. Cloud sites are billed pay-as-you-go, daily per active site, which is what makes ephemeral per-PR previews so cheap.
Do I need Docker or MySQL to use it?
No. Local sites run on WordPress Playground, which is PHP compiled to WebAssembly with a SQLite database. The only system requirement is Node.js 18 or higher. There is nothing else to install and nothing to uninstall later.
Can an AI agent like Claude Code use the InstaWP CLI?
Yes. Every command supports --json output and a single INSTAWP_TOKEN environment variable, which is exactly what AI coding agents and CI runners need to operate non-interactively. An agent can create a local site, build against it, provision a cloud site, deploy, and verify the result, all through CLI commands it runs itself. For a conversational, no-code path, pair it with InstaMCP.
How do I run WP-CLI without SSH access?
Add the --api flag to any instawp wp or instawp exec command. The command travels over HTTPS to the InstaWP API, which runs it on the site for you, so you do not need SSH keys, an open port 22, or a server login. This works inside locked-down VPNs and CI runners where SSH is blocked.
Can I use the CLI inside GitHub Actions?
Yes. Install the CLI in the runner, set INSTAWP_TOKEN from a repository secret, and it works headlessly. The common pattern is to create a real preview site named after the pull request, deploy the branch to it, post the URL back as a comment, and delete the site when the PR closes.
Create a free account, add a card for $25 in credits, and run npm i -g @instawp/cli@beta to get started in minutes.