To move WordPress from a local server to a live site, you copy the files, import the database, replace every localhost URL with the live one, then flush permalinks and caches. There are four ways to do it: push the site with InstaWP Connect, upload a ZIP export, transfer files and database manually over SFTP and WP-CLI, or run a migration plugin such as Duplicator. This guide covers all four, then shows how to fix the things that usually break afterwards.
- InstaWP Connect needs no public URL, no SSH and no port forwarding. The transfer starts on your machine and goes outbound.
- ZIP import is the quickest route and is capped at a 1 GB archive.
- Manual migration is the only method that gives you direct control of the database, and the one where serialized data gets corrupted if you use plain SQL find-and-replace instead of
wp search-replace. - Most post-migration failures are URL failures. Broken images, 404 permalinks, mixed-content warnings and the white screen almost always trace back to a URL that was missed or replaced badly.
- Never copy your local
wp-config.phpto the destination. It carries the wrong database credentials and will break the connection. - Develop on the cloud from the start and there is no migration step to get wrong.
Why Developers Build WordPress Locally
Before we get to how to move WordPress from a local server to a live site, it is worth being clear about why local WordPress development is still the default for so many developers and agencies. Local environments such as LocalWP, XAMPP, MAMP and WAMP remain the default for good reasons.
Benefits of Local WordPress Development
Standardized Environments
Ensures consistency across team setups.
Cost Savings
Eliminates hosting fees during development.
Version Control
Integrates with Git for code management.
Offline Capability
Allows development without internet access.
Safe Experimentation
Offers a disposable sandbox for testing.
Zero Latency
Provides instant server responses.
The problem is the handover. Everything you gain while building, you pay back at the moment you have to transfer WordPress from localhost to a server. That step is where projects break, and it is what the rest of this guide is about.
Move WordPress from a Local Server to Live Site: Best Methods Covered

Once your website is ready in LocalWP, XAMPP, MAMP or WAMP, the next step is moving it to a live hosting environment. The official WordPress guidance on moving a site covers the same ground at the core level. You can do that with an automated push, a direct ZIP import, a manual files-and-database transfer, or a migration plugin. The right choice depends on how big the site is, how comfortable you are with the command line, and how much control you want over the database.
| Method | Typical time | Skill needed | Size limit | What usually goes wrong | Best for |
|---|---|---|---|---|---|
| 1. InstaWP Connect push | 5 to 15 min | Beginner, one WP-CLI command | No ZIP limit | Closing the terminal mid-transfer | Most sites, and anything too big to upload as a ZIP |
| 2. ZIP import | 5 to 20 min | Beginner, no terminal | 1 GB archive | Refreshing the tab during upload | Small and mid-size LocalWP sites |
| 3. Manual transfer | 45 to 90 min | Advanced, SFTP plus WP-CLI | None | Corrupted serialized data, overwritten wp-config.php |
Developers who want control over the database |
| 4. Migration plugin | 20 to 40 min | Intermediate | 512 MB free tier on some plugins | Installer files left on the server | Moving to a host you do not control |
We will start with the simplest option for moving a local WordPress site to InstaWP.
Method 1: Push a Local WordPress Site to InstaWP Using InstaWP Connect
InstaWP Connect transfers a locally hosted WordPress site straight into your InstaWP account. The migration starts from your computer and sends the site data outbound, which is why your local website does not need a public URL, SSH access, port forwarding, temporary live hosting, or any manual database configuration.
The process moves your files and database, rewrites the site URLs, and creates a cloud-hosted copy in your account. It works with LocalWP, XAMPP, MAMP and WAMP.
The push works from localhost because of the direction the traffic runs. On your own machine the command zips the WordPress root and dumps the database. It creates the destination site in your InstaWP account through the API, then opens an outbound SFTP connection from your computer to that new site and uploads both archives. The server unpacks them and runs the restore. Nothing ever connects in to your machine, which is why your local site needs no public URL, no tunnel and no port forwarding.
wp --info.Step 1: Prepare Your Local WordPress Site
Start your local environment and confirm the site runs correctly before you begin. Check that:
- The frontend loads without errors.
- You can reach the WordPress admin dashboard.
- The themes and plugins you need are active.
- Images, menus, forms and key pages work.
- There are no pending database updates.
- You have a recent backup of the local site.

Step 2: Install InstaWP Connect
In your local WordPress dashboard, go to Plugins → Add New Plugin, search for InstaWP Connect, click Install Now, then Activate.

The InstaWP Connect menu now appears under Tools. Go to Tools → InstaWP and click Connect with InstaWP.

You may be asked to sign in to your InstaWP account. Review the requested access and click Approve.

Once approved, the local site is connected to your account. There is no API key to copy and paste.
Go back to Tools → InstaWP. The plugin shows the push command, wp instawp local push, with a copy button next to it.

wp instawp local push, not something generated per site, so there is nothing in it to get wrong. What ties the push to your account is the connection you approved a moment ago, which the plugin stored in the local database. Because it is a WP-CLI command it is identical on Windows, macOS and Linux. The only thing that changes between setups is how you get a shell with WP-CLI at the site root.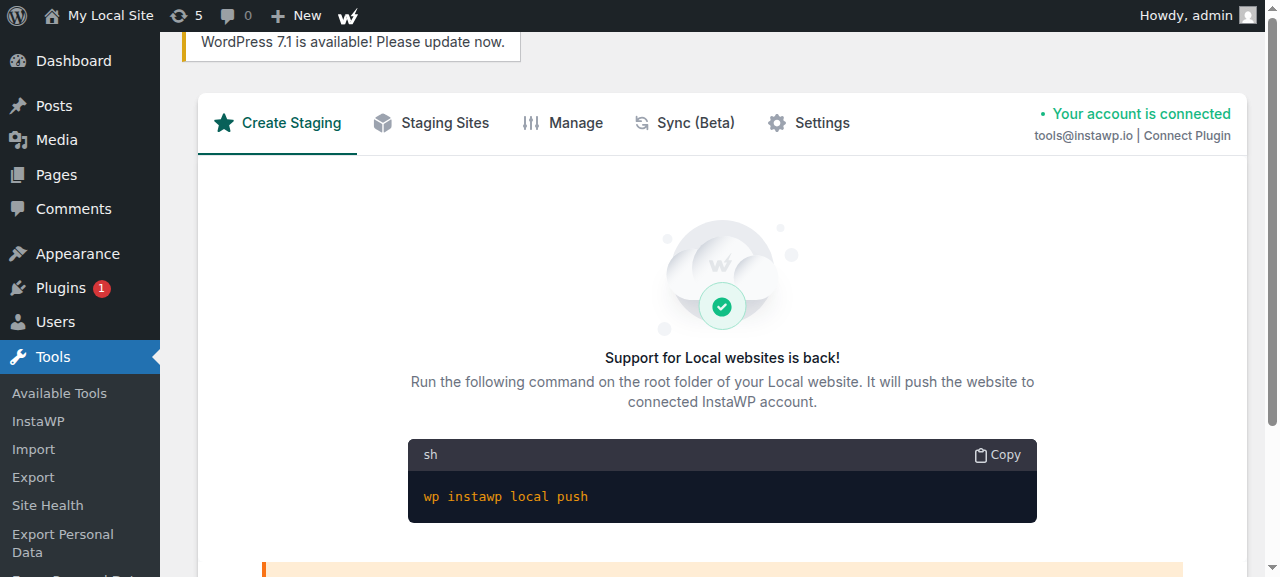
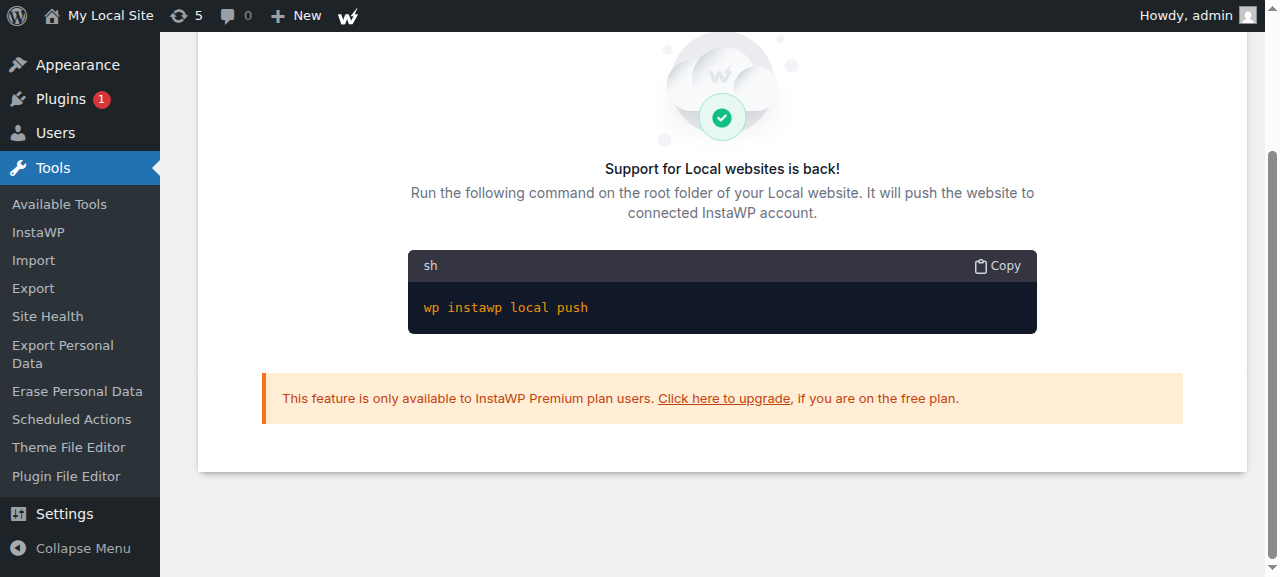
Return to your local development environment and select the site. Click Site Shell. That opens a terminal for that WordPress installation, which on Windows usually appears in PowerShell.

On XAMPP, MAMP and WAMP there is no Site Shell button, so you open a shell yourself, change into the folder that holds wp-config.php, and make sure WP-CLI is installed there. The folder sits in a different place on each stack:
- LocalWP (Windows and macOS): right click the site in LocalWP and choose Open Site Shell. It opens at the site root with WP-CLI already available, so nothing to install.
- XAMPP (Windows): open Command Prompt or PowerShell and run
cd C:xampphtdocsyoursite. Install WP-CLI first. - XAMPP (macOS): open Terminal and run
cd /Applications/XAMPP/htdocs/yoursite. Install WP-CLI first. - WAMP (Windows): open Command Prompt and run
cd C:wamp64wwwyoursite. Install WP-CLI first. - MAMP (macOS): open Terminal and run
cd /Applications/MAMP/htdocs/yoursite. If you use a custom document root, use that path instead. Install WP-CLI first. - A plain macOS or Linux setup: open Terminal and change into whichever directory holds
wp-config.php, for examplecd ~/Sites/yoursiteorcd /var/www/yoursite.
Run wp --info once you are in the right folder. If it prints a WP-CLI version and your site’s path, you are ready. If it says the command is not found, install WP-CLI before going further.
Paste the command and press Enter. The upload starts and a matching site is created in your InstaWP account. Because the transfer begins on your machine, the local site never needs to be reachable from the internet.
The terminal prints progress as it goes. Leave it open and keep the local site running until it confirms the process finished. How long it takes depends on the number of files, the database size and your upload speed. After the command completes:
- Sign in to your InstaWP dashboard.
- Open the Sites section.
- Find the newly created site.
- Wait until its status shows ready.
- Open the site, or use Magic Login to reach its WordPress dashboard.
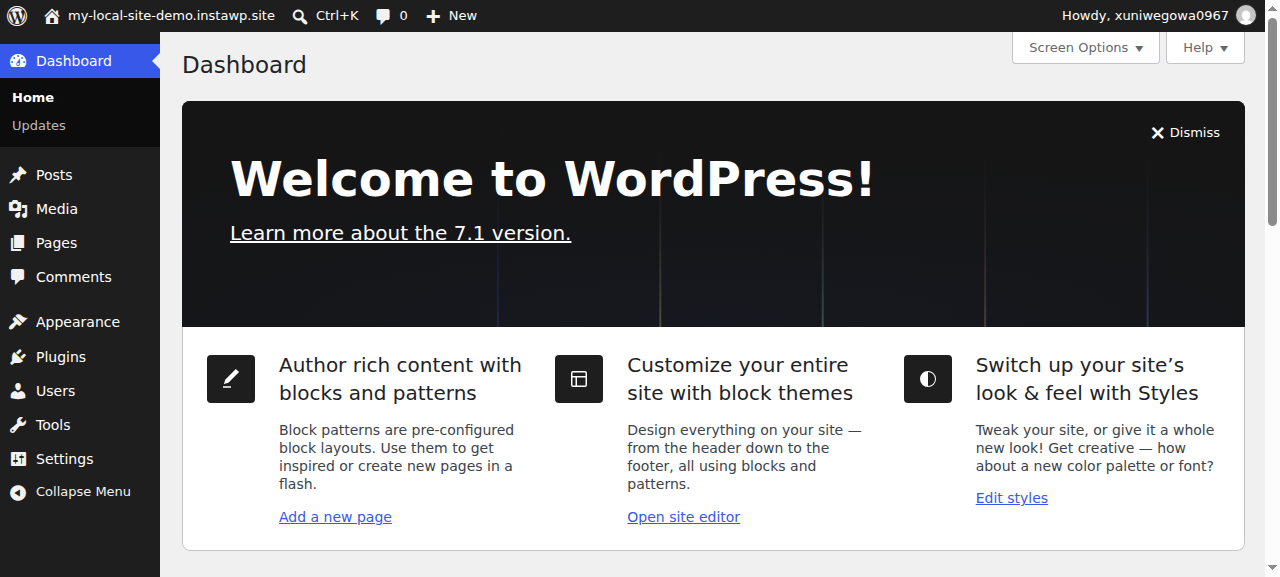
The push creates a new site in your account. It does not overwrite an existing destination site.
The restore rewrites your local URLs to the new site URL on the way in, including URLs stored inside serialized data, so you do not have to run a search and replace yourself. One check is still worth doing: open a page built with a visual builder such as Elementor or Bricks and confirm its images and links resolve. Builders store some settings as serialized objects, and a stale URL can survive there. If you find one, fix it in the builder and save the page.
Method 2: Import a Local Site Using a ZIP File
This method exports the site from your local environment and uploads it through the InstaWP dashboard. It needs no plugin, no terminal command, no SSH and no publicly reachable local URL. Check first that your exported ZIP is inside InstaWP’s current 1 GB upload limit. The walkthrough below uses LocalWP as the example.
Open LocalWP and select the site you want to move. Click Start Site and wait for it to come up. Right-click the site name, or use the three-dot menu beside it, and select Export.

Choose where to save the file and wait for LocalWP to build the archive. It packages the database, media, plugins, themes and the rest of your content into one ZIP. Leave it compressed, because you upload the ZIP itself to InstaWP.
Sign in to your InstaWP account, open the Sites page and click Import Site.

An import modal opens with the available backup sources. Open the drop-down and select Local WP.

That tells InstaWP how the archive was created and how to process it. Click the upload area, select the ZIP you exported from LocalWP, and choose the hosting plan you want the site to run on.

You can also drag and drop the file into the upload area. Wait for the upload to finish and do not close or refresh the tab while it runs. When the file is ready, click Next.
Now enter the details for the imported website. Give it a site name you will recognise in your dashboard, and pick a server location close to the audience or client the site is for. Review any remaining site or plan settings, then click Import Site.

InstaWP restores the files and database into the new cloud environment. The time it takes depends on the archive size and your connection. Keep the dashboard open until the status confirms the site is ready. Installation starts automatically once you submit the import.
When the import finishes:
- Return to the Sites page.
- Find the newly imported site.
- Open the frontend and confirm the website loads.
- Use Magic Login or the admin login option to get into WordPress.
Keep the original LocalWP site and its exported ZIP until you have finished checking the new one.
When to use this method
ZIP import suits you when you want a dashboard-based workflow and your export sits inside the upload limit. For larger sites, or when uploading a big archive is impractical, push the site with InstaWP Connect instead.
Method 3: Manually Migrate a Local WordPress Site to InstaWP
Manual migration gives you direct control over the files, the database and the URL replacement. Use it when you would rather work with SFTP, database exports and WP-CLI than an automated tool.
Step 1: Export the local database
Open the database manager your local environment provides. In phpMyAdmin, select the database your local WordPress site uses and click Export.

Select the Quick export method, choose SQL as the format, and download the .sql file.

You can do the same with WP-CLI:
wp db export local-site-database.sqlKeep the SQL file somewhere safe.
Step 2: Package the local files
Find the root directory of your local WordPress site. It normally contains wp-admin, wp-content, wp-includes, wp-config.php and index.php.
Compress the WordPress files into a ZIP or TAR archive, and leave the local wp-config.php out of it. The destination site already has a configuration file holding the database credentials InstaWP needs. You can also skip files that are no use on the live site, such as wp-content/cache, wp-content/updraft, wp-content/ai1wm-backups, error_log and debug.log.
Step 3: Create the destination site
Sign in to InstaWP and create a new WordPress site. Go to Sites, click Add Site, then choose From Scratch.

Worth reading alongside this: Create Site.
This new site is the destination. InstaWP builds a complete hosted WordPress environment, so there is no database to create by hand through cPanel. Copy the temporary InstaWP URL, because you will use it to replace the local URLs stored in the database.
Step 4: Connect over SFTP and upload the files
In the InstaWP dashboard, click the three-dot menu and select SFTP/SSH.

Turn on the SSH/SFTP toggle and copy the host, username, password and port shown.

The same credentials work for both SFTP and SSH. InstaWP supports clients such as FileZilla and Cyberduck. Open FileZilla, create a new connection, set the protocol to SFTP, enter the host, port, username and password from InstaWP, then click Quick Connect.

Once connected, find the WordPress root directory on the destination server and upload your archive there. Extract it over SSH or with the file manager, overwriting the existing WordPress files where needed.
wp-config.php. It holds the database connection details for the InstaWP environment. Uploading your local copy over it stops WordPress connecting to the destination database, which is the fastest way to land on an “error establishing a database connection” screen.Step 5: Import the database
You can import the database through InstaWP’s DB Editor, or over SSH with WP-CLI.

Step 6: Replace the local URLs
The imported database still points at your local address. Every reference to http://example.local has to become the InstaWP site URL. Use WP-CLI for this, because it handles serialized WordPress data safely. Preview the replacement first:
wp search-replace 'http://example.local' 'https://your-instawp-site-url'
  --all-tables-with-prefix
  --skip-columns=guid
  --dry-run
Read the results. If they look right, run it for real by dropping --dry-run:
wp search-replace 'http://example.local' 'https://your-instawp-site-url'
  --all-tables-with-prefix
  --skip-columns=guid
The WP-CLI search-replace command rewrites serialized PHP data correctly. A plain SQL find-and-replace does not, and it will corrupt the serialized settings stored by themes, widgets, page builders and plugins. Leave the guid column alone as well: WordPress treats it as a permanent identifier, not as the current permalink.
Step 7: Update home and siteurl, then flush
wp option update home 'https://your-instawp-site-url'
wp option update siteurl 'https://your-instawp-site-url'
Confirm both values came back as the destination URL:
wp option get home
wp option get siteurl
Then clear the cache and rebuild the rewrite rules:
wp cache flush
wp rewrite flush
If you would rather do the last step in the admin, go to Settings → Permalinks and click Save Changes without altering the structure. Finish by clearing any caching plugin the migrated site uses.
Method 4: Using Migration Plugins
If the manual route sounds tedious, a WordPress migration plugin automates most of it. Three are worth knowing for a WordPress local to live migration.
1. All-in-One WP Migration

All-in-One WP Migration is the simplest of the three, with over 5 million active installations. It packages the whole site, database, media, plugins and theme into a single .wpress file. You click export on the local site, download the file, and import it on the live server. No technical knowledge required.
The catch is size. The free version caps imports at roughly 512 MB, so a site with a substantial media library will hit that wall and need the premium extension to finish.
2. Duplicator

Duplicator takes a more transparent approach. Instead of a proprietary format it produces a standard ZIP archive of your files plus a standalone installer.php script, so you can inspect exactly what is being moved. The installer wizard walks through database configuration, URL replacement and validation, and it handles serialized data correctly.
It also runs a pre-migration scan that flags incompatible server configurations, oversized files and problematic plugins before you start.
3. Migrate Guru

Migrate Guru runs the migration in the cloud. Rather than downloading files to your computer and re-uploading them, it transfers the site from source to destination through its own infrastructure. That makes it a good fit for large sites, or when your connection cannot handle a multi-gigabyte upload. It supports one-click migration to most major hosts and handles sites up to 200 GB with no local storage needed.
The tradeoff is control. You are trusting the service to handle every step, and you cannot see inside the process the way you can with Duplicator.
The walkthrough below uses Duplicator, because it automates the parts that are easy to get wrong (serialized data, URL replacement, validation) while still showing you what happens at each step.
Step 1: Install and Activate Duplicator
In your local WordPress dashboard, go to Plugins → Add New, search for Duplicator, install the plugin by Snap Creek and activate it.

Step 2: Create a New Package
Go to Duplicator → Packages and click Create New in the top right.

Enter the details for your backup.

Duplicator runs a system scan that checks for large files, server compatibility and problematic plugins. Review any warnings and fix what needs fixing. In most cases you can carry on.

The scan finishes quickly and the backup is ready to build.

Click Build. Duplicator packages the entire WordPress installation, all files and the complete database, into a single archive.

Step 3: Download Your Package Files
When the build completes you have two files to download:
- installer.php, the standalone script that unpacks and configures your site
- archive.zip (or similar), your complete WordPress site in compressed form

Download both to your computer.
Step 4: Upload Files to Your Live Server
Using FileZilla, Cyberduck or your host’s file manager, connect to the live server and open your domain’s root directory, usually public_html or www. Upload both the installer and the archive there. Do not unzip the archive, because the installer does that itself.
Step 5: Create a Database on Your Live Server
The installer needs an empty database waiting for it. Log into your hosting control panel (cPanel, Plesk or similar) and:
- Create a new MySQL database and note the name.
- Create a new MySQL user with a strong password.
- Add that user to the database with all privileges.
Keep those credentials to hand, because the next step asks for them.
Step 6: Run the Installer Wizard
Open https://yourdomain.com/installer.php in your browser. The Duplicator wizard launches and runs in four stages:
Accept the terms and let Duplicator validate the archive, then click Next.
Enter the host (usually localhost), database name, user and password you just created, then click Test Database before you continue.
Duplicator detects the old localhost URL and the new live URL. Check both are right. The plugin handles every URL replacement, serialized data included.
The migration completes and you are prompted to log in. Use the WordPress admin credentials from your local installation.
Step 7: Clean Up
Once the site works, finish the job:
- Delete the installer files. Duplicator prompts you to remove
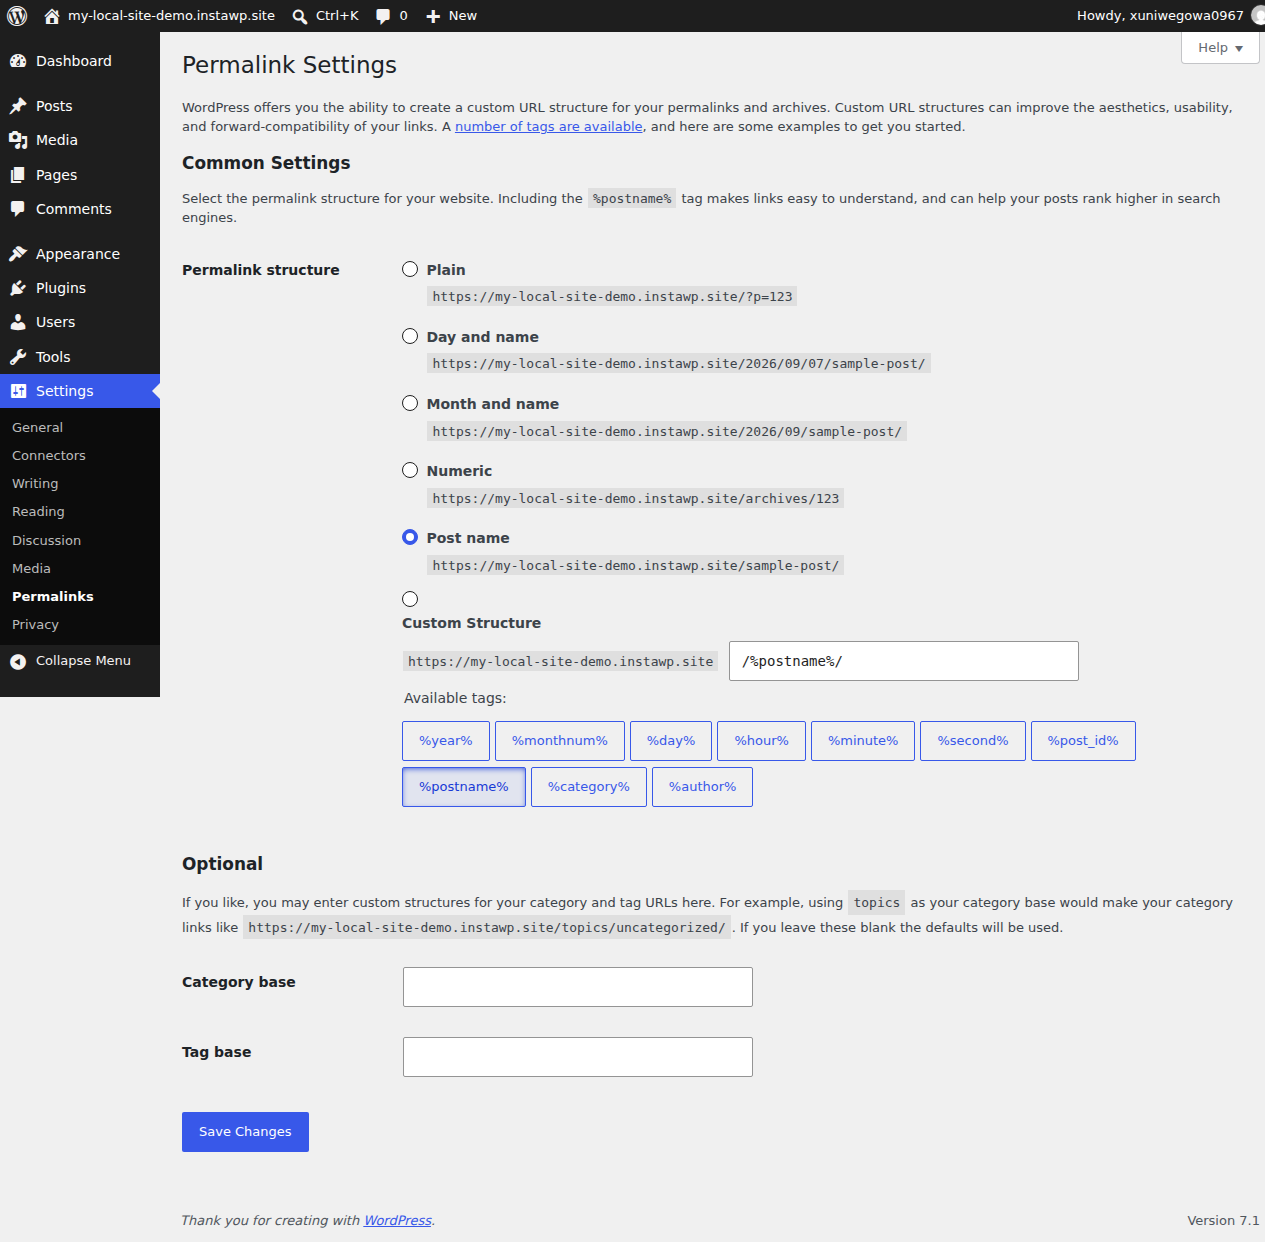
installer.phpand its related files. Do it straight away, because leaving them in place is a security risk. - Regenerate .htaccess. Go to Settings → Permalinks and click Save Changes.
- Test properly. Check pages, posts, images, forms and any custom functionality.
- Clear caches. If a caching plugin is running, flush it so visitors get the migrated site.
Duplicator Pro adds scheduled backups, cloud storage integration, multisite support and the ability to install into an existing WordPress installation, which is useful if you run migrations often.
After You Go Live: Fixing What Breaks
Most of the problems that appear straight after a migration come back to a URL that was missed or replaced badly. Work through them in this order.
| Symptom | Most likely cause | Fix |
|---|---|---|
| Images and internal links broken | Localhost URLs still in the database | Re-run wp search-replace with --all-tables-with-prefix |
| Page builder layouts scrambled | Serialized data corrupted by SQL find-and-replace | Restore the database and redo it with WP-CLI |
| Homepage loads, every other page 404s | Rewrite rules not rebuilt | Save permalinks again, or run wp rewrite flush |
| Padlock warning, assets blocked | Mixed content, http URLs on an https site | Search-replace http:// to https:// for your domain |
| Blank white screen | PHP fatal error or wrong file permissions | Enable WP_DEBUG, read the log, check directories are 755 and files 644 |
| Database connection error | Local wp-config.php overwrote the destination one | Restore the destination config file |
Broken images and internal links
If images fail to load and internal links still point at example.local, the replacement missed rows. WordPress stores URLs across many tables, and plugins add their own, so run the search-replace against every table with your prefix rather than just wp_posts. Check that you matched the exact local URL, including the protocol and any port number such as :10004, which LocalWP often uses.
Permalinks return 404 after migration
The homepage loads but every other URL 404s. That is the rewrite rules, not your content. Go to Settings → Permalinks and click Save Changes without altering the structure, which rebuilds .htaccess. On Nginx there is no .htaccess, so the try_files rule in the server block has to be right instead.
The white screen after migration
A blank page almost always means a PHP fatal error that is not being displayed. Set WP_DEBUG and WP_DEBUG_LOG to true in wp-config.php and read wp-content/debug.log. The usual culprits are a PHP version gap between local and live, a plugin calling a function the live PHP version removed, or a memory limit that is too low. If the site loads but behaves oddly, our guide on WordPress site not loading covers the wider set of causes.
How to change the WordPress site URL after migrating
If home and siteurl still hold the local address you will get redirect loops or be locked out of wp-admin. Fix them with WP-CLI as shown above, or add these lines temporarily to wp-config.php:
define('WP_HOME','https://yourdomain.com');
define('WP_SITEURL','https://yourdomain.com');
Remove them once the database values are correct, because leaving them in place makes the setting impossible to change from the admin later. If you land on a database error instead, our walkthrough for error establishing a database connection takes it from there.
Where Should the Live Site Actually Go?
The destination decides how much of the work above you have to do at all, so it is worth deciding before you start rather than after.
On traditional shared hosting you create the database yourself, set the PHP version by hand, request an SSL certificate, and fix file permissions after the FTP upload. Those four steps are where most of the failures in the table above come from.
On managed WordPress hosting the environment is built for you. InstaWP provisions the database, the PHP version, the SSL certificate and a working URL when the site is created, which is why Methods 1 and 2 above have no database step at all. You also get SFTP and SSH access, WP-CLI, a database editor, and automatic WordPress backups by plan, so the recovery path exists before you need it.
The Hidden Costs of Local-to-Live Migration
Migration is where WordPress projects break. You can spend weeks building a flawless site on localhost and watch it fall apart in an hour. Experienced developers hit these problems too, so it is worth knowing what you are up against.
Worth reading next: WordPress local development challenges and the alternative.
Database URL problems
The search-and-replace step looks trivial until you meet serialized PHP arrays. WordPress stores URLs inside them, one wrong character invalidates the whole array, and that data sits in theme options, widget settings, page builders and countless plugins. Some plugins store URLs with a trailing slash and some without, and an http reference on an https site produces mixed-content errors.
Environment mismatches
Your localhost runs PHP 8.2 and your host defaults to PHP 7.4, so the plugin that worked perfectly now throws fatal errors. MySQL version differences (strict mode in particular), PHP memory limits, maximum upload sizes and disabled PHP functions cause the same class of surprise.
File permission errors
Files uploaded over FTP often arrive with the wrong permissions. You will see a white screen, “installation failed: could not create directory”, media uploads that fail silently, or plugin and theme installs that will not complete.
Works locally, breaks live
Everything runs perfectly on localhost, then the live site shows missing images, broken internal links, CSS that will not load, 500 errors or redirect loops. Tracking those down can take hours, sometimes days. Add DNS propagation, SSL setup and testing to that, and a redesign launch carries a stretch where the site may be broken for real visitors.
A Better Approach for WordPress Development: Build on Cloud from Day One
There is a way to avoid all of this: do not move WordPress from local to live in the first place.
Instead of building locally and then transferring, you develop directly in a cloud environment. All-in-one cloud platforms such as InstaWP create a working WordPress site in seconds with your chosen PHP version, an SSL certificate and a shareable URL. You configure no server, install no XAMPP or MAMP, and open the site from any browser.
Building WordPress on cloud changes four things:
- No migration required. Your development site and your live site are the same kind of environment, so going live is a deployment rather than a migration.
- Consistent environments. The PHP and MySQL versions that run your staging site run production too, which removes the “works on my machine” class of bug.
- Instant sharing. Client feedback needs a link, not a local tunnel or a throwaway server.
- Built-in staging. Clone a site, take a snapshot, roll a change back, none of which touches your machine. If you want to try this before committing, a WordPress sandbox takes seconds to create.
The tradeoff developers expect
When developers hear “cloud-based development” they usually raise the same four objections. They want VS Code with their own extensions. They want Git version control on their theme files. They find editing through the WordPress admin too slow for real work. And they need to work offline sometimes.
Those are fair. Editing code through a dashboard or a web file manager cannot match a proper IDE for search across files, syntax highlighting, linting and keyboard shortcuts. That is the reason InstaWP built Local Mount.

With Local Mount your cloud-hosted InstaWP site appears as a folder on your computer. Open it in Finder or File Explorer and the whole WordPress file structure is there: wp-content, wp-config.php, themes, plugins. Edit a file in VS Code and save it, and the change is live on the cloud site straight away, so there is no upload step to remember and nothing to migrate later.
You keep managed cloud hosting with its consistent environments and shareable URLs, and you keep local file access with your own IDE and tooling. The walkthrough below shows it running on macOS, Windows and Linux.
How Local Mount Works
Local Mount uses standard network file sharing to expose your InstaWP site’s filesystem to your operating system. When you enable it, InstaWP gives you a server address, a username and a password. Your computer mounts that as a network drive on Windows or a network volume on macOS and Linux, and from then on the files behave like local ones.
drive
“Connect to Server”
or `sshfs`
Getting started with Local Mount
The prerequisites are below.
Step 1: Enable Local Mount in InstaWP
Open the Sites page in your InstaWP dashboard and click your site to open its settings.

Select Local Mount in the left panel and switch Enable Mount on, then copy the server address, username and password shown.

Step 2: Connect from Your Computer
On Windows, open File Explorer, go to This PC and click Map Network Drive in the toolbar.

Paste the server address into the Folder field and click Finish, then enter the username and password from InstaWP. Tick “Remember my credentials” if you want to skip that next time. Your site now shows up as a drive letter under This PC.

On macOS, open Finder and choose Go → Connect to Server, or press Command K.

Enter the server address with https:// in front of it.

Click Connect and enter the username and password from InstaWP. Your site appears in the Locations sidebar in Finder.

On Linux, use your file manager’s Connect to Server option, or mount it from the command line:
sshfs username@host:/remote/path /local/mountpointMove into the mounted folder and you will find the usual WordPress structure: wp-admin/, wp-content/, wp-includes/ and wp-config.php. Open wp-content/themes/your-theme/ in your IDE and start working. Every save syncs.
Manage the Live Site With AI After Launch
Launching the site is a one-off task. Updating content, plugins and users afterwards carries on for as long as the site exists.
Once the site is running on InstaWP, InstaMCP makes it MCP-ready with a single toggle. You do not set up a server, write a JSON config file or generate an application password. From there an AI client such as Claude Desktop, Claude Code, Cursor, ChatGPT or VS Code can work on the site through prebuilt tools for posts, pages, media, users, comments, categories and plugins. Our guide to the WordPress MCP server explains how the connection works.
InstaMCP does not perform the migration for you. Use one of the four methods above to get the site live, then use InstaMCP to manage it once it is running.
Conclusion
Building locally and then migrating made sense when cloud tooling was limited. It is still the step in the process most likely to fail, and it fails at the point where the site is meant to go in front of real visitors.
If you have to move an existing local build, use Method 1 or Method 2 and work through the troubleshooting table before you point the domain. If you are starting something new, consider building it on the cloud instead, so there is no migration to get wrong.
Four routes get a local site live: InstaWP Connect for a push with no public URL, ZIP import for anything under 1 GB, manual transfer when you want control of the database, and a migration plugin when the destination is a host you do not control. Whichever you pick, the failures afterwards are nearly always URLs, so work the troubleshooting table before you point the domain.
FAQs
Why do my images and links break after moving WordPress from localhost?
Because the database still holds the old localhost URLs. WordPress stores them across many tables, including inside serialized arrays used by themes, page builders and plugins. Run u003ccodeu003ewp search-replaceu003c/codeu003e with u003ccodeu003eu002du002dall-tables-with-prefixu003c/codeu003e and u003ccodeu003eu002du002dskip-columns=guidu003c/codeu003e, and match the exact local address including any port number.
How do I change the WordPress site URL after migration?
Update both values with u003ccodeu003ewp option update homeu003c/codeu003e and u003ccodeu003ewp option update siteurlu003c/codeu003e, then confirm them with u003ccodeu003ewp option getu003c/codeu003e. If you cannot reach wp-admin at all, define u003ccodeu003eWP_HOMEu003c/codeu003e and u003ccodeu003eWP_SITEURLu003c/codeu003e temporarily in u003ccodeu003ewp-config.phpu003c/codeu003e, fix the database values, then remove those lines.
Why do my permalinks return 404 after moving to a live server?
The rewrite rules did not come across. Go to Settings and then Permalinks and click Save Changes without altering the structure, which rebuilds u003ccodeu003e.htaccessu003c/codeu003e. On Nginx there is no u003ccodeu003e.htaccessu003c/codeu003e, so the try_files directive in the server block has to be configured correctly instead.
What causes the white screen after a WordPress migration?
A PHP fatal error that is not being displayed. Set u003ccodeu003eWP_DEBUGu003c/codeu003e and u003ccodeu003eWP_DEBUG_LOGu003c/codeu003e to true and read u003ccodeu003ewp-content/debug.logu003c/codeu003e. The common causes are a PHP version gap between local and live, a plugin using a function the live PHP version removed, a memory limit that is too low, or file permissions that are not 755 for directories and 644 for files.
Do I need a migration plugin to move a local site live?
No. A plugin automates the file transfer and the URL replacement, but you can push the site with InstaWP Connect, upload a ZIP export, or move the files and database yourself over SFTP and WP-CLI. Plugins are most useful when the destination is a host you do not control.
Can I move a local WordPress site without touching the database?
Not with a manual transfer, because the database holds your content and every stored URL. Automated methods do the database work for you: InstaWP Connect and the ZIP import both move the database and rewrite the URLs, so you never open phpMyAdmin.
Is Local Mount secure?
Yes. Local Mount uses HTTPS for encrypted data transfer. Your credentials are unique to your site and can be regenerated by toggling the feature off and on. Disconnect the drive when you are not using it, especially on a shared computer.
Does Local Mount work with all InstaWP plans?
Local Mount is available on Starter plans and above. Each team member can mount the same site on their own computer, and changes made by one person appear for everyone.


