Caching is a high-speed storage system that temporarily stores frequently accessed data to enable faster retrieval and access than accessing the primary storage location. A Cache works as a middleman between the application and the data storage system, allowing for quick access to data without the need to repeatedly fetch the same data from the primary storage location.
Caching is also an essential practice in web development because it is used to enhance the speed of web pages by storing frequently accessed data in the user’s browser or on a server. These data may include but are not limited to images, CSS files, script files, etc.
Caching implementation can be based on different approaches that a developer decides to take. Although caching is a general concept, some of its implementation approaches stand out and they are client-side caching, database caching, and server-side caching. Their use case and technology also vary.
Now that we understand the general concept of caching, let us see what caching is in WordPress.
What is Caching In WordPress?
Caching in WordPress is the process that temporarily stores website data such as images, JavaScript, and web pages so that they can be quickly retrieved and served to website visitors on subsequent requests.
Types of Caching In WordPress
Caching in WordPress is of different types with each having its own benefits and drawbacks.
The most common types of caching for WordPress are page caching, object caching, and database caching.
Page caching stores the entire output of a page as a static HTML file, while object caching stores the results of expensive database queries or API responses in memory.
Database caching, on the other hand, caches the results of database queries to reduce the number of queries needed to generate a page.
Why Caching In WordPress Is Important?
In WordPress, caching is a crucial tool for developers to achieve significant performance improvements on their websites. By caching frequently accessed data, such as images, scripts, and web pages, WordPress can reduce the time it takes to generate pages and serve content to website visitors.
With caching implemented, the website can load faster and more efficiently, resulting in a better user experience and improved search engine rankings. Caching is particularly important for dynamic WordPress sites, where content is frequently updated and generated on-the-fly.
WordPress caching can be implemented in several ways, including using caching plugins, leveraging server-side caching solutions, or utilizing a content delivery network (CDN) such as Cloudflare to cache and serve static content from a network of distributed servers.
How To Set Up Caching In WordPress?
Implementing or setting up caching in WordPress can be confusing if you a not doing it the right way and sometimes you can run into inherent challenges associated with setting up caching for WordPress. However, this article will guide you on a step-by-step of how to set up caching in WordPress.
The Prerequisites
Before setting up your caching, make sure to answer the following questions:
- What type of caching do you need for your specific website
Website specificity is something you should consider before choosing the type of caching that you will need to implement.
To determine which type of caching is best for your website, you should consider factors such as your website’s traffic levels, the types of content you are serving, and the performance issues you are experiencing.
For example, if your website receives high levels of traffic and you are experiencing slow page load times, page caching may be the best option. If you are experiencing performance issues with specific database queries or API responses, object caching may be the best choice.
- Is Your Hosting Supported?
The kind of hosting you use for your website is crucial in determining what caching you can implement. Ensure you check with your hosting to be sure if their environment is optimized for caching.
- Is Your WordPress Set Up Compatible?
Think of your plugin, theme, WordPress version, PHP version, and ask if they are up to date and set up to meet your caching choice. InstaWP provides a staging environment where you can experiment with versioning and implement your caching setup before deploying your website live.
- Do you know the contents to exclude?
Not all content on your website necessarily needs to be cached. Such pages displaying personalized or dynamic content are examples of pages that don’t need to be cached.
Having ensured you have all these areas covered, you can move on to set up caching for your WordPress.
Step 1: Use A Caching Plugin
Using a caching plugin is the easiest way to set up caching in WordPress. There are several caching plugins available, both free and premium, that can help optimize your website’s performance by caching pages, objects, and other files to reduce load times. Install any of the compatible plugins of your choice and activate them.
Most caching plugins will automatically enable page caching, which is the most common type of caching used in WordPress. You can adjust the cache expiration time and other settings in the plugin’s configuration to optimize performance if you need to.
Step 2: Configure Page Caching
By configuring page caching, you are configuring the most common setting in WordPress caching. You can enable page caching in your caching plugin settings and adjust the expiration time to determine how long pages should be cached before they are regenerated.
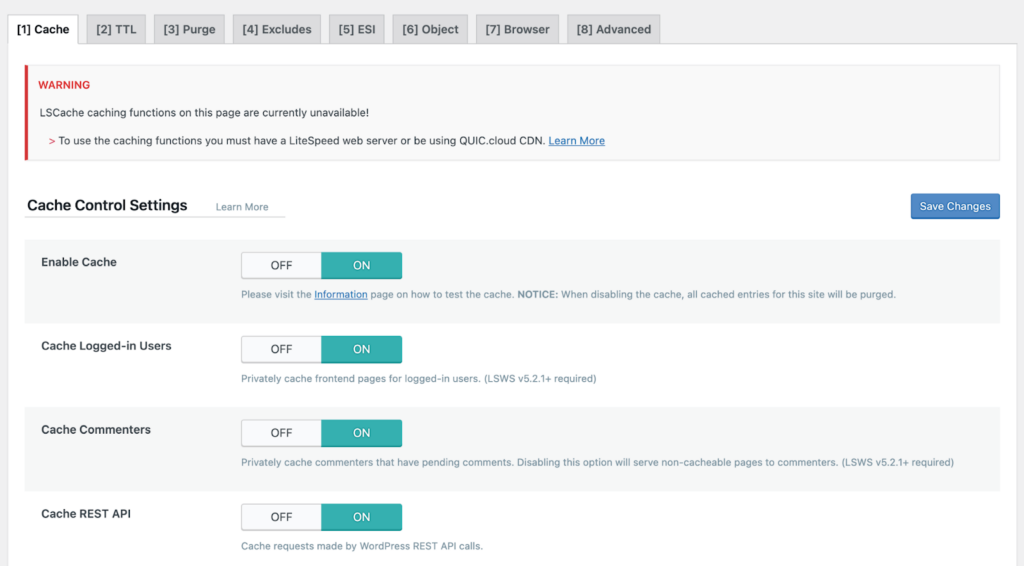
Enable and save your changes. You should also consider enabling object caching for your WordPress website because it can further speed up your website by caching database queries and other objects in memory. If your caching plugin supports object caching, enable it and adjust the cache expiration time.
Step 3: Configure Browser Caching
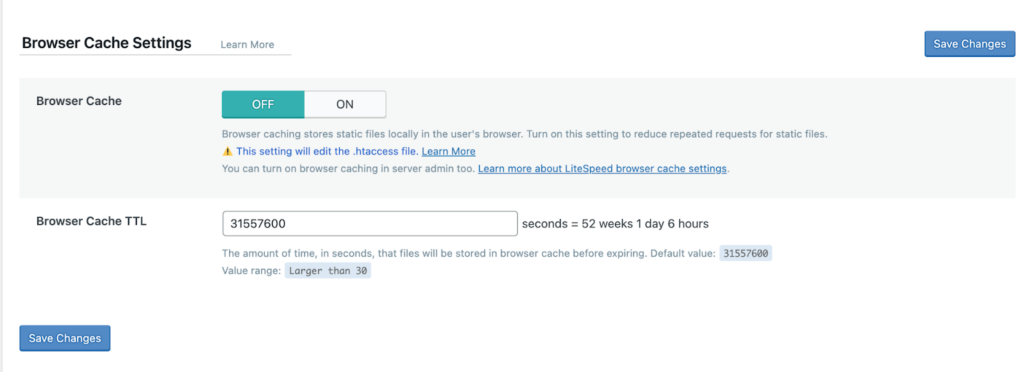
To optimize your website’s performance, adjust the browser caching settings in your caching plugin to enable visitors’ browsers to store certain files, such as images and CSS, in their cache. This ensures that these files don’t need to be downloaded every time the page is loaded.
To do this, navigate to your caching plugin’s configuration settings and locate the browser caching section. Adjust the cache expiration time and which files are cached based on your website’s needs and the types of files that are frequently accessed.
By optimizing the browser caching settings in your caching plugin, you can significantly reduce load times and improve the overall user experience for your website visitors.
Other Methods To Set Up Caching
The other methods with which you can use apart from plugins to set up caching for your WordPress are:
- Content Delivery Network (CDN): A CDN is a network of servers that are strategically located around the world to deliver content to users from the server closest to them. By using a CDN, you can reduce the load on your server and improve page load times. Some CDN providers also offer caching features that can further optimize your website’s performance. Cloudflare is a good example of a CDN provider that is free and easy to set up for WordPress.
- Server-Level caching: Server-level caching is a type of caching that is handled at the server level by your web hosting provider. This means that your server is configured to store frequently accessed content in cache memory, which can significantly improve your website’s performance and speed. Some popular web hosting providers that offer server-level caching options include Siteground and WP Engine
- Code The Caching: Thanks to WordPress itself for providing built-in support for code-level caching through the use of caching functions such as WP_CACHE and WP_MEMORY_CACHE. This type of caching can be implemented through custom code or by using a caching plugin that supports code-level caching.
How InstaWP Can Help Set Up Caching In WordPress?
After setting up caching for your WordPress site, ensure that you test the caching before deploying it on a live website. This is where a staging environment comes into play.
InstaWP is a game changer in this regard, providing a sandbox area for you to implement a critical feature like caching. Test your caching setup in InstaWP staging environment to ensure that it is working as expected and not causing any issues or conflicts.
Maintenance is the next important factor you should consider after setting up caching for your WordPress website. Why is maintenance important? It has been stressed over time how maintaining your website will continue to ensure security and workability.
Well, in addition to that regularly monitor your website’s caching performance and make adjustments as needed to ensure optimal performance. This may include clearing the cache when content is updated, adjusting cache settings based on changing traffic levels, and upgrading your caching solution as needed.
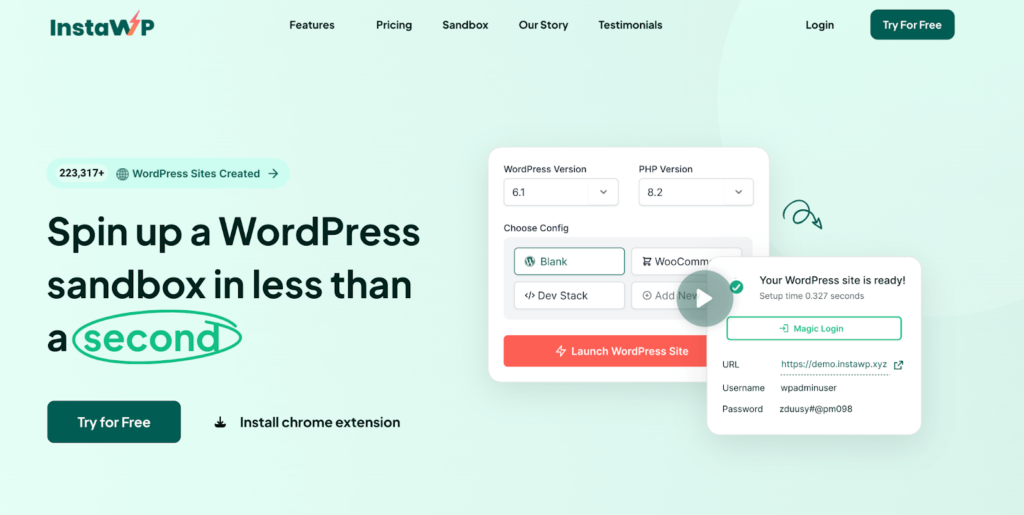
Your instaWP staging environment will ensure safer configuration, thorough testing, and ongoing maintenance of your Caching in WordPress so that you can tackle the challenges that may arise from implementing caching in your WordPress
Conclusion
For WordPress websites, there are several ways to implement caching, including using caching plugins, server-level caching, and content delivery networks. Choosing the right caching method depends on your website’s needs and technical capabilities. By setting up and optimizing your website’s caching settings in InstaWP staging environment, you can control the testing and maintain your website while enhancing your visitors’ browsing experience and improving your website’s search engine rankings.
