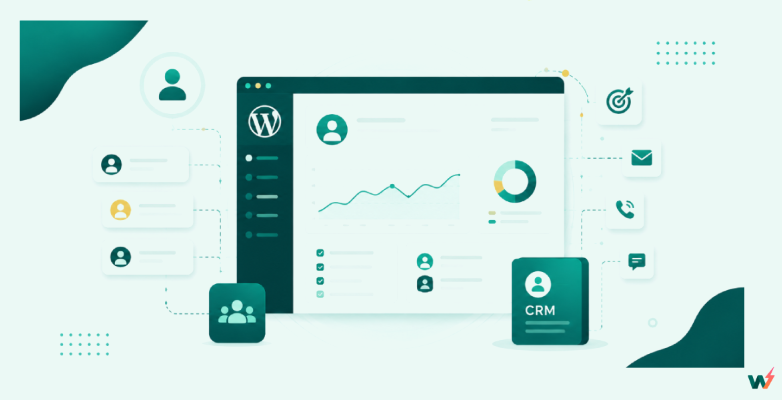
If you’re building and launching sites with WordPress, you know that a WordPress staging site is your safe space for testing. This private copy of your live website is crucial to try new themes, update plugins, or experiment with custom code without risking downtime or breaking anything visitors see.
Many WordPress hosting providers with staging make the process of creating a WordPress staging environment, and Bluehost is one of them.
In this guide, we will explore what a Bluehost staging site is, the key features it offers, the limitations that developers often encounter, and why many professionals prefer using a more flexible staging solution.
Table of Contents
What is a Bluehost Staging Site
A Bluehost staging site is a cloned version of your live WordPress site that exists in a separate environment. It allows you to make design changes, test plugin updates, or adjust settings without affecting your visitors. When everything is ready, you can push the changes from the staging environment to your live site with a single action.
Bluehost’s staging feature is available primarily on its WordPress hosting plans and is aimed at making the update process safer for non-technical users. The process creates a duplicate of your site on the same hosting server, giving you a sandbox to work in without worrying about real-time user activity.
However, unlike independent staging platforms, the Bluehost staging site is tied directly to its hosting infrastructure. This means the staging copy uses the same server resources as your live site, and the feature may not be available on all plans. While it works for simple testing needs, developers working with multiple sites or more complex setups may find it restrictive.
Must Read: How to Create a Staging Site for Your WordPress Website
Key Features of Bluehost Staging Site
If you host your WordPress site with Bluehost, you get access to its built-in staging feature. This is designed to let you safely test updates, design tweaks, or plugin changes before deploying them to your live site. Here’s what it offers:
- From the Bluehost control panel, you can duplicate your live WordPress site into a staging environment with a single click.
- Bluehost staging sites are created on a subdomain of your existing domain (e.g., staging.yourdomain.com), keeping test changes separate from the live site.
- When your changes are ready, you can push the WordPress staging site back to live, replacing both files and the database in a single action.
- Bluehost integrates staging controls directly inside the WordPress admin bar, making it easier to switch between environments.
- Your staging copy includes all site files and a cloned database, so you can test updates on a full replica of your live site.
- Bluehost applies Let’s Encrypt SSL to staging sites, ensuring secure access during testing.
- The WordPress staging interface is straightforward, making it suitable for site owners without deep technical expertise.
How to Create a Bluehost Staging Site
If your WordPress site is hosted with Bluehost, you can use its built-in staging feature to clone your site into a private testing environment. This lets you test new themes, plugins, or custom code changes without affecting your live visitors. However, remember, this feature only works if your hosting plan supports staging, and it’s tied to Bluehost’s servers.
Go to Bluehost.com and log in to your hosting account. In the dashboard, find the “My Sites” tab or directly open your WordPress dashboard from the hosting panel.
Inside your WordPress dashboard, you’ll see a “Staging” option in the admin bar (added by Bluehost’s plugin integration).

Click on Staging → Create Staging Site to start the process.

Bluehost will automatically create a copy of your entire site, including the database and files. You don’t get to pick specific files or database tables; it’s always a full clone.
Depending on your site’s size, the process can take a few minutes. Once done, you’ll see a notification that your staging site is ready.
Your staging site will be hosted on a temporary subdomain like staging.yoursite.com. You can make any changes here; install new plugins, test code snippets, or tweak your theme design.
When you’re satisfied with the updates, click Push to Live. Bluehost replaces your live site with the staging version in one go. This means you can’t push only certain changes; it’s all or nothing.
💡 Pro Tip: Always double-check backups before pushing to live, as Bluehost doesn’t allow partial deployments like some advanced staging tools do.
Limitations of Bluehost Staging Site
While Bluehost’s staging feature is handy for quick tests, it comes with several limitations that developers and agencies need to be aware of:
- The staging tool only works if your site is hosted on Bluehost. If your site is hosted elsewhere, there’s no native way to use their staging system. Developers working with multiple hosting providers or client sites will find this restrictive.
- You have no granular control over PHP workers, memory limits, or CDN configuration in the staging environment. This means you can’t always test performance optimizations under production-like conditions.
- Bluehost allows only one staging copy per site. You can’t create multiple variations of staging sites for different testing purposes, which limits flexibility for teams running concurrent experiments.
- All staging sites are tied to a subdomain of your main domain. This can make it harder to test certain domain-sensitive configurations, especially for multisite setups or domain mapping.
- If you’re a freelancer or agency working on a site that’s not yet live on Bluehost, you can’t spin up a staging version using their system. You’d need to migrate the site to Bluehost first, adding extra time and complexity.
- The push-to-live process overwrites both files and the database entirely. Without a manual backup before pushing, there’s a risk of losing recent live site changes if multiple people are working in parallel.
- There’s no built-in feature for maintaining multiple restore points or easily rolling back to earlier staging states beyond the single pre-push backup.
InstaWP: A Better Alternative to Bluehost Staging Site
InstaWP is an all-in-one WordPress cloud platform that enables its users to create WordPress staging sites without locking them to a single hosting provider, like Bluehost.
Whether you’re using the managed WordPress hosting of InstaWP or not, you can create WP staging environments in under a minute using its free WordPress staging plugin, InstaWP Connect plugin.
Did You Know?
With InstaWP, you can create unlimited WordPress staging environments without moving your live site. This means no migration headaches, no waiting for DNS propagation, and no dependency on where your site is hosted.
Here’s why developers and agencies prefer InstaWP over Bluehost staging:
- Work with clients on different hosting providers? No problem. InstaWP works seamlessly whether your site is on Bluehost, SiteGround, Kinsta Hosting, or even a self-managed VPS.
- Run A/B testing, plugin experiments, and theme redesigns at the same time. You’re not limited to a single staging version like you are with Bluehost.
- InstaWP lets you tweak PHP versions, workers, memory limits, and even enable CDN and security settings to match your production environment more closely.
- Connect your live site and spin up a staging copy in under 2 minutes. No domain subdomain configurations, no waiting on hosting-side processes.
- Every staging site can have multiple snapshots. If something breaks during testing, you can roll back instantly without affecting your live site.
- Save a staging site as a reusable template, perfect for agencies onboarding new clients or building similar project types.
- Push only the changes you’ve tested, whether that’s files, database, or both, without overwriting fresh updates made to the live site using its 2 Way Sync feature.
If you’re tired of hosting lock-ins, InstaWP is the way out. Create, test, and launch confidently without moving your site from its existing home.
The table below will help you understand the advantage InstaWP has over Bluehost when it comes to creating staging sites for WordPress.

How to Create a Staging Site with InstaWP
As we’ve already mentioned, InstaWP lets you create a staging site for WordPress regardless of where your live site is hosted. That means you can keep your production site on any host, install the free InstaWP Connect plugin, and instantly spin up a secure staging environment. Here is how you can do it.
Go to InstaWP.com and create a free account. The dashboard is browser-based, so there’s no software to install.
From your WordPress dashboard, search for InstaWP Connect in the plugins directory, install it, and link it to your InstaWP account. If you’re already an InstaWP user, you don’t even need to log in to the WP admin; you can use WP-CLI or the Bulk Edit feature from the InstaWP dashboard to install this or any other plugin or theme directly.

Approve the connection and let your live site connect with your InstaWP account. This connection allows you to create a staging site directly from your live site, no matter where it’s hosted.

Click Create Staging from either the InstaWP dashboard or the plugin interface. Within seconds, your staging environment will be live, complete with:
- Valid SSL certificate (no www/non-www mismatch issues)
- Isolated sandbox to test without affecting your live site
- Full control over PHP versions, WP-CLI, and other server settings
InstaWP staging sites run on optimized cloud servers with developer tools built in. You can:
- Test code changes without impacting live traffic
- Use Local Mount to sync changes from your desktop instantly
- Save the staging environment as a reusable template for future projects
When ready, use Migrate to deploy your changes from staging to production. Unlike Bluehost, InstaWP allows partial or selective push (files only, database only, or both), so you can merge updates without overwriting unrelated live content.
Did You Know? InstaWP uses a pay-as-you-go WordPress model for staging environments. Spin up a staging website WordPress project only when you need it, then delete it to stop paying; perfect for agencies managing multiple client sites.
Choosing the Right Way to Create a WordPress Staging Site
While Bluehost’s staging tool is convenient if your site is hosted on their platform, it’s limited to that environment. If you ever switch hosts or need to collaborate across different hosting setups, you’ll have to rethink your entire staging workflow.
With InstaWP, you’re free from hosting lock-in. You can create a staging site for any WordPress installation, regardless of where it’s hosted. You can save staging sites as reusable templates, share them with your team, and push changes to live with one click. It’s the kind of flexibility developers, agencies, and freelancers need in 2026 to work faster and smarter.
Why limit your development workflow to one hosting provider’s boundaries? Create your first InstaWP staging site today and see how effortless WordPress development can be, whether your site is hosted on Bluehost, another provider, or even locally.
Sign up for free and start staging smarter.
FAQs
1. Does Bluehost offer a staging site feature?
Yes, but it’s available only for sites hosted on Bluehost. If your site is hosted elsewhere, you can’t use their staging tool.
2. Can I create a staging site for a Bluehost-hosted WordPress site using InstaWP?
Absolutely. Simply install the free InstaWP Connect plugin on your Bluehost WordPress site, link it to your InstaWP account, and create a staging copy in minutes.
3. What’s the biggest difference between Bluehost staging and InstaWP staging?
Bluehost staging is tied to Bluehost hosting, while InstaWP works with any host. Plus, InstaWP lets you save staging sites as templates, collaborate with teams, and push changes instantly.
4. Can I use InstaWP to test on a temporary site before going live?
Yes. InstaWP lets you create temporary or permanent staging sites for plugin/theme testing, security updates, and design changes without touching your live site.
5. Is InstaWP free?
Yes. You can start with the free plan, which includes staging site creation, and then upgrade to pay-as-you-go or higher plans for more advanced features like 2-way sync, reusable templates, and increased resource allocation.