A WordPress child theme, as the name implies, is an offspring of its parent (theme). It inherits the functionality and traits from its parent theme.
WordPress child themes provide a way for developers to modify or customize the appearance and functionality of a parent theme without directly altering its core files.
Table of Contents
This article has hand-picked 10 expert tips for creating WordPress child themes as a developer. So read along.
Understanding Parent Theme and Child Theme in WordPress
As a developer, you may have encountered various themes in your work. Oftentimes, theme developers offer a convenient way to generate WordPress child themes based on their parent themes when you need to make customizations. Let’s provide an overview.
- Parent Theme In WordPress
The parent theme provides the core functionality, design, and templates for your WordPress website. That is the theme you will be customizing indirectly through the child theme. To keep it precise, it serves as the foundation of the child theme.
WordPress themes are in thousands and have been provided by theme developers over the years. A lot of these themes are free for testing and setting up your website quickly as a developer when you are testing for functions and features. What better way to do it than an integrated WordPress staging environment with a one-click setup like InstaWP?
Find a few awesome WordPress Theme demos here.
- Child Theme In WordPress
The child theme and parent theme are related; one is genetically spun from the other. This means that you can’t have a child theme without its parent. For customizing a WordPress theme, creating its child is standard practice and has multiple benefits.
Why Do You Need A Child Theme?
Using a child theme is a best practice in WordPress development as it allows you to maintain the original theme’s integrity while still having the flexibility to customize and extend its functionality.
With its presence, you to maintain the integrity of the main/parent theme and saves your customizations/efforts from being overridden.
A child theme allows you to have the best of both worlds. You can customize the appearance and features of your website, while you also have the ability to update the parent theme for security/enhancement reasons.
Demerits of Not Using a Child Theme for Your Live Site
While there are numerous advantages to utilizing a child theme in your WordPress development project, there are also significant consequences if you choose to forgo its usage. As a developer, adopting a child theme doesn’t impose any additional costs upon you. However, not implementing a child theme could potentially lead to costly repercussions. Let’s delve into the reasoning behind this.
- Customization Loss: You can lose customization if you directly modify the parent theme instead of using the child theme. All changes are overwritten when the parent theme is updated.
- Issues With Maintenance: Without the child theme, maintenance becomes complicated and difficult. For example, you would create avoidable complications when updating your theme the moment you decide not to use a child theme.
- Security Lapses: When you don’t update your WordPress site because of the fear that you may lose all the hard work and time you put into the recent changes you made, you run into a bigger risk of exposing your website to attacks associated with outdated themes.
How to Create a Child Theme in WordPress Without a Plugin
Creating a child theme manually is simple. Follow these steps:
- Create a New Folder: Go to
wp-content/themesand create a new folder namedyour-child-theme. - Create a style.css File: Inside your child theme folder, create a
style.cssfile. Add the following header:/* Theme Name: Your Child Theme Template: parent-theme-folder-name */ - Create a functions.php File: Create a
functions.phpfile in the same folder and add the enqueue code mentioned above. - Activate Your Child Theme: Go to the WordPress dashboard, navigate to “Appearance” > “Themes,” and activate your child theme.
- Customize as Needed: You can now make changes to your child theme without affecting the parent theme.
Developing WordPress Child Themes More Effectively: Our 10 Tips

Now that you understand how important a child theme is to successful WordPress Website development and maintenance, let’s look at our 10 tips for effective WordPress Child Themes setup.
1. Choose A Good Parent Theme
A good theme is the hallmark of every fine website development project. Since the parent theme is the foundation of a child theme, you should consider a proper plan and research in its selection. Think of the following aspects:
- The Parent Theme Documentation: It will give you a good understanding of the theme structure, making it easier for you to generate its child theme.
- Code: A well-coded theme has all the advantages that come with creating a child theme.
- Maintenance: Be sure the parent theme is regularly updated with features that align with your project requirements, like design and functionality.
- Parent theme support: There is no better way to maintain a theme than having access to theme support. Remember that you can’t be the developer of every theme you use for your WordPress development project.
2. Use WordPress Child Theme Generator
No need to reinvent the wheel when developing WordPress child themes in the initial setup process. Just take advantage of WordPress child theme automated generators out there. These tools will generate the necessary files and folder structure, saving you time and reducing the chance of errors.
Some of the best WordPress child theme plugins are Child Theme Configurator and Child Theme Wizard. They provide a starting point for your child theme and include features like a template customizer, a stylesheet editor, and a plugin manager.
3. Create WordPress Child Theme From Your Theme Directory
This other way to generate WordPress child themes is straightforward but more developer-oriented. You have to know what you are doing because you don’t want to mess up your theme.
Within the ‘/wp-content/themes/’ of your WordPress site, create a new directory/folder for your child theme. You can name it ‘your-child-theme’ or something that reflects your current project/brand.
In the WordPress admin area, go to “Appearance” and then “Themes.” You should see your child theme listed among the available themes.
Activate the child theme.
With that, you have successfully created a child theme for your parent theme, and you have done it in the appropriate folder/directory. You can now go ahead and start making changes or adding functions to your child theme.
4. Organize Your Files And Assets
Keep your child theme’s files organized by following best practices. For example, Inside the child theme directory, create a new file called `style.css`. This file will contain the CSS rules that override the styles of the parent theme.
You can also create a `functions.php` file in your child theme directory. This file allows you to add custom PHP functions or modify existing ones without touching the parent theme’s code.
5. Move From Small Changes To Big Changes
The ground-up strategy is very much applicable to creating WordPress child themes. You don’t want to make all these big changes and completely break your theme. Instead, you want to start small. It could be from header information, such as theme name, theme URI, template, and version. You can also add other information like author, description, license, etc.
You can then move to big changes like using WordPress Actions and Filters. You can take advantage of these hooks in your child theme’s `functions.php` file to add or modify functionality without directly modifying the parent theme’s code.
Apart from modifying functions, you can also override styles with CSS. The `style.css` file in your child theme is the primary place for overriding the parent theme’s styles. Use specific CSS selectors to target the elements you want to modify and apply your custom styles accordingly.
6. Understand Template Hierarchy and How To Use template File
If you want to know how to use a child theme in WordPress, you must understand the WordPress template hierarchy to understand how template files are loaded.
You can customize the layout and structure of different pages by creating and modifying specific template files in your child theme. WordPress considers the child theme’s template file instead of the parent’s, so your changes will work smoothly.
Use these simple steps for more help:
- Identify the template file in the parent theme that you want to modify. This could be a file responsible for displaying a specific page, post, or part of your website.
- Copy the desired template file from the parent theme’s directory.
- Paste the copied template file into your child theme’s directory.
- Edit the template file in your child theme to make the desired changes to the layout or structure. You can modify the HTML structure, add or remove elements, or adjust the CSS styles.
WordPress will recognize the template file in the child theme when it renders the website.
7. Use WordPress Customizer And Follow WP Standards for Coding
To use WordPress Customizer, and add custom options or settings to your child theme, you can utilize the customize_register action hook and the WP_Customize_Manager class.
These tools allow you to create new sections, panels, controls, and settings specific to your child theme. Additionally, you can use the get_theme_mod() and set_theme_mod() functions to retrieve and update the values of your custom settings.
This allows you to provide a more personalized and flexible experience for users without directly modifying the parent theme.
Also if you are writing the code for your child theme, ensure consistency and maintain clean readable code. You can use tools like PHP_CodeSniffer and resources like WordPress Coding Standards (WPCS) handbook.
8. Test Your Changes Extensively
Before you publish your child theme, ensure you do thorough testing. Use different devices, browsers, and screen sizes to ensure that your customizations are rendering correctly and that the website’s functionality remains intact.
You can also use tools like Google PageSpeed Insights, and GTMetrix to test your child theme’s speed and optimization. By utilizing these performance analysis tools, you can identify areas where your child theme can be optimized for improved speed and overall performance.
9. Document Your Changes
If you want to easily update and troubleshoot your child theme in the future, don’t sleep on documentation. Take note of the changes you make as you go. You can document these changes in your `style.css’ file.
10. Continually Update The Parent Theme
Regularly check for updates and apply them after ensuring that your customizations are compatible. This helps you benefit from bug fixes, security patches, and new features while maintaining your modifications.
How InstaWP Can Help Developers Build Child Themes?
InstaWP is a tool designed to help developers build WordPress sites faster, it also helps developers test changes in a safe environment without compromising their production website.
Here are ways in which InstaWP can help developers build child themes.
- Pre-configured Development Environment
InstaWP offers a pre-configured development environment specifically tailored for WordPress that can be used in child theme development. It provides a local development environment with all the necessary tools, including a web server, database, and PHP, to facilitate the smooth development and testing of child themes.
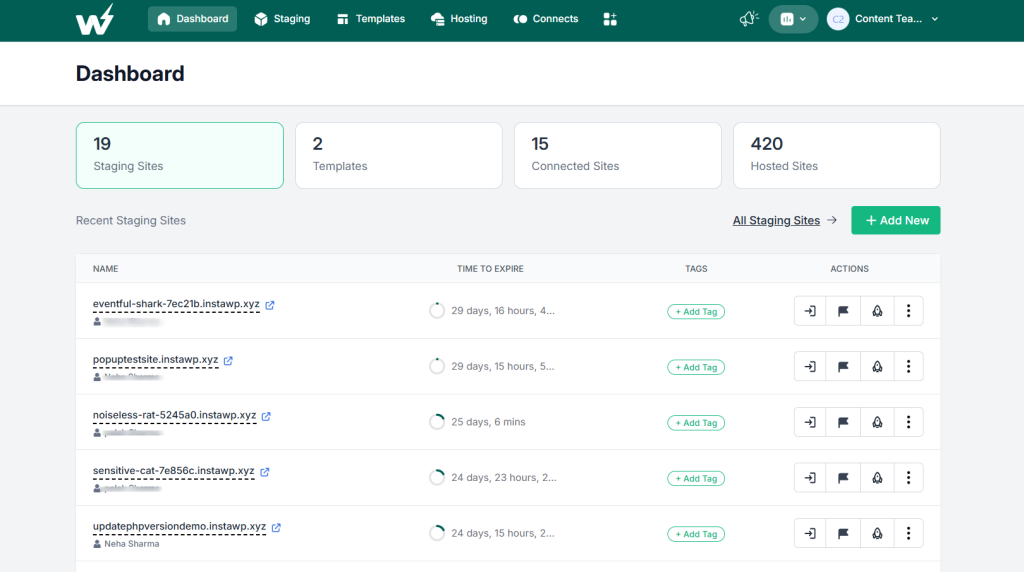
- Built-in Development Tools
InstaWP includes built-in development tools that can aid developers in creating child themes. It comes with features such as code editors, syntax highlighting, version control integration, and debugging tools. These tools enhance the development workflow and allow developers to efficiently write, test, and debug their child theme code.

Guide to Testing Your WordPress Child Theme with InstaWP
This simple guide will help you test your WordPress Child theme with InstaWP.
- Sign up for an account if you don’t already have one. Use this link.
- Install the InstaWP plugin with the necessary prompt and connect your site to your InstaWP account.
- Back in your InstaWP dashboard, you will find the exact clone of your live WordPress site, including your child theme.
- You can now make all the changes and test them with the InstaWP development environment, ensuring that your live website is not messed up.
- Lastly, push your changes to your live website, having ensured all readiness.
Common Pitfalls When Creating a Child Theme
When creating a child theme, developers often make mistakes that can lead to issues down the road. Here are some common pitfalls to avoid:
- Not Backing Up: Always back up your site before making changes. This protects your work in case something goes wrong.
- Ignoring Parent Theme Updates: Failing to update the parent theme can lead to security risks and missing out on new features.
- Incorrect File Structure: Ensure your child theme’s folder has the correct files. Missing files can break your theme.
- Overriding Parent Styles Incorrectly: Make sure to enqueue styles properly to ensure that your changes appear as intended.
- Not Testing Changes: Always test your changes on a staging site. This avoids breaking the live site.
Benefits of using InstaWP for Child Theme Development
By using InstaWP for WordPress child theme development, you will be able to:
- Easily create child themes using child theme generator plugins or code without breaking anything on your live site.
- Test your child theme with InstaWP built-in development tools.
- Easily install the parent theme by spinning up the WordPress site with a few clicks.
- Safely make changes and updates to your parent theme and child theme.
These and many more are the benefits of using InstaWP while you create WordPress child themes for various purposes.
Get Start with InstaWP Today
Get started with InstaWP today and streamline your WordPress child theme development experience. With InstaWP, you can effortlessly create WordPress sites with a click of a button, generate and test your child theme, save your time, and reduce the chances of errors.
1. What is a child theme in WordPress?
A child theme is a theme that inherits functionality and styling from another theme, known as the parent theme. It allows for customization without altering the parent theme directly.
2. Do I need coding skills to create a child theme?
Basic coding knowledge helps, but many tools and plugins can assist in creating child themes without extensive coding.
3. Can I use multiple child themes with one parent theme?
Yes, you can create multiple child themes based on a single parent theme. Each child theme can have its own unique customizations.
4. Will my customizations be lost if I update the parent theme?
No, customizations made in a child theme remain intact after updating the parent theme. This is one of the primary benefits of using child themes.
5. How do I activate my child theme?
After creating the child theme, go to the WordPress dashboard, navigate to “Appearance” > “Themes,” and activate your child theme from there.
6. Can I create a child theme without using a plugin?
Yes, you can create a child theme manually by creating the required files in your WordPress theme directory.