Need a safe place to experiment with WordPress without crashing your live site? A WordPress testing environment, also called a test or staging site, lets you clone your website and test updates, themes, and plugins risk‑free. In this guide you’ll learn how to set up a free WP test site in minutes and compare different methods to create a WordPress test site.
Table of Contents
Key Takeaway
| A WordPress test site is a private copy of your live site used to test changes. Staging environments keep updates and debugging invisible to visitors. You can create a test site via plugins, hosting tools, or manually, but each has pros and cons. InstaWP offers instant, free test sites with shareable URLs, templates, and two‑way sync. |
What is a WordPress Staging Site?
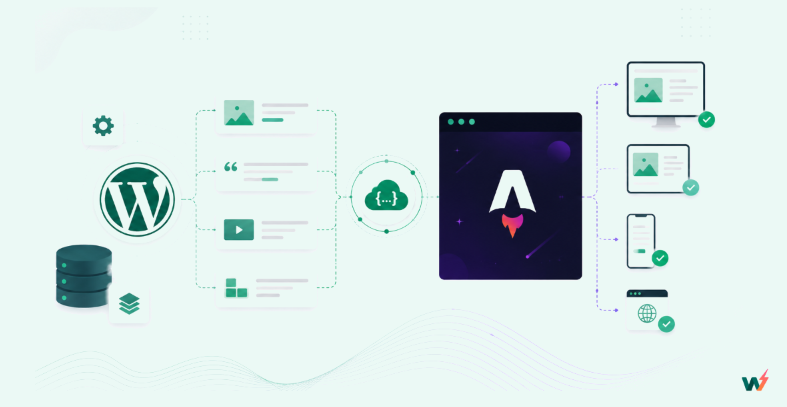
A WordPress staging site is an exact replica of your live website, hosted in a separate environment, used for testing changes, updates, and new features without affecting the live site.
It functions as a private WP test site where developers, designers, and site owners can safely experiment with plugins, themes, custom code, or content changes. Once tested and verified, changes can be pushed to the live site with confidence—minimizing downtime, bugs, and performance risks.
Think of it as a WP sandbox environment where you can break things, fix them, and perfect your site—before your visitors ever see a thing.
Why Create a WordPress Test Site?
Making direct changes on your live website is like performing surgery without anesthesia—risky, stressful, and often painful. That’s why every WordPress user, from solo bloggers to full-scale agencies, should create a WordPress test site before touching the live version.
Here’s why it’s a must:
1. Test Updates Safely
Whether it’s WordPress core, plugins, or themes—updates can break your site. A WP test site lets you try them out first, ensuring compatibility and smooth performance before applying them live.
2. Try New Themes, Plugins, or Layouts
Thinking about a full redesign or adding new functionality? With a WordPress test site, you can experiment freely, without scaring away your real users with half-finished changes.
3. Troubleshoot and Debug Without Disruption
When something goes wrong, it’s easier to isolate the issue on a staging copy. A WordPress test environment helps you find and fix bugs without interrupting traffic or sales.
4. Get Client or Team Approval
Working with stakeholders or clients? A WP test site lets you showcase changes for feedback before going live. It builds trust and saves you from endless revisions.
5. Confidently Push to Production
Once everything is tested and approved, you can migrate or sync your changes to the live site—knowing they work flawlessly.
Creating a WordPress staging site isn’t just smart—it’s essential for professional, error-free site management.
Watch the video below to learn the importance of WP staging sites for WordPress developers.
How to Create a WordPress Test Site: All Methods Covered
There are several ways you can create a WordPress test site, and each comes with its own pros and cons. Whether you’re a beginner or an advanced user, you’ll likely explore one of these three common methods:
| Method | Ease of use | Cost | Best for |
|---|---|---|---|
| Staging plugins | One‑click setup, but can slow down your host and premium features cost extra. | Free to paid | DIY users who need quick staging on shared hosting. |
| Host‑provided staging (cPanel or managed hosts) | Built into many managed WP plans but depends on provider; may require cPanel/FTP knowledge. | Usually included with hosting | Agencies and site owners using managed hosts with staging tools. |
| Manual local/subdomain setup | Full control but requires file transfers, database work, and technical know‑how. | Free | Developers who need offline testing or custom setups. |
| Managed cloud platform | Spin up a WP test or WooCommerce site in seconds, no server configuration, includes templates & shareable URLs | Free for basic usage | Anyone who wants a fast, free, and scalable testing environment—perfect for “wp test” or “wptest” queries. |
1. Using a WordPress Staging Plugin
WordPress staging plugins like InstaWP Connect, WP Staging or BlogVault let you create a WordPress test in the form of a staging from your live sites with a few clicks. It’s convenient, but it can slow down your hosting server, and premium features often come at a cost.
2. Creating a Staging Site via Hosting Panel (cPanel or Managed Hosts)
Some hosts offer built-in WordPress staging site options. These are reliable, but they depend heavily on your hosting provider’s infrastructure. Not all shared or budget plans support staging environments, and in many cases, setting one up can get technical—especially if you’re dealing with cPanel, FTP access, or database duplication.
3. Manual Setup on a Subdomain or Localhost
Creating a WP test site manually gives you control, but requires file transfers, database setup, and extra configuration. Great for developers, but not beginner-friendly or scalable
All of these methods can work when you want to create a WordPress test site. But, they often require:
- Hosting access or server setup
- Plugin installation and configuration
- Manual cleanups or syncs
- Limited test site lifespans or lack of portability
And none of them let you spin up, share, and test WooCommerce, plugins, or theme updates instantly—without touching your live site.
4: Managed Cloud Platform
Modern managed WordPress platforms allow you to create a WP test site without any hassle. There’s no need for complex setup, hosting limitations, or risky live-site changes. You can spin up a fully functional WordPress test site or WooCommerce staging site in seconds—with zero server configuration.
With InstaWP, you can create a test staging site in seconds and use it as WordPress test enviormment. Whether you need a fresh WordPress install, want to clone your live site, or test plugin/theme changes, InstaWP makes it possible—all without needing hosting access or dealing with complex configuration.
As you create a WordPress staging site and use it as WordPress test site with InstaWP, you enjoy:
- One-click site creation – Launch a blank WordPress or WooCommerce site instantly.
- Preset templates – Save time by using pre-configured site setups.
- Shareable staging URLs – Let clients or teammates preview test sites easily.
- 2-way sync & cloning – Push changes to live or spin up staging from production effortlessly.
- Isolated test environments – No impact on your actual site.
Whether you’re a developer testing features, an agency prototyping for clients, or a blogger experimenting with layouts—InstaWP is the fastest way to create and manage your WordPress test site.
It’s not just another staging tool—it’s in a league of its own. InstaWP supported WordPress 6.8 for staging just a day after its official release. That’s how fast and future-ready it is.
And here’s the game-changer: WP test sites built with InstaWP aren’t just for testing. You can save them as templates and start selling them as WaaS (Website as a Service).
Watch WordPress experts shedding light on how to set up WaaS for agencies.
Reusable income, automated client launches, and productized services—all from your staging dashboard.
InstaWP isn’t just where you test—it’s where you scale.
Here are the steps to create a WordPress test site without any setup hassle.
1. Creating a WordPress Test Site
Visit the InstaWP website if you want to create a quick site.
Click on ‘ Add Site‘.
")
This will open up a pop-up where you can configure the basics of your WordPress test site:
- WordPress version – Up to the nightly version.
- PHP version – it’s up to 8.2
- Configuration – choose a configuration or create a new one.
- Site name – Helps you distinguish between sites in your InstaWP dashboard.
- Server Location – Choose servers from different locations such as the USA, the UK, Canada, Germany, and Singapore.
Or, you can also create your WordPress test site from pre-setup templates, using AI, or from the Store. Here is a detailed guide helping to teach the steps of creating a WordPress test site using each method.
Click on ‘Create Site’ and within seconds your new WordPress test site will be ready with login credentials.
You can log in using the ‘Access Now’ button, or you can just click the Magic login button to automatically log in to your WP admin.
")
Inside the WordPress dashboard, you will see it works exactly like any other self-hosted WordPress install. You can install or change the themes and plugins, adjust settings, users, and so on. There are different tools you can install for your WordPress site, and as per your needs, you can further configure settings.
If you have created the test site with the latest WordPress version, then you can customize your entire site with blocks and patterns. Furthermore, you can add pages, posts, or categories. Basically, you can do everything that you’re thinking of implementing on your live website.
2. Manage Your WordPress Test Site Using Free Tools
In addition to accessing your WP admin area by clicking on ‘Auto-login’, InstaWP also provides several tools for accessing and managing your website, which you can use from the ‘Sites’ dashboard:
")
- URL, Username, and Password can be saved for future use or can be obtained from Sites > View Creds.
- The ‘DB Editor’ option lets you edit the database of your site using Adminer (phpMyAdmin alternative).
- Next to ‘Open Database’ is ‘Code Editor’, which opens up an in-browser multi-tab enabled code editor where you can edit all the files, themes, and plugins. It is a quick way to make edits if you don’t want to use FTP (which, btw, you can do that too).
- The ‘View Logs’ button allows you to view the error logs and access logs.
In addition, you get a bunch of options when you click on the dropdown:
- From the ‘View Creds’ option as well, you can see the WP details.
- You can ‘Migrate’ the site to live hosting, click on the option, which helps you to migrate your WordPress to the available choice of host.
- From Export As, you can export the site as a zip file to use in LocalWP (local development).
- Save As Template: You can save your site as a template for future use.
Then, under Advanced options that are available in paid versions, you get:
- FTP/SSH – secure network and file transfer
- Map Domain – You can map a custom domain for the particular sandbox site.
- Reserve site – You can, through this tool, reserve your site so that it doesn’t expire at all.
3. Configure Templates & Configuration
InstaWP is not just instant in name, but provides features. It helps you to save time with two presets:
- Templates
- Configurations
The templates feature gives you the option of saving your existing site as a template. You can further create new sites through the template, and it will look exactly like the original one. In the free version, you can only create 1 template. However, you can create 5 template sites.
The configuration feature lets you create a preset for technical details like WordPress version, PHP configuration, WordPress configuration, and so on. You can also pre-install plugins and themes.
Templates
In templates, you can go beyond just pre-installing plugins and themes, as it lets you configure and save your settings. To create a template, navigate to the drop-down of the active site that you want to save as a template and select the ‘Save As Template’ option.
It will then open up to a slide-out from where you can configure settings like:
- Template Name & Description: This is where you have to fill in the basic information, like the name of the template and what it does.
- Enable Sharing: This lets other people create template sites by clicking on a link. If you’re a developer who wants to provide potential customers with WordPress sandbox sites, this is what you can use. The customers need to do is click the shared link, and they can create their site install.
- Instant template: It is a paid feature. If enabled, the site will be instantly created based on the template

If you opt for ‘Sharing’, then advanced options will be opened to you (they are all in the paid version). You get the ‘site lifetime’ option and the ‘disallow file modification’ option if you don’t want others to modify the sandbox.
")
Further, you get a cool feature where you have the option to collect and require people to enter their emails. You can even customize the email that people receive and add a branding logo.
")
Once you are done with configuring, save and see the added template in the ‘Templates’ section. You can edit it if you want to edit the template. Besides, you can create a new site from the template by selecting this ⊕ symbol.
")
Configuration
Now moving forward to the ‘Configurations‘ tab, you’ll find three tabs for each configuration:
- General: Here, you choose WordPress and PHP versions from the dropdown.
- PHP: Here, you can do PHP configuration settings such as memory limit, max. execution time, max. upload size, etc.
- WordPress: In this tab, you can install plugins and themes through WordPress.org or enter the direct URL for the same (it is in the paid version). Further, you can enable multi-site installation.
Don’t forget to ‘Save‘ or ‘Save As New’.
")
You can add as many configurations as needed, they will show in the sidebar interface. While you create a new WordPress test site, you can choose from any of the pre-built configurations.
4. WordPress Github Integration
InstaWP has come up with the latest new feature, which is the Deployments tab.
")
Here, you can easily connect your GitHub repository to this server. For that, go to the ‘Add New+” button and select the ‘Public’ repo type or ‘Private’ based on whichever repo you have. In the ‘Public’ repo:
In ‘Repo URL’, copy the ‘HTTPS’ link from your GitHub repository,
Then, under ‘Branch‘, add the branch you want to deploy your site to, and further add the destination folder of your plugin.
Every time you create a new instance of a template, your GitHub repository will be pulled, and this folder’s content will be replaced with the contents of live GitHub code. Click on ‘Add’, and it will be added to your deployments tab.
As mentioned before, in the templates section, go to the ‘Enable Deployment’ option beside the edit option. You can then select the repository you want to deploy when a site is created using the specific template. Now, you can create a new site from that template.
If you have a Private repo, then you must enter the SSH Link, then add a branch and destination folder.
Along with that, generate an SSH Key Pair that you can copy to your repository.
(To know in detail how you can add a GitHub repository with InstaWP, watch this video!)
Notable Features of InstaWP Staging Sites
- Site Tools: You get full access to the site with FTP, SSH, database editing, and more advanced tools.
- Slack Integration: InstaWP comes with Slack Integration, which means you can create a WordPress disposable website and get the credentials. So, if you have teammates in Slack, then it’s easy to access through Slack.
- Chrome Integration: It also comes with Chrome integration.. Once you have added the Chrome extension, you can use it to add the ‘Launch’ button to WordPress.org plugins and themes. It lets you create a new site that pre-installs the extension – a great way for fast testing of new themes/plugins.
- White Label custom /Suffix Domain: Another amazing feature of InstaWP is that it lets you have your own custom domain for the sandbox sites. It’s great for agencies or if you’re offering testing for WordPress plugins.
- Team/Team Members: Another cool feature is adding a team or team members. You can create a team and add team members to it if you are working in a group.
- Deployment: The latest feature added in InstaWP is the ‘Deployment’ section. It is for deploying your site/project to GitHub repositories.
Conclusion
Whether you’re a solo blogger, a WooCommerce store owner, or an agency juggling multiple client sites—creating a WordPress test site is a must for safe, confident development. A WP test site lets you experiment, troubleshoot, redesign, or update without risking your live content or customer experience.
And while there are several ways to set up a WordPress staging site, tools like InstaWP simplify the process to just one click—no hosting limitations, no technical hassle, no stress.
So, before your next plugin update, layout change, or client project—create a test site first, and move forward without fear.
FAQs
What is a WordPress test site?
A WordPress test site (or WP test site) is a clone or separate installation of your site used for safely testing changes before pushing them live.
Why should I use a WordPress staging site?
A staging site prevents downtime, errors, and bugs by letting you test themes, plugins, code, or design changes away from your live audience.
How do I create a WordPress test site easily?
You can create a test site using plugins, hosting tools, or the fastest method—cloud-based platforms like InstaWP, which require no setup and work instantly.
Can I test WooCommerce updates on a staging site?
Yes, a staging site is ideal for testing WooCommerce plugin updates, shipping settings, payment gateways, and checkout flows before going live.
Will a staging site affect my SEO or customers?
Not at all. Staging sites are private and usually noindexed, meaning they don’t appear in search results or interfere with customer traffic.
Can I use my test site for client demos or productized websites?
Absolutely. With InstaWP, you can save test sites as templates, share preview links, and even sell pre-built sites as WaaS (Website as a Service).